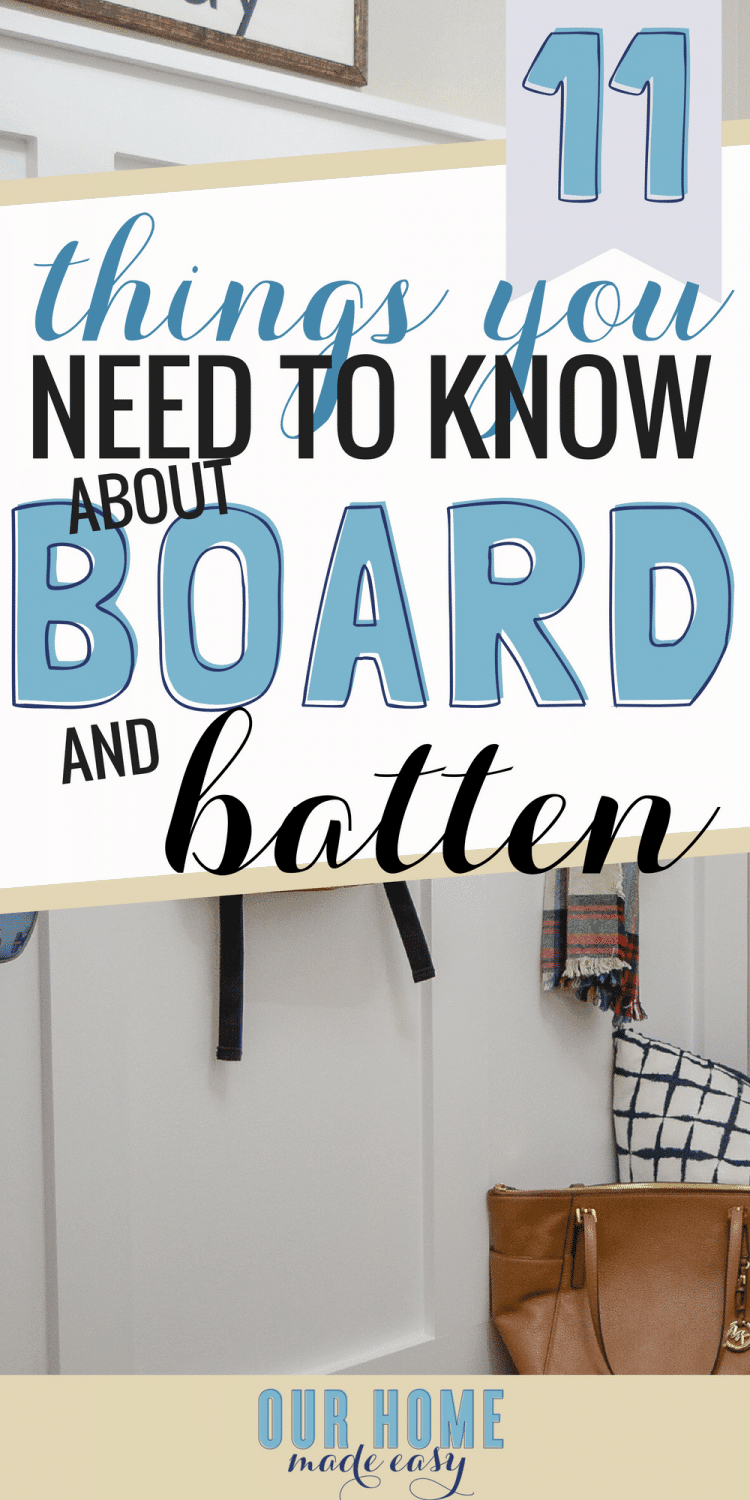
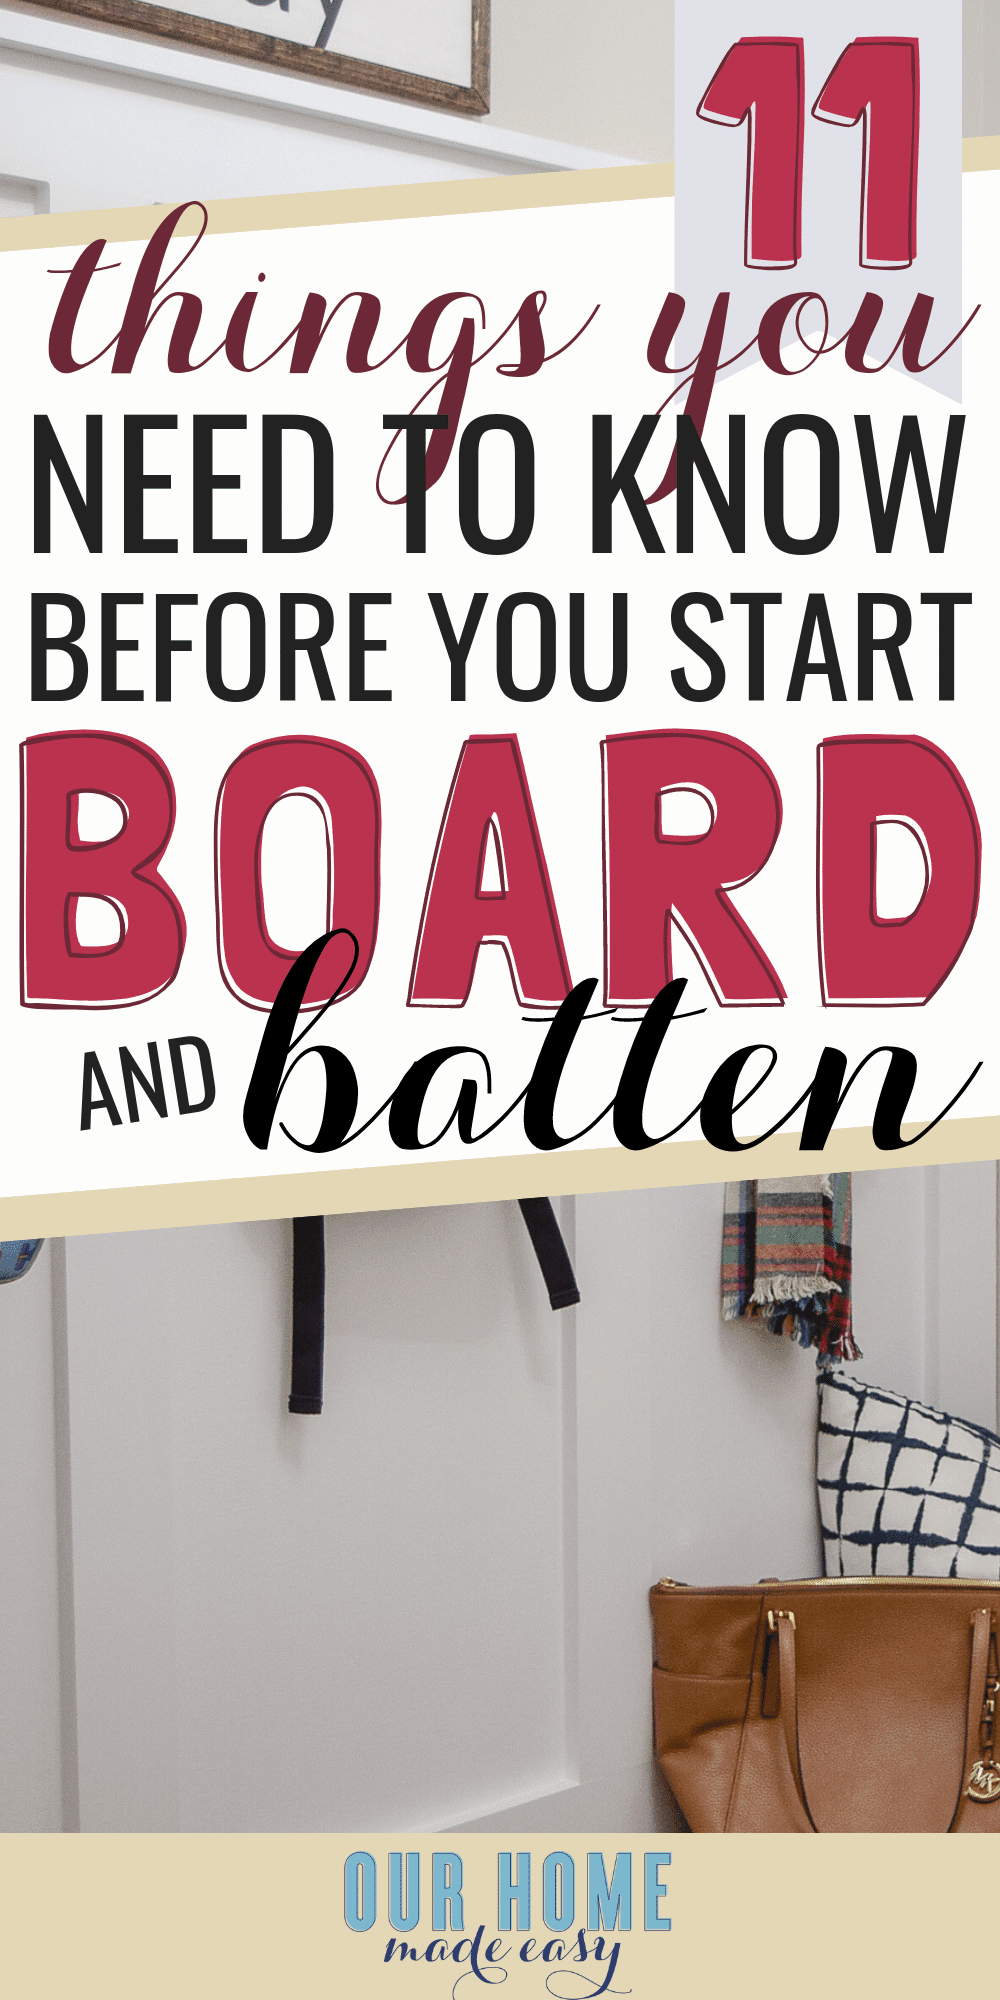
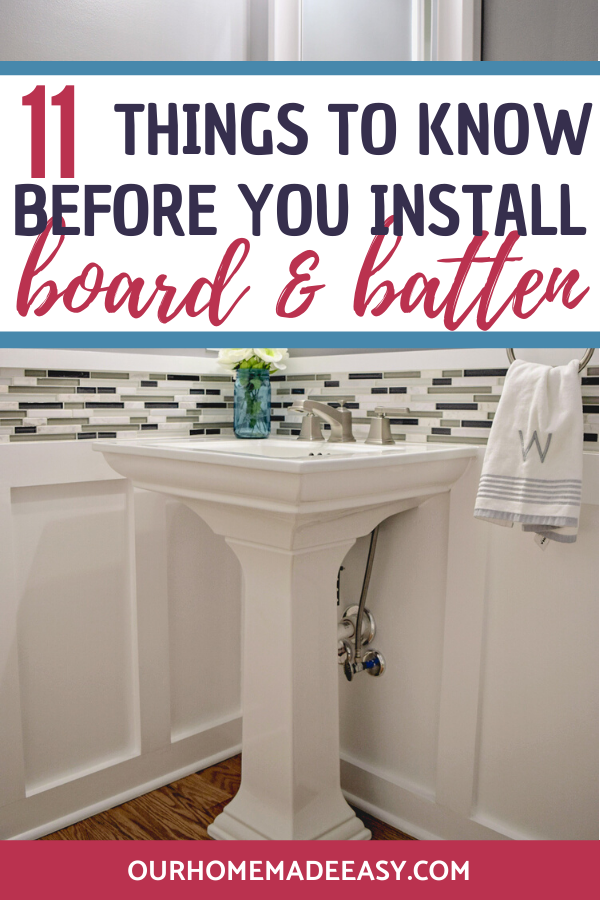
11 Things To Know About DIY Board & Batten Walls
Discover essential tips and tricks for DIY board & batten walls! Learn how to make this project easier and avoid common mistakes. Perfect for your next home improvement adventure. Choosing traditional wainscoting vs board & batten?
Hey there! I’m Brittany from Our Home Made Easy, and I’m thrilled to share my passion for easy DIY projects and simple recipes tailored for busy moms like us! Today, I’m diving into one of my favorite home improvement projects—DIY board & batten walls. If you’re contemplating adding some stylish flair to your home with board & batten, you’re in the right place!
In this post, I’ll walk you through the 11 most important things you need to know before you start your board & batten project. From measuring and material selection to painting tips and time-saving tricks, I’ve got all the insights to help you achieve beautiful results with minimal hassle. Let’s get started!
We are doing a budget-friendly powder room makeover for the challenge. If you missed last week’s powder room makeover design board, definitely check it out. This week I am showing our latest progress AND the 11 things you need to know before making board & batten walls!

The One Room Challenge is hosted by Linda from Calling it Home. Each Thursday, guest bloggers from the internet link up their latest project for the 6 week challenge. In the 6th week, the bloggers link up their Final Reveals! For this challenge, my husband & I are giving our little powder room a much-needed refresh!
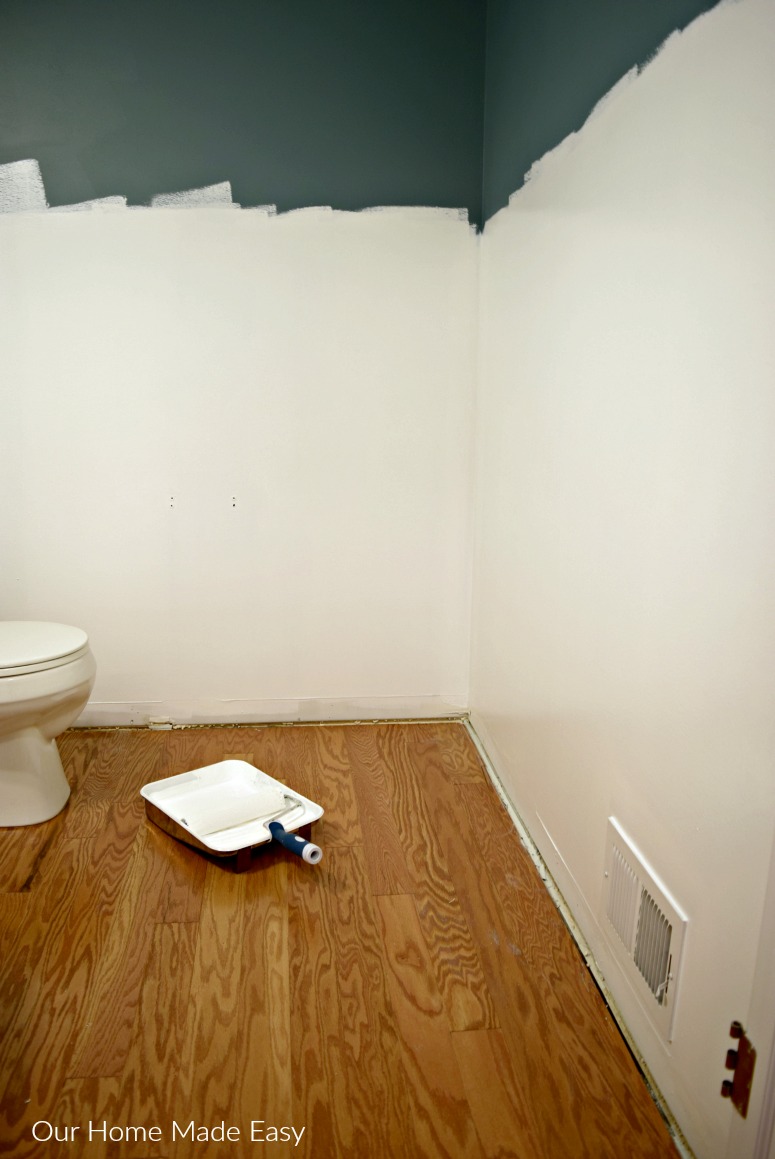
If you need to remember how the powder room looked like just a few days ago, here is the before…
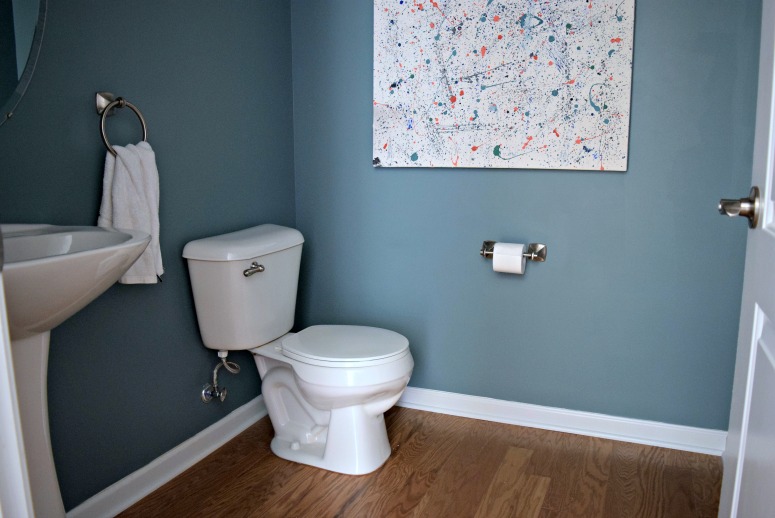
Pretty dark, right?
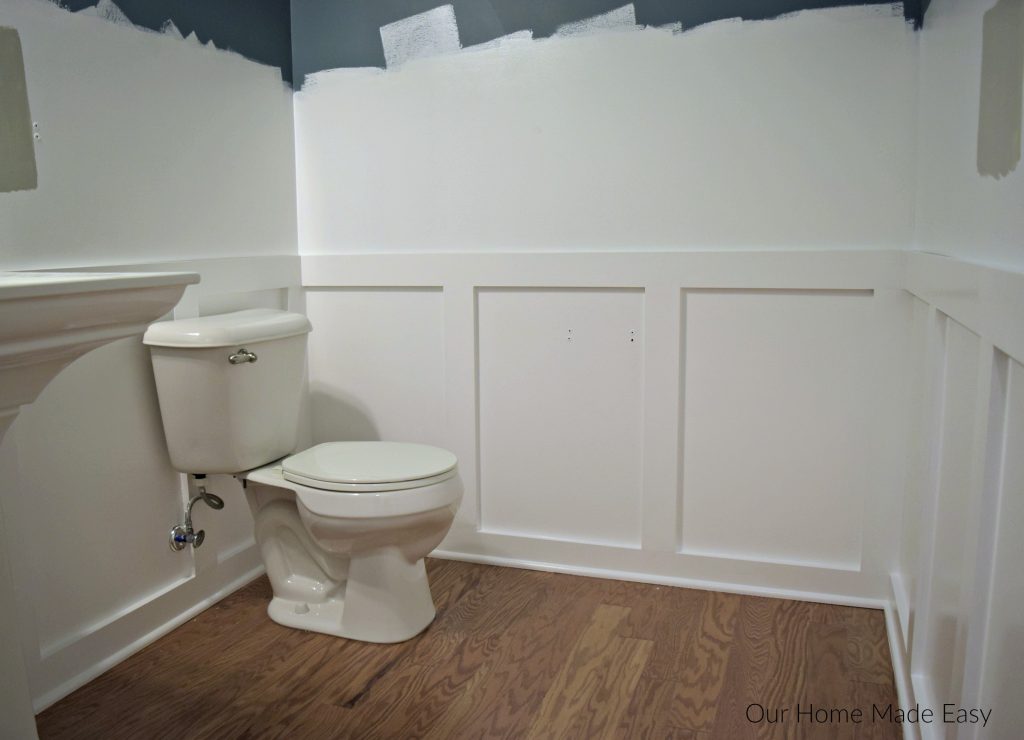
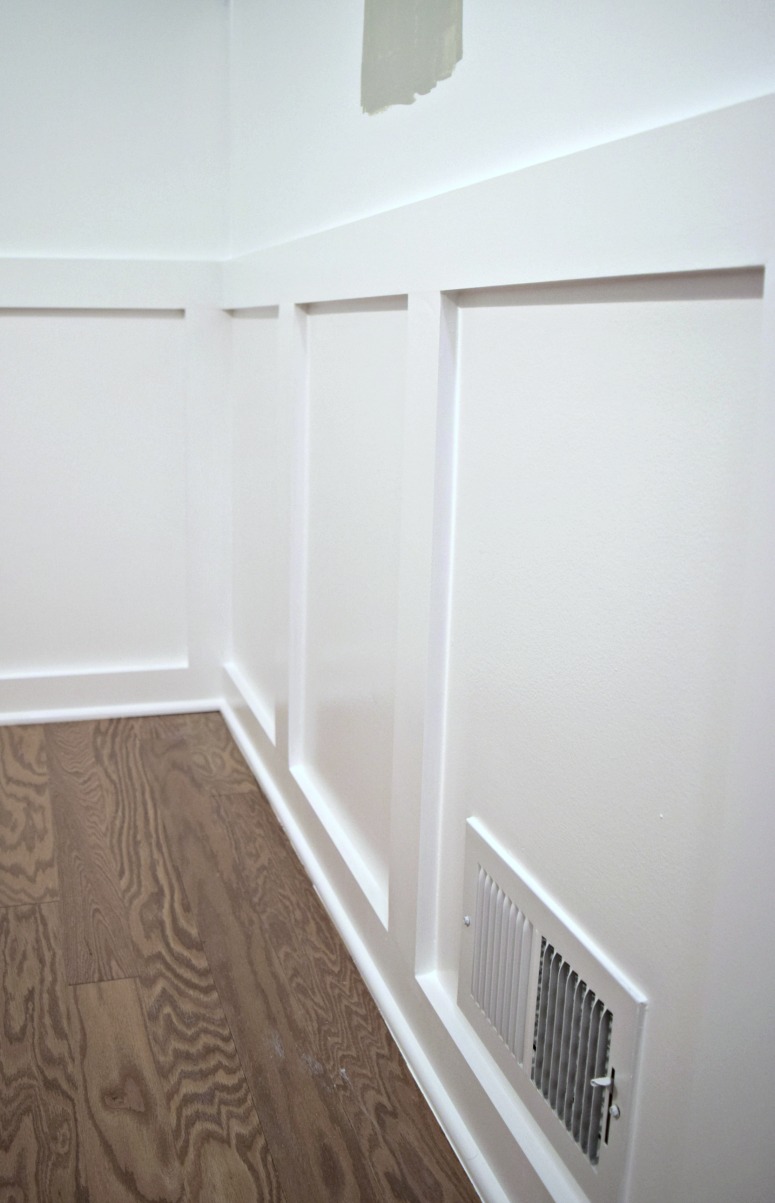
Fast forward about 36 hours and here we are this week! Light and bright(er)!
(This post contains affiliate links. If you shop from my blog, I may be compensated for clicks or purchases that you make. Read my disclaimer page for more information.)

This was our first time ever creating board & batten walls. I am excited to share some learned wisdom (thanks, Jordan!) with you so that when you create your board & batten walls, you’ll save lots of time.
11 Things You Need to Know About DIY Board & Batten Walls…
1. Measure Everything 3 Times! I know the old engineering adage is “Measure twice, cut once.” But when it comes to figuring out wall measurements, sometimes you’ll get lost in how many widths across you need, versus the estimated lengths of the rails. Take a few minutes to roughly draw a box (your room) and write down your wall width. Don’t forget to double the widths since you’ll need a top and bottom molding. Then, figure out your estimated height. Decide how many rails you’ll want and multiply it by the rail length dimension.
Your measurements should be the same, whether you are debating between 1″x4″ or 1″x3″ boards. For reference, we used 1″x4″ boards.
2. Buy 25% More Material Than You Expect To Use… You know what will make your project last even longer? Unexpected trips to Lowes or Home Depot! Avoid having to stop working and running to the store by overbuying your items.
Big box stores have great return policies, so you can return any unopened items rather easily once your project is completed. For this project, Jordan bought 4 extra boards (just in case) and it actually worked out really well.
Once we arrived home, he found that the two he picked out were a little more warped than he would’ve liked. Luckily he had plenty to make up for them and he didn’t waste more time running back to the store.
- Related: 5 Things You Need to Know About Wainscoting vs Board and Batten
- Related: Mudroom Makeover
- Related: Budget Powder Room Makeover Reveal
- Related: Favorite DIY-er Approved Gift Ideas
3. Spend More to Save Yourself Time… When it comes to board & batten, there are so many tutorials on Pinterest. Many recommend using furring strips or cheaper wood boards to save money.
And that works, but if you don’t buy a select grade of the board, you’ll find yourself spending ALOT of time filling in holes, sanding boards, and making them smooth for the board & batten walls.
I recommend spending the extra $1-$3 per board and choosing select pine. You’ll find that they are ready to be painted and hung. Buying the better boards saved us lots of time (for a reasonable amount of additional spending).
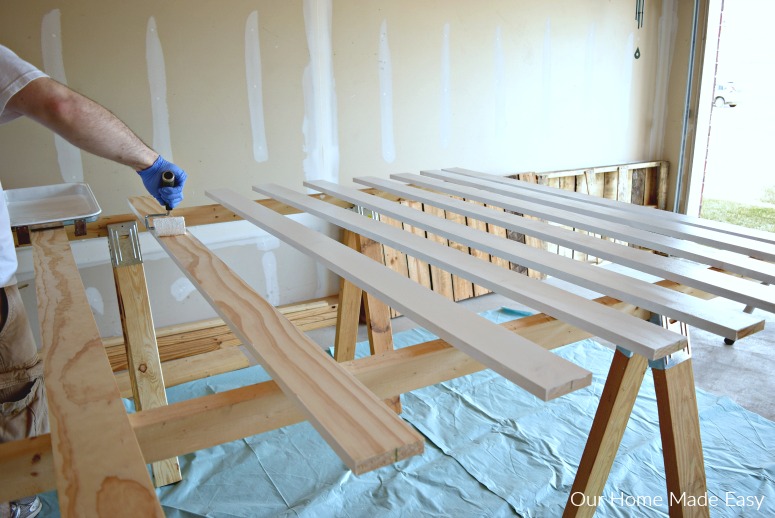
4. Paint Everything Ahead of Time… In order to cut the time needed to finish the project, paint your walls and board before you even start cutting! It took 4 coats of bright white paint to cover our dark teal walls. Once Jordan had the walls painted, he painted 3 coats of bright white on his wood rails, aka the batten.
Side note: Do not paint the extra you bought in item # 2! You’ll still want to return any extra, so those are as-needed. Once everything is painted, you can start hanging the boards and see an immediate effect. While you’ll still need to do one final coat to cover your nail holes, you won’t be spending too much time at the end of your project.
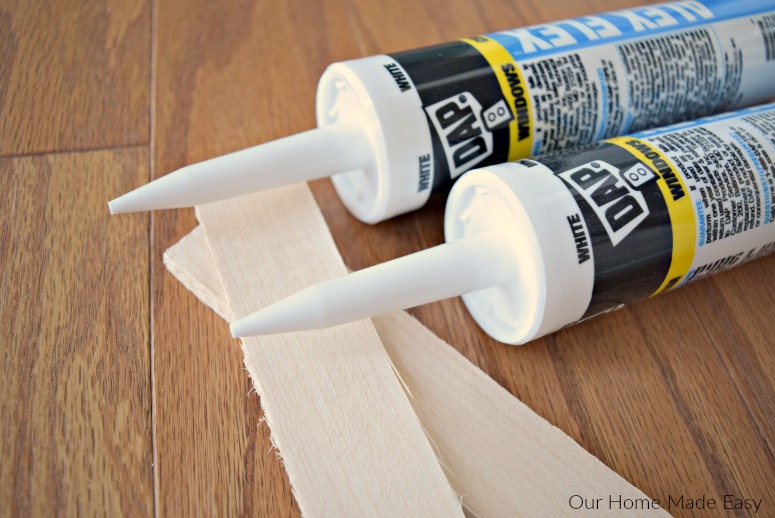
5. Use Great Supporting Tools… Sometimes the best tools are the most affordable! Jordan swears by this little caulk finishing tool. Since the molding requires lots of caulking, he was able to quickly move through this step with the finishing tool. Another great tool is using a stud finder to assist with hanging the batten boards and the horizontal top and bottom boards.
Unless you have the perfect length of walls, you’ll need to cut down your rails with a miter saw. You may need to buy 6′ , 8′, or 12′ long boards. At any length, you’ll need some support. We used this rolling support stand to help Jordan when I couldn’t be around to help.
Tools Required For Board & Batten Walls
Then, once you’re ready to hang your rails, use a nail gun to quickly set them in place! You can hang a board in only a few minutes and have the entire room up in almost no time.
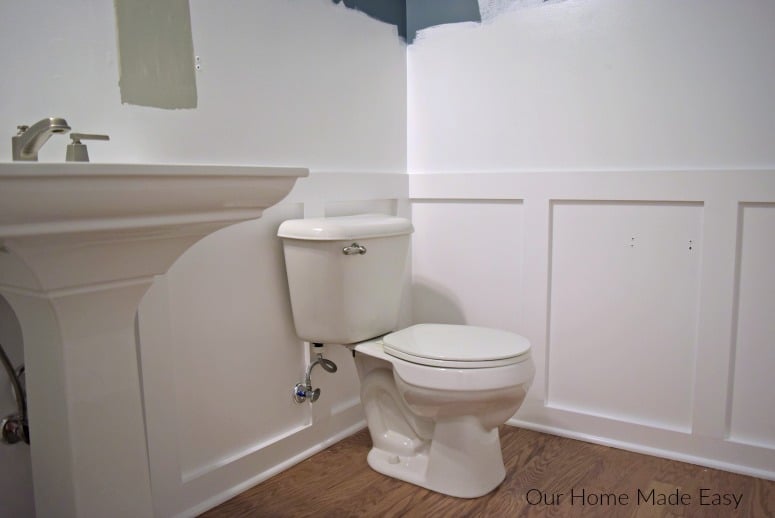
6. Remove as Much Furniture as You Can…. This includes doors and even toilets! To make sure that there is as much as room possible, remove any doors from the hinges. If you are in especially tight spaces, consider getting creative and removing furniture.
For the powder room, Jordan removed the toilet tank and he said it made working in the space even easier.
7. Know That Caulking and Spackling Go a Long Way… If you’re in doubt while making the board & batten walls, know that caulking will do wonders for the look and feel of your end result.
We were a bit worried about how to finish the ends of the molding and the door frame. We placed a rail directly along the door frame and it looked… a little awkward. With a bead of caulking, the awkward transition suddenly looked so much nicer.
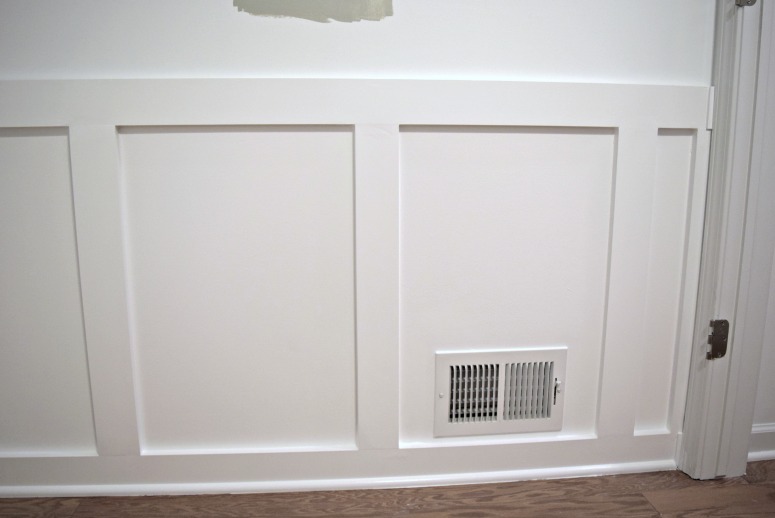
I encourage you to use a flexible & paintable caulk and use it as much as you can to finish off your project. The spackling is great for filling in the nail holes and the areas where you join the rails alongside the horizontal boards.
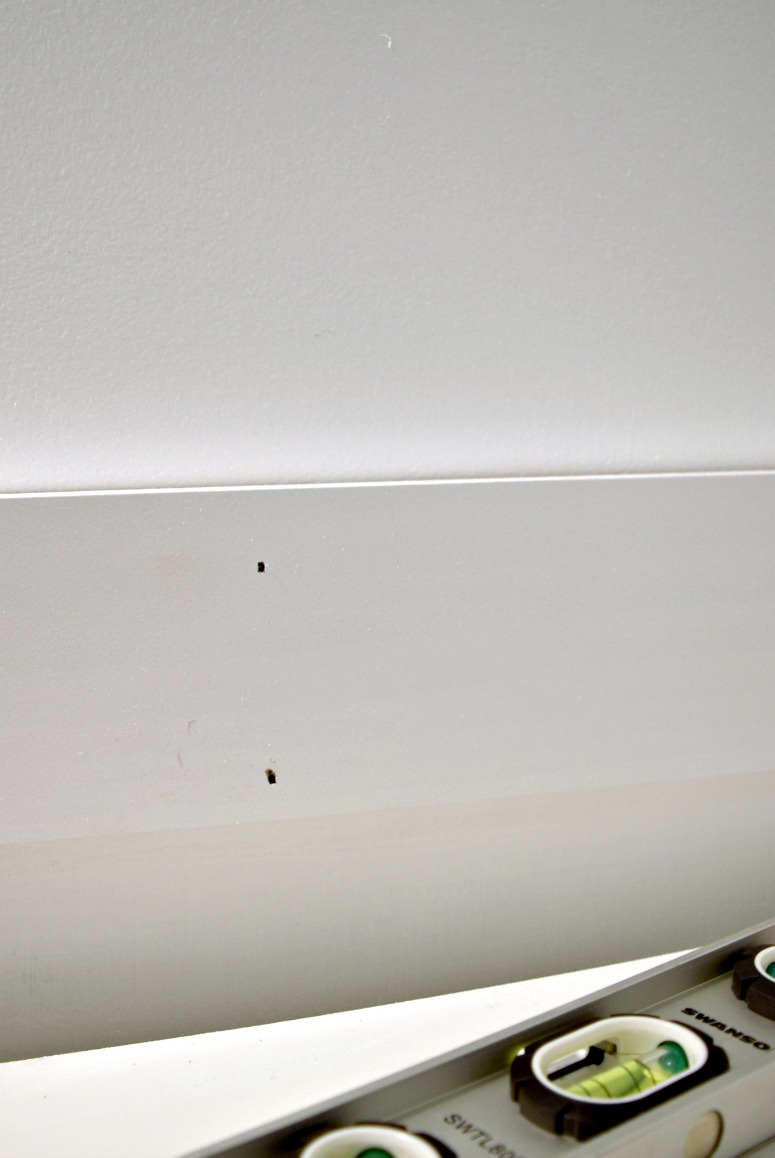
8. But Don’t Overdo It…. the biggest lesson we learned from adding molding to our dining room was that fewer nails are better. I’m as guilty as anyone, give me a pneumatic nail gun and I’ll enjoy popping them into the wall! 🙂
BUT, it takes so much time to spackle, sand, and paint over those nail holes! Go easy on the nail holes and be strategic ahead of time where you’ll use them in your boards. While it isn’t as fun doing only a few per board, you’ll appreciate it later. 🙂
9. Don’t Assume Your Walls are Straight… we are so guilty of this! Jordan knew our walls would be a little off, but we weren’t expecting to see how much they were once he started applying the horizontal boards!
Know ahead of time that whether you have a new home build or an old farmhouse, you will need to accommodate for times when walls & boards are far apart.
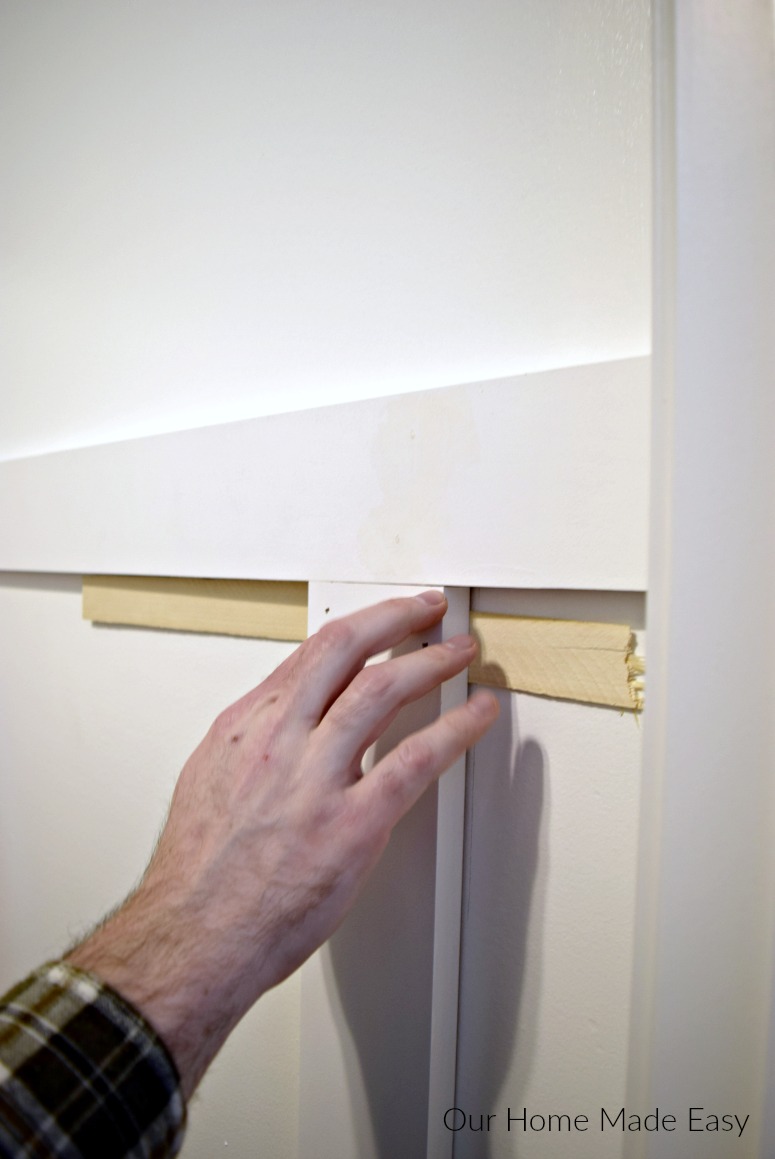
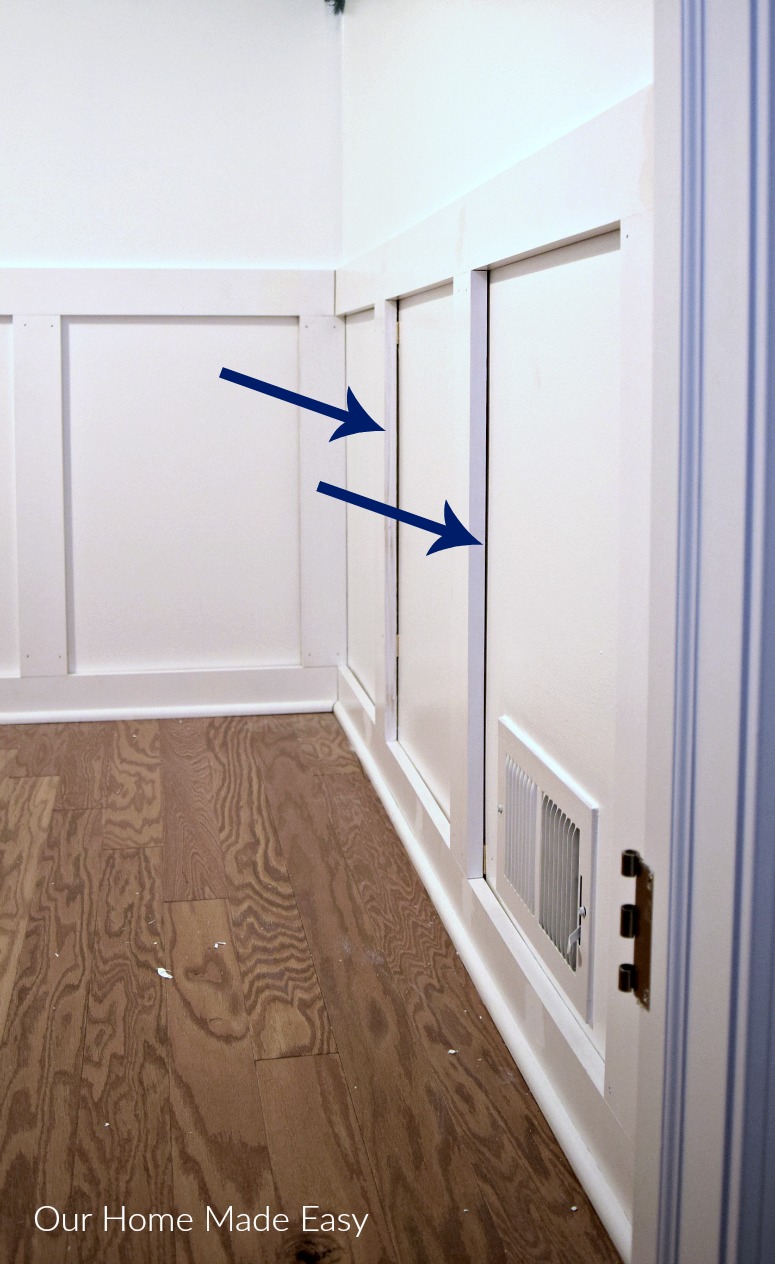
10. Shims are your new BFFs….. when #8 happens above, use wood shims! These little guys fixed every single issue we had with the walls. Sure, we could’ve caulked around the opening, but Jordan wanted to reinforce the largest openings between rail and the wall. I hope that makes sense.
The shims were in-between the wall and rails so that when you leaned against the wall, you wouldn’t feel the railing buckle under your weight. We still caulked the transition between railing and walls, but this definitely gave a nice sturdy end result.
![]()
11. It’s Going to Take Longer Than You Think… I know this isn’t what you want to hear! But just let me explain… if you have a weekend to devote to the project, I think you can get it done!
However, if you have several visits to the hardware store, or have little ones running around, plan on it taking an extra few days. It’s not really difficult to work, simple steps that require lots of waiting & drying time that you can’t skip!
And that is it! With some time and the right tools, you’ll have no trouble making board & batten walls. Simply plan your project from the beginning and you’ll find that the time planning will save you so much more time throughout the project!
Frequently Asked Questions For Installing Board and Batten Accent Walls
Over the years we’ve received several questions on how to easily install board and batten accent walls.
How Do I Determine the Width in between Each Vertical Batten?
This is going to be room-specific. We recommend starting at every 28 inches in width and adjusting as needed when you’re planning the number of battens. Be on the lookout for electrical outlets, toilets, and window frames that may get in your way.
Where Should I Start My First Vertical Boards?
We recommend starting in the middle of the room and working your way towards the corners. Just like tile work, you’ll feel confident that the focal point of the room, the center, will look great visually and any width adjustments (see above Q), can be managed on the outer corners.
Would Board and Batten Make For a Great Feature Wall?
Absolutely! We love to see finished projects where board and batten are used along entryway hallways, primary bedrooms, nurseries, and dining rooms. You could use the Board & batten look to create a uniform look and feel throughout your home.
Do I Need To Install Cabinet Grade Wood Panels On My Walls, First?
No. We are using the smooth finish of the existing walls to create our board appearance. In the photos above, we lived in Michigan and had smooth walls. In Arizona, we have textured walls. However, we’ve seen homeowners continue that batten-only look and their texture isn’t really noticeable.
What Finish Of Paint Should I Use For My Board and Batten?
We recommend Satin finish or Semi-Gloss. My preference will always be the durability of satin with its less glossy appearance. However, in bathrooms, it may make sense to choose semi-gloss to keep things looking fresh and extra clean.
I can’t wait to show you next week’s progress!!
Powder Room Design Board (Week 1)
Board & Batten Walls (Week 2) << You’re here!
How to Install a Pedestal Sink (Week 3)
Adding Mosaic Tile Wall Accent (Week 4)
Over the Toilet Storage Ideas (Week 5)

Pin for Later!

Hi, I’m Brittany, and I believe life at home should feel easier, not heavier.
I’m the creator of Our Home Made Easy, a space for busy women who want dinner on the table, their homes running smoothly, and a little breathing room at the end of the day.
You won’t find perfection here, just realistic recipes, smart shortcuts, and simple routines that work in real life. The kind that help you feed your family well, stay organized enough, and still have time to actually enjoy it.
If you’re juggling work, kids, schedules, and everything in between, you’re in the right place. I’m so glad you’re here.


These are all great tips Brittany, and your board and batten looks fantastic!! I love the 4″ boards, they give such a substantial, custom carpentry finish. Looking forward to seeing more of your ORC!
Thank you Lisa! I’ve already asked when we can do another room…. 🙂 Thank you for stopping by! -Brittany
Brittany – I am wondering what you did with the existing baseboards. You mentioned the horizontal rails, that you must double that measurement for the top and bottom. Did you remove the existing baseboards and replace them with the 1×4’s and then replace the shoe molding?
You did a great job!
That is exactly what Jordan did, Julia! I’ll update the post to reflect that. Thank you for stopping by! -Brittany
How did you get your toilet to fit on the back of the rail? We have exactly 12″ clearance & I’ve been trying to figure that out.
We were able to slide it through. I asked my husband and he said you could cut a top and bottom piece to give the appearance if you don’t have the clearance.
The walls look great! I can’t wait to see how the rest of the room comes together.
Thank you Sara! -Brittany
Our walls do not look smooth like I expected…love the look but not the finish! What can I do to get this smooth look!! Thanks!
Brittany, this was SO helpful! Especially the suggestions about the paintable, flexible caulk and the shims! The bathroom already looks great! Can’t wait to see the final result.
Thank you Kelly! -Brittany
It looks beautiful. We’re doing something similar in our bedroom for the challenge! I can’t wait!
Thank you Megan! The end result is awesome and I’ve already asked if we can do more rooms 🙂 -Brittany
It looks so great!!! I’m a big wall treatment fan! Board and batten is just so pretty!
I love your tips! Oh my – my husband is totally nail crazy. He’s the one that’s filling those holes though so he told me it “doesn’t matter”. But he’s got our cordless nail gun and he’ll throw sooo many nails into the boards. :). At least I’m not filling them LOL
>> Christene
Keys to Inspiration
That was our dining room! We learned our lesson 🙂 🙂 Thank you for stopping Christene, I always appreciate it! -Brittany
Brittany! So glad to see you getting after this project, we are in the midst of board and battening our office for the ORC. Your advice is spot on. Trouble is we have lath and plaster walls so we had to actually add the “board” part. Yours looks terrific, the room is lovely and bright and I can’t wait to see your end result 🙂
Oh dear! That would be a lot of extra work! Luckily the end result is worth it. 🙂 Thank you so much for stopping by, Karen! -Brittany
I love these walls and currently have wainscoting. I pinned this — just in case I am brave enough to attempt myself for a certain bathroom in my house.
Wow! The board and batten makes such a big difference! So pretty! And thank you for sharing your wisdom! I plan to tackle some board and batten myself soon!
Thank you so much Nicole! I really like it too 🙂 -Brittany
Great tips! We are considering adding something similar to the walls in our little bathroom reno. Really helps to brighten up the room!
How did you figure out the distance between “boards”? Are the blank parts all the same all the way around?
It looks lovely!
Hi Truus! You could use your wall studs for reference to maintain a consistent distance. We wished we could’ve used the studs as a guide, but the toilet location put a snag in that plan. We didn’t want a board (or nails) anywhere near the plumbing. We took each wall length and divided it equally all the way around. If I remember correctly, each board is about 29″ apart from one another. Thanks for stopping by!
My dining room is oddly shaped, narrow, & long with just 2 opposite walls as it’s between an open concept kitchen & livingroom. I already did tbe side along & behind my buffet/hutchat 65″ height from floor (approx. 2/3 wall height), but am thinking of doing the board & batten on the opposite wall behind my 8′ long antique library table at 72″ above the floor so I can top it with a step shelf to display my antique & repro pitcher collection so that heads moving to & away from the pew won’t hit the shelf. What are your tboughts about board & batten on the opposite sides of the same narrow room being different finished heights? PS the buffet/hutch covers nearly all but 4′ of that side whereas the 10′ of the table side is completely visible.
Thanks for your thoughts.
Hi Zoe! Your situation sounds unique. I’d err on the side of making them the same height. Could you build some floating/ledge shelving above the table to hold your items and keep a consistent look? Thank you for stopping by! -Brittany
Brittany,
You may have addressed my question partially above. Did you add a thin board to the wall before adding the battens? If you did not add flat boards, do you have any tips for painting over the sheetrock? Did the sheetrock texture look different from the vertical and horizontal boards? I love this look ! It really changed your bathroom.
Thanks,
Lee
Our walls are just drywall with no texture other than the natural paint and drywall surface. I will say, the board and batten achieved a much smoother look since the wood we used was select pine and had a very smooth surface. But at the end of the day, using the same sheen of paint helps bring the wall and board and batten together.
If you did add a thin sheet to smooth out the wall, you may need to account for the extra thickness at the top batten and just add a thicker bead of caulk. Thank you for stopping by Lee!
Hi, I have textured walls (orange peel-ish). Should I sand the walls to smooth them out, prior to painting?
Thank You!
Hi Jillian! I’ve never worked with textured walls and refinishing them. If you have a small inconspicuous spot, you could test out sanding the surface. Otherwise, you might need to cover the entire space with a board. Let us know how it turned out!
Hi –
What type of paint finish did you go with – Flat, Semi-Gloss, Gloss, etc…?
Kellen
Thank you for sharing! Great details.
Thank you for stopping by, Wendy!!
How long the vertical boards? The baseboard looks like it is wider than the top two rails. 6” baseboard and 4” top rail and rail above the tile.
Thank you,
Cindy
We chose the height based on the height of our pedestal sink. We wanted to end the top thick board right at the sink level to create a backsplash with the tile. The top & bottom baseboards are 1″ x 4″ boards and the verticals are 27.5″ tall.
We are doing board and batten in our kitchen with an open walkway to our living room (no door frame). I can’t for the life of me figure out how to nicely finish off the edges without building a frame around the doorway. Any recommendations?
That sounds beautiful, Kelly! Here is a great post for an open area, perhaps it will help inspire you on how to finish the edge. https://www.blesserhouse.com/the-cheapest-and-easiest-diy-board-and-batten-part-one/ –Brittany
Hi Brittany, thanks for this great info! What color of paint and finish did you go with – Flat, Semi-Gloss, Gloss, etc…?
Hi! Thanks for the tutorial. Did you have to do any planning around the wall studs? Any concerns about nailing it directly to finished drywall?
Hi Trish! It’s always best to find a wall stud, but if you can’t, use liquid nails/wood glue and a nail long enough to secure the board into the wall.
Double check what’s behind the wall to make sure you don’t puncture any wires or piping.
Thanks for stopping by! –Brittany
What do you do about keeping spacing around to the next wall that has different densions?
Hi Tricia! We kept the same spacing as our eyes traveled across the room. Wherever the last upright ended was going to be okay since its hidden behind the bathroom door and it’s not super noticeable.
This turned out so so good! I am obsessed. We finally bought a house in Redding, CA and I am dying to fix it up a little bit. I think this would make such a fun accent wall and I am totally going to try it out. With this and some hardwood floor refinishing my mud room is going to look so much better. Thank you for all the tips!
Hi Brittany –
We are considering a board and batten accent wall in the landing area of our staircase. We have some custom moulding that the bottom area will butt up against. It is not very wide, so we would need a very thin product to create the board and batten with. Do you think drywall shims might work? There is a link below to the product we are thinking of. This is our first attempt at a project like this – any and all advice is welcome.
https://www.menards.com/main/building-materials/drywall/shims-trims/strait-flex-reg-45-drywall-shims-case-of-100/56690-83235/p-1444444161477-c-13059.htm?tid=2674376413463438437&ipos=2
Thank you,
Tracy
I’m confused about the shims, did you leave a portion of the shim under it? How did you cut the sides off after nailing it?
We are getting ready to start our first board and batten project in our master bath. Thanks for your wonderful suggestions. One that I can add – Our daughter recommended using Adobe Illustrator to layout your walls first. I did that and wow what a help. AI has a way to distribute the “battens” evenly. If you know how to use Illustrator, or know someone who does, just create an Art board the size of your wall (in inches). The create Objects that are the correct width (for a 1×4, use 3.75″ for width) of your vertical battens. Then Distribute those objects to the Artboard evenly using the Align tool. And voila! It gives you the exact measurement in between each batten. So glad she though of that. 🙂
Hi Michelle! What an awesome tip, thank you for sharing, and good luck on your project!
Did you use a Peel and Stick tile or regular tile between the boards? Looks awesome!!
Recommendations where the vertical board protrudes our base board at the bottom? Just leave overhang? Or 45 degree angle?
If we would have followed #1, we wouldn’t be here 😕
Thanks!