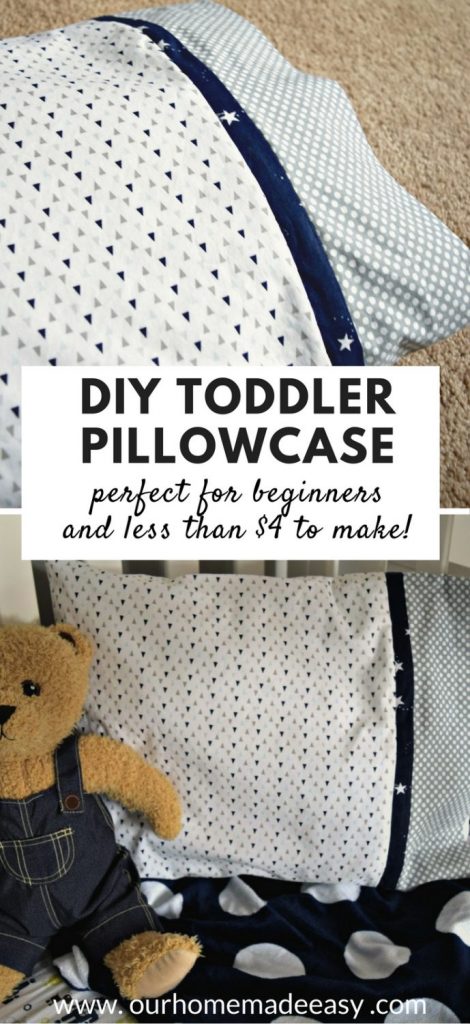
Easy DIY Toddler Pillowcase
Good morning and Happy New Year! How were your holidays?? In case you didn’t notice, things were especially quiet around here. I spent two weeks with the family and almost zero blogging was done. Why? Well, it was time for some much needed relaxation from my PC and social media. Do you ever feel like you need to step away and recharge?
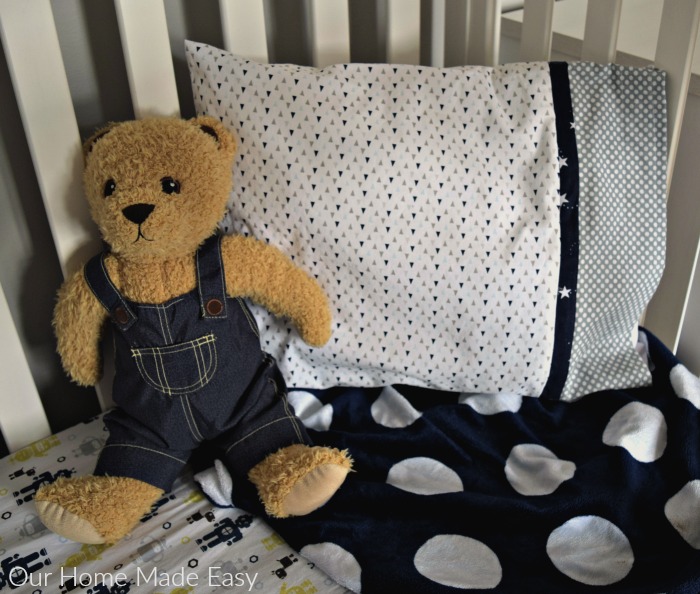
But don’t worry– I wasn’t completely vegging out on the couch wearing yoga pants and watching Hallmark movies (okay only a small part of time)! Jordan & I were busy with a few DIY projects around the house. I can’t wait to share them with you over the next few weeks! First up is a small toddler pillowcase for Owen. We’ve held off buying a pillow for the little guy and after watching him ball up his blankets night after night, we thought it was finally time. So… Santa brought a toddler pillow for him (exciting gifts around here 😉 )!
This post contains affiliate links. If you shop from my blog, I may be compensated for clicks or purchases that you make. Thank you for supporting ‘Our Home Made Easy!’ Read my disclaimer page for more information.
![]()

I found the pillow on Amazon and its the perfect size for the little guy, who still sleeps in his crib. The only downside? The pillowcases are $17 apiece! I knew we’d need at least 2 cases because drooling / the stomach bug / general exhaustion happens alot around here and having one pillowcase wouldn’t cut it. That left me with either spending more than $35 on the pillowcases or finding a way to DIY them.
It couldn’t be that hard, right? Well… I learned. Sigh….. and then I made a second toddler pillowcase in a fraction of the time. I can’t wait to show you!
Spoiler: I made them for less than $3 apiece!
Interested in making your own? I’ll step you through the entire process, explain some tricks, and make sure you avoid all the mistakes I made the first time through!
How to Make a Toddler Pillowcase
Supplies Needed for a Making a 14″ x 19″ Toddler Pillowcase (Finished is 15.5″ x 21″)
-
- 1/2 Yard of Main Color Fabric (I used Blue Triangles from Jo-Ann Fabric’s Nursery Collection)
- 1/3 yard of Cuff Fabric (I used this one)
- 6 inches of Accent Fabric (I used Love to Moon Stars from Jo-Ann Fabric’s Nursery Collection)
- Coordinating Thread
- Fabric Scissors
- Optional: Rotary Tool & Mat
Prep Your Fabric
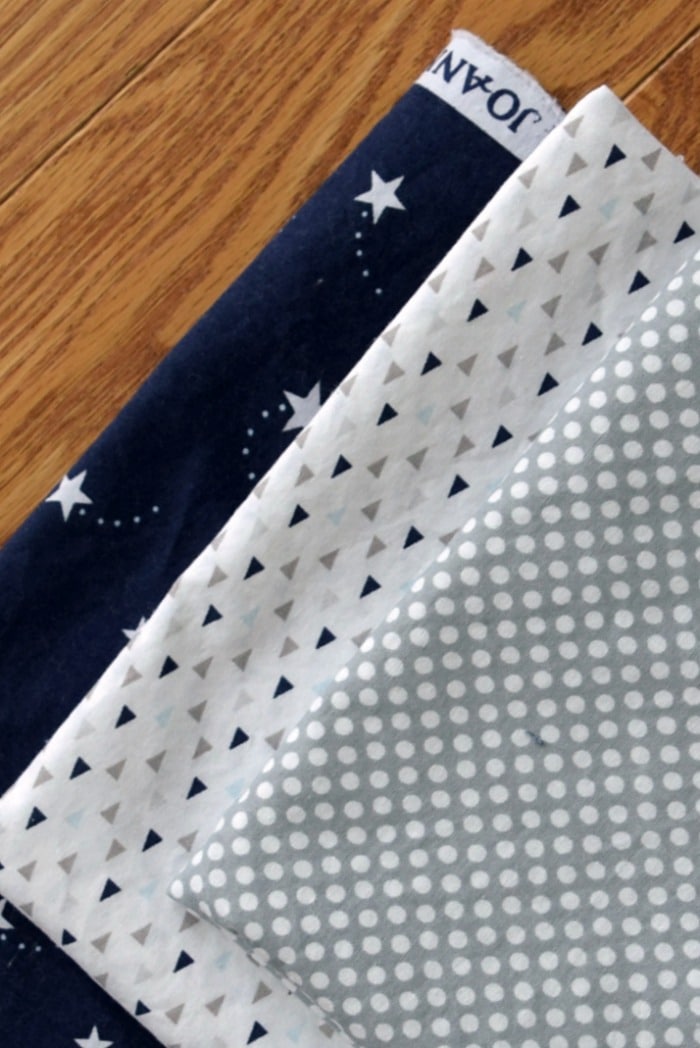
I picked these colors to coordinate with Owen’s Blue & Gray nursery. I couldn’t have asked for better prints!
Now, it’s your turn. Choose three fabrics. My go to shops for Nursery fabric are Jo-Ann Fabrics and Fabric.com (they are an Amazon company).
Once you pick out your three colors, pre-wash them to avoid any shrinkage issues post sewing. I always like to give myself at least an extra 2 inches when I order the fabric to compensate for the shrinkage.
- Related: Must Have Items for Sewing Beginners
Trim the Pieces
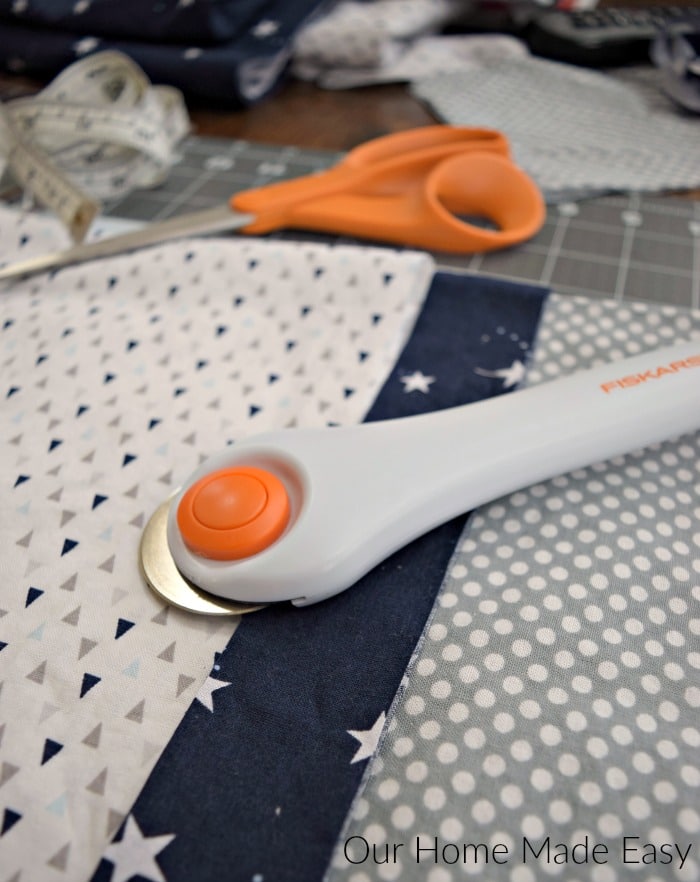
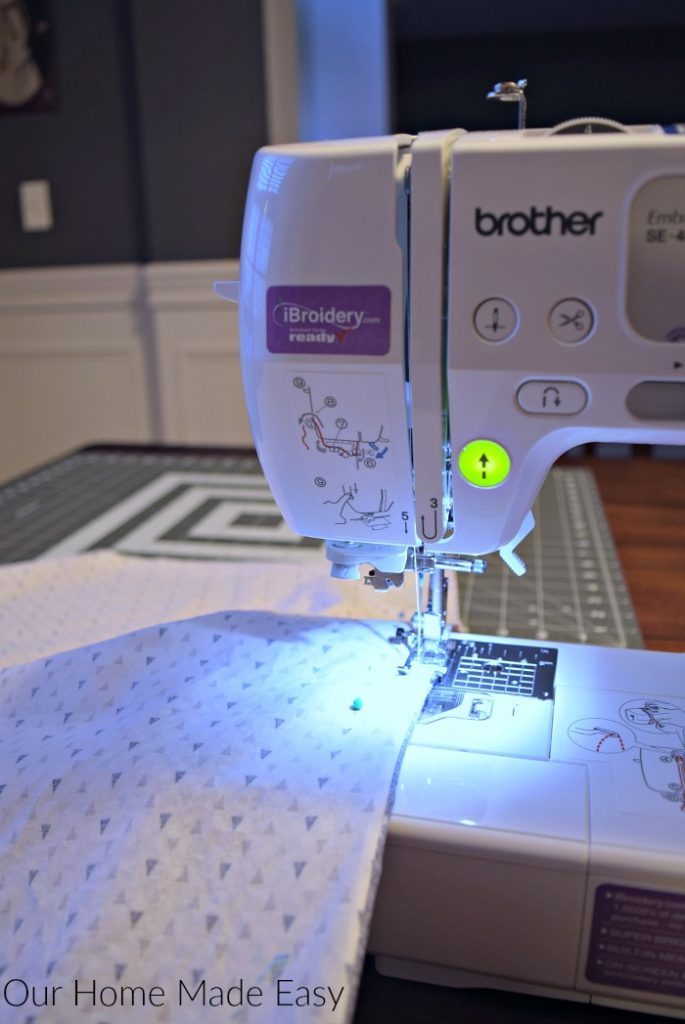
This part is important for squaring up the fabric. I used my rotary tools to cut the fabric (I need all the help I can get). If you don’t have a rotary set, carefully cut the fabric to the following sizes….
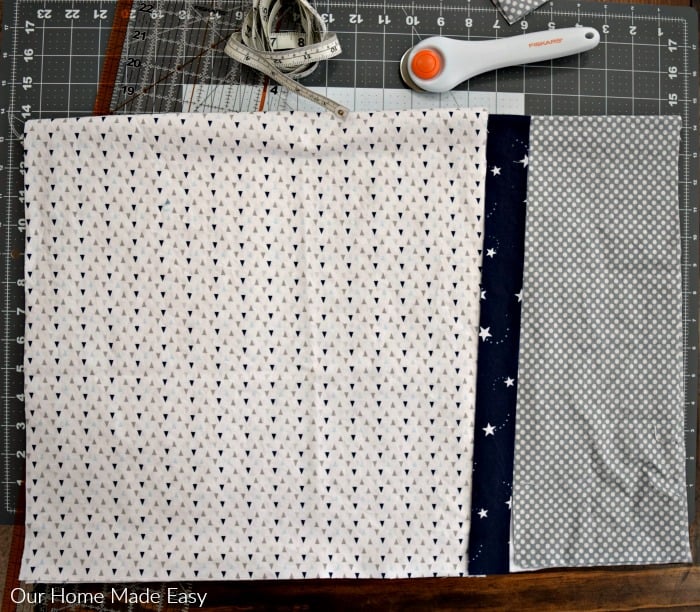
Main Fabric: 32″ x 15″
Accent Fabric: 32″ x 2.5″
Cuff Fabric: 32″ x 8″
Note: I made my seam allowance pretty tight. If you want a little extra wiggle room, add 1/2″ to each of the 32″x [15/2.5/8+1/2″]. This will account for allowance differences and if there is a manufacturing change to the pillow.
Create the French Seams with Main Fabric and Accent Fabric
So this can be a bit difficult if you’ve never sewn a French seam. Good news! Once you make one seam, they are so easy, you’ll laugh at yourself for being confused. I promise. 🙂
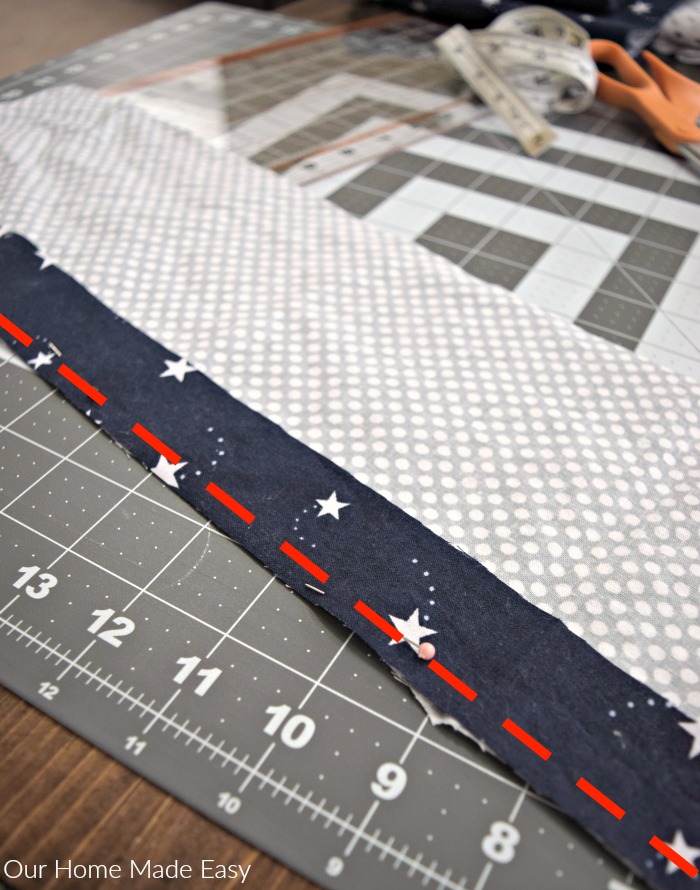
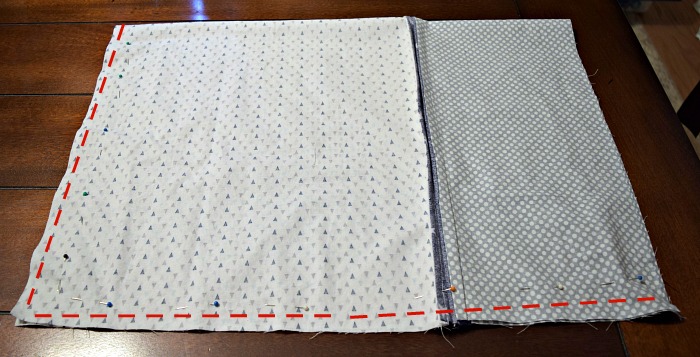
So let’s start the French seam. Lay your main piece of fabric with the right side facing down on your table. Line up your accent piece face up. This is out of the ordinary, I know. You want the wrong sides together. Pin the piece in place and carefully sew a straight line using about a 1/4″ seam. I’m not that great at tiny seams, so I like to give myself plenty of room to sew.
Use the picture below to get an idea of where to sew your stitch. This was a major time drain on my part. 🙂
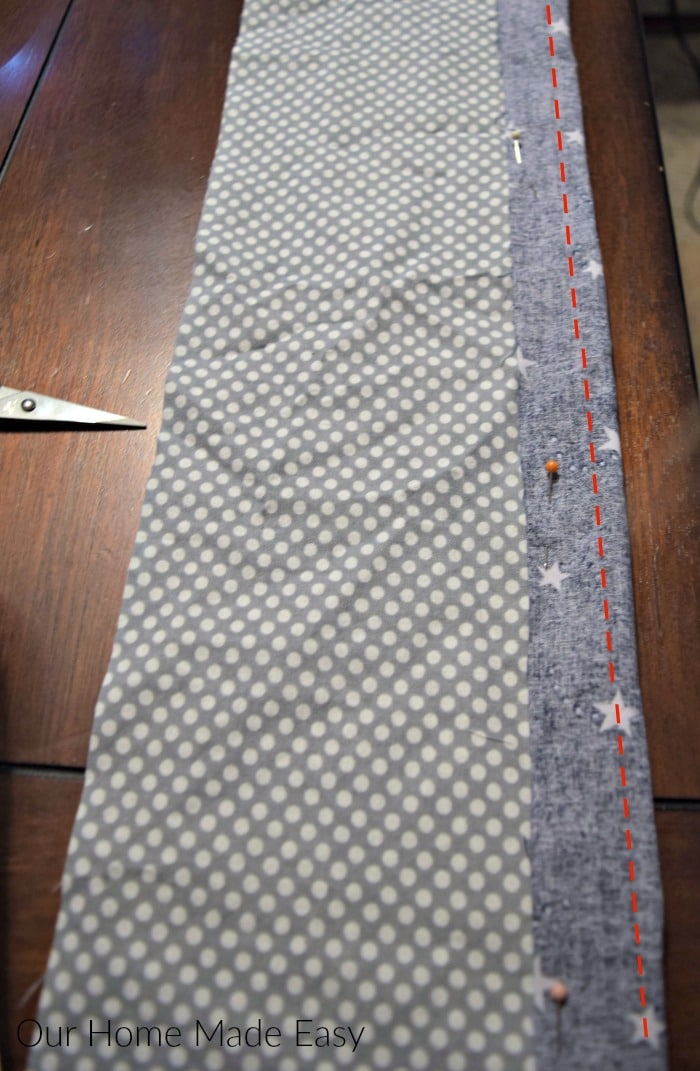
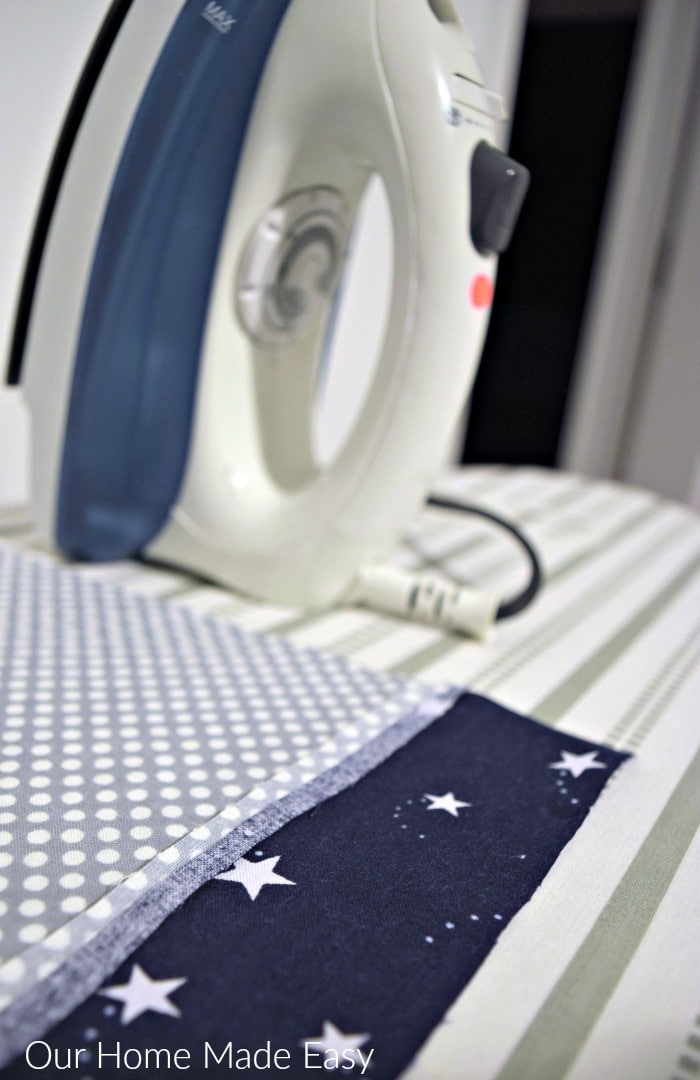
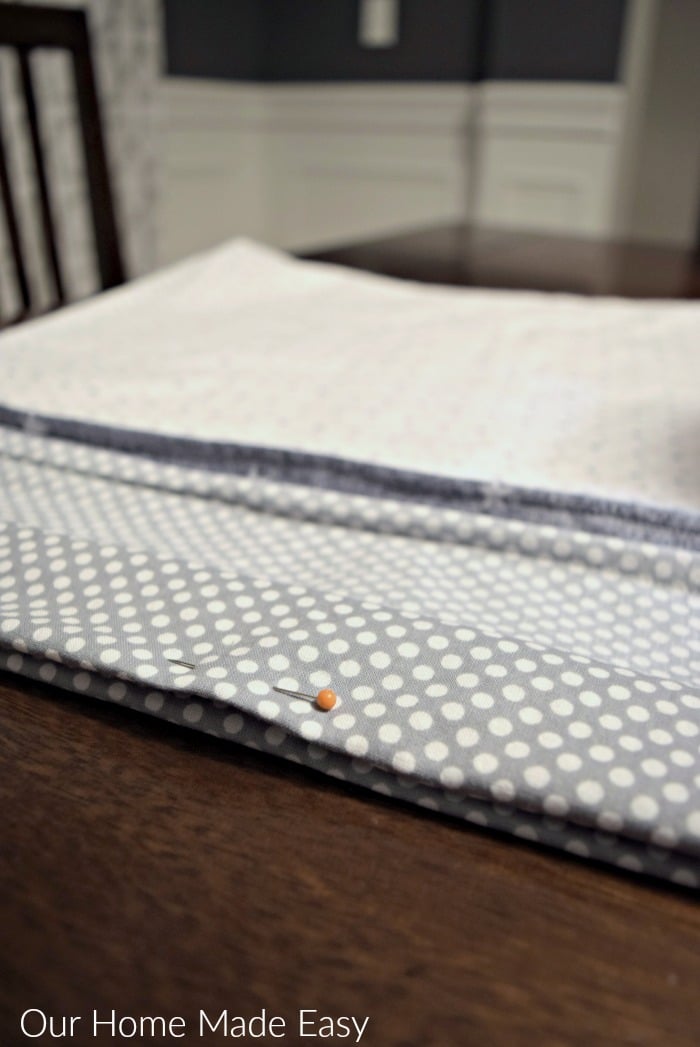
Once you have that sewn, press open the seam with a hot iron. [ I have a picture of the opening between the accent & cuff in the section below. ]
Next, you will want to fold over the accent piece onto the main piece. Sew a straight line immediately below the open seam [ the seam is underneath] Here is a photo showing where you’ll sew:
Now you should see a nice looking seam — that is the French Seam! That first one may be tricky, but they become easier the second time. Once I mastered this seam, I knocked out my second pillowcase in a third of the time it took to make my first.
- Related: Make a $5 Blanket Flannel Scarf!
Continue with Accent and Cuff
Follow the same steps with the accent piece and the cuff. Match the wrong sides together, and sew a straight line with a small 1/4″ seam.
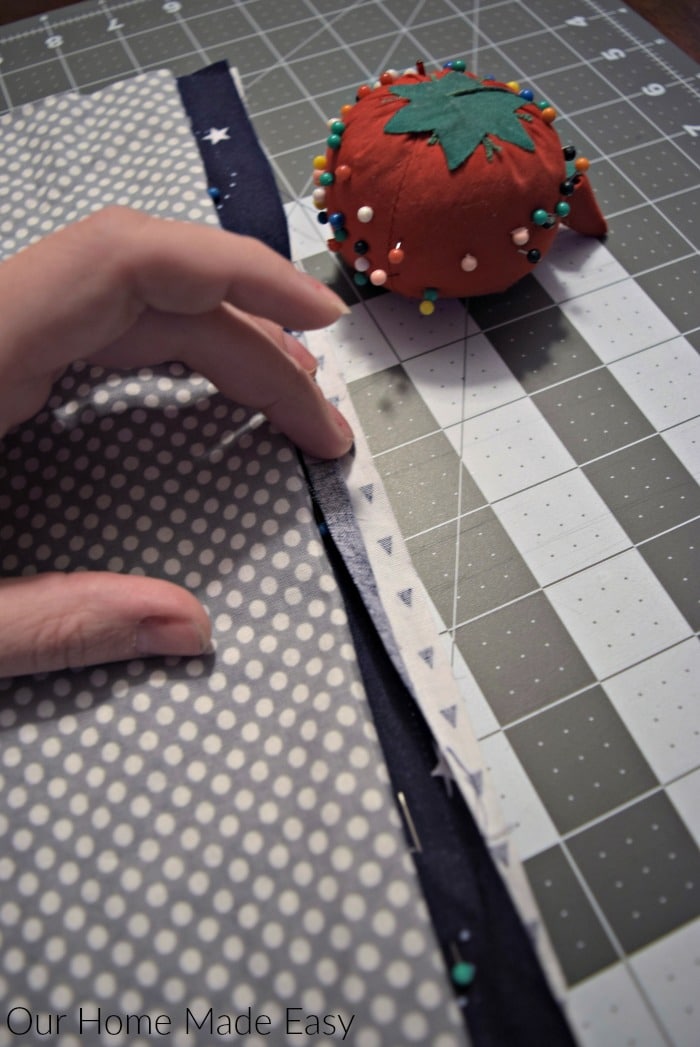
Press open the seam.
Like the main & accent pieces, fold over the material to create the French seam. Take the accent side and fold over to match up (right sides together) with the cuff. Sew a straight line just under that open seam.
Now, you should have a large piece of fabric that is beginning to look like an open pillowcase!
Sew Together the Pillow
Now the fun part! Fold the fabric in half and pin the right sides together. Sew a wide, but tight zigzag stitch along the very outside perimeter of the pillow. Be sure to lay the seams flat so that there isn’t a bump in the pillowcase.
Fold the Cuff
I originally thought that it would be easier to create a folded cuff before sewing it all together. However, I quickly realized that if I did that, then there would be an inner seam within the cuff. Not a terrible thing, but it may not look as nice as you’d like.
Therefore, create the cuff once the pillowcase is sewn. Fold in the cuff 1.5-2″. Pin loosely. Fold the cuff again. Pin securely in place.
I recommend 1.5″-2″ because it depends on how much room you have within the pillow. I did a dry run with the pillow inserted to see how much room I had to fold under and create the cuff.
Run a straight stitch at the inner part of the cuff. To finish it off, I ran a second straight stitch over the end of the cuff.
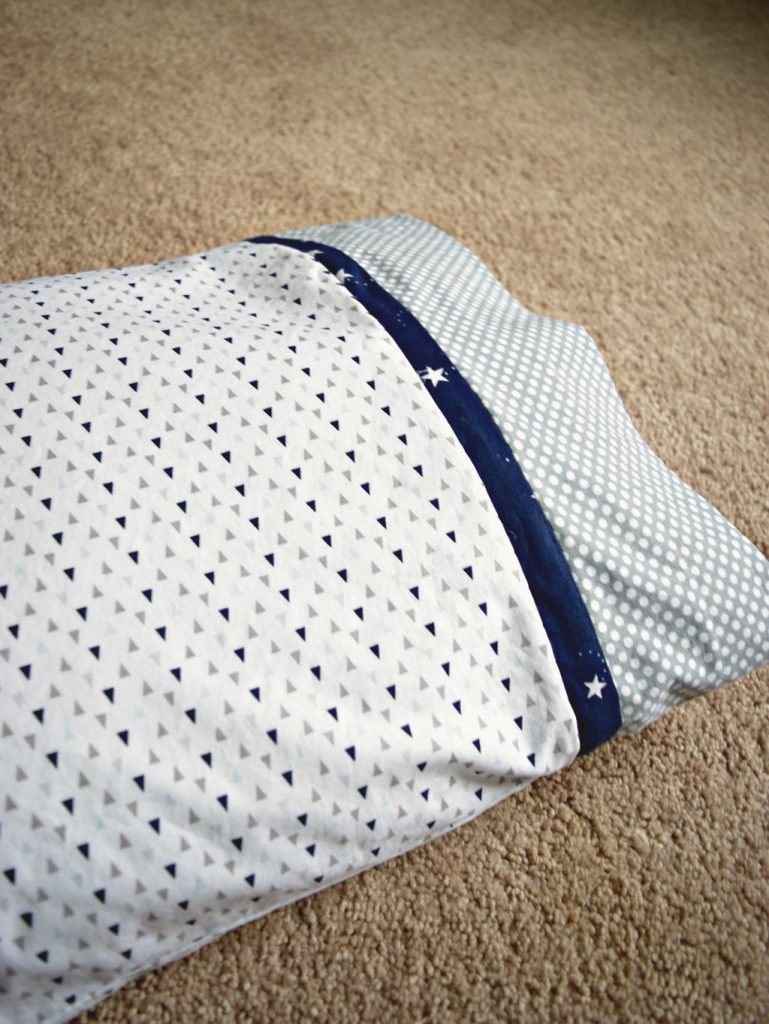
And here it is… all ready for Owen to arrive home! He loves his pillow. 😀 😀
Total Cost: $3!
Fabric at Jo-Ann was $3.99 a yard. I had an additional 40% off total purchase coupon (love the calendars). Total spent for one toddler pillowcase? Less than $3!

Hi, I’m Brittany, and I believe life at home should feel easier, not heavier.
I’m the creator of Our Home Made Easy, a space for busy women who want dinner on the table, their homes running smoothly, and a little breathing room at the end of the day.
You won’t find perfection here, just realistic recipes, smart shortcuts, and simple routines that work in real life. The kind that help you feed your family well, stay organized enough, and still have time to actually enjoy it.
If you’re juggling work, kids, schedules, and everything in between, you’re in the right place. I’m so glad you’re here.


I made this pillowcase and bought he exact pillow on amazon and the case was too short. ☹️ I’m not sure what I did wrong. I used the exact measurements that you did.
Oh no, Angela! I certainly understand your frustration. I’ve made a few of these now, and the only thing I can think of is that we are using different seam allowances (mine were tight) or the pillow was slightly larger in size? –Brittany
The toddler pillow i bought is 13″ X 18″. Is that what yours was??