How to Easily Remove Paint & Varnish from Old Furniture!
Are you falling in love with the furniture makeovers on Pinterest? But not sure where to start with your current furniture or a piece you picked up impulsively. If you are ready to tackle a new furniture project, this post is for you. With a bit of sweat equity, you can take any Craigslist buy and really turn it into something ready for your home!
(This post contains affiliate links. If you shop from my blog, I may be compensated for clicks or purchases that you make. Read my disclaimer page for more information.)
New furniture isn’t always in the budget for young families. Sometimes you have to use what you already have on hand or pick up pieces from Facebook Marketplace. Or, you may simply enjoy the challenge of finding new furniture and bringing it back to something cool & modern or chippy & farmhouse (a’ la Joanna style).
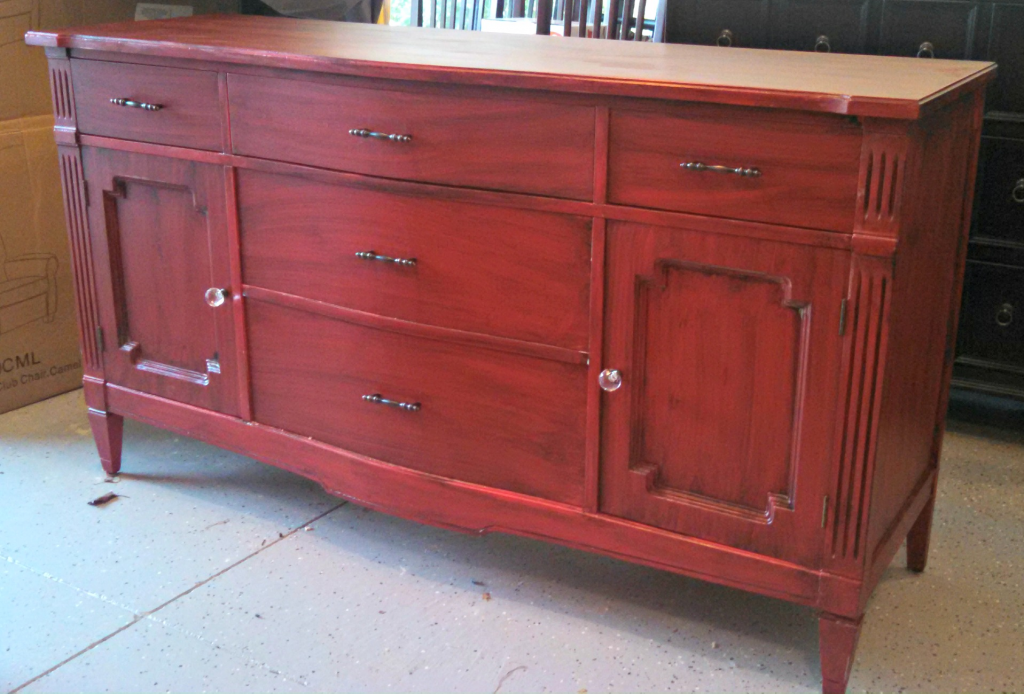
For this piece, I redid it years ago [you can see the refinished buffet post here] and after figuring out my home style, decided to forego the RED and choose a color that is better for us.
But before you get to make an old piece of furniture new, you have to strip it down to its bones! I cannot wait to show you the easy way of doing it yourself!
Supplies Needed to Remove Paint from Wood Furniture (& varnish, too!)
- Coarse Sand Paper and Block (to save time)
- Citristrip
- Chip Brushes
- Heavy Duty or Nitrile Gloves
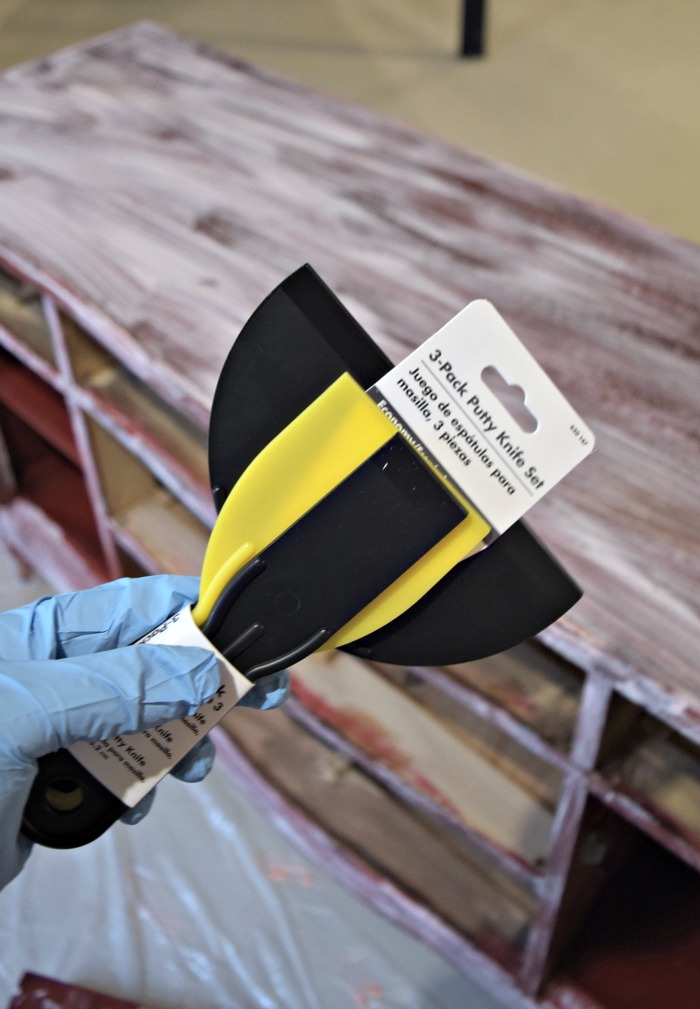
- Paint Removal Tools (I used these ones and these ones!)
- Fine Sand Paper (or Orbital Sander & Pads)
- Safety Glasses / Mask (optional)
- Extra Step: Heavy Duty Paint Remover (use in a well-ventilated area)
Furniture Makeover Guides You’ll Love:
- 8 No-Fail Ways to Update Old Furniture
- Easy How To DIY Your Own Perfect Two Tone Furniture
- Fusion Mineral Paint: Is It Worth It?
- A Side by Side Comparison of Fusion Mineral Paint Colors
How to Remove Paint and Varnish
Prep Your Wooden Surfaces
Remove all old hardware, including door hinges.
To save yourself lots of effort and time, spend about 10 minutes and sand over your entire piece with coarse sand paper. Make sure to sand in direction of the wood. What you’re doing is prepping the remover to do an even better job than its advertised. I’ve found that a bit of effort goes a long way when you have furniture with wax or special finishing on it (like mine!).
Apply the Varnish & Paint Remover
While this process is easier and safer than more traditional methods, it will still take some time. You have to wait in between remover coats and then there is some physical labor involved. Easy yes, but prepare to spend a bit of time on it depending on the size of your piece.
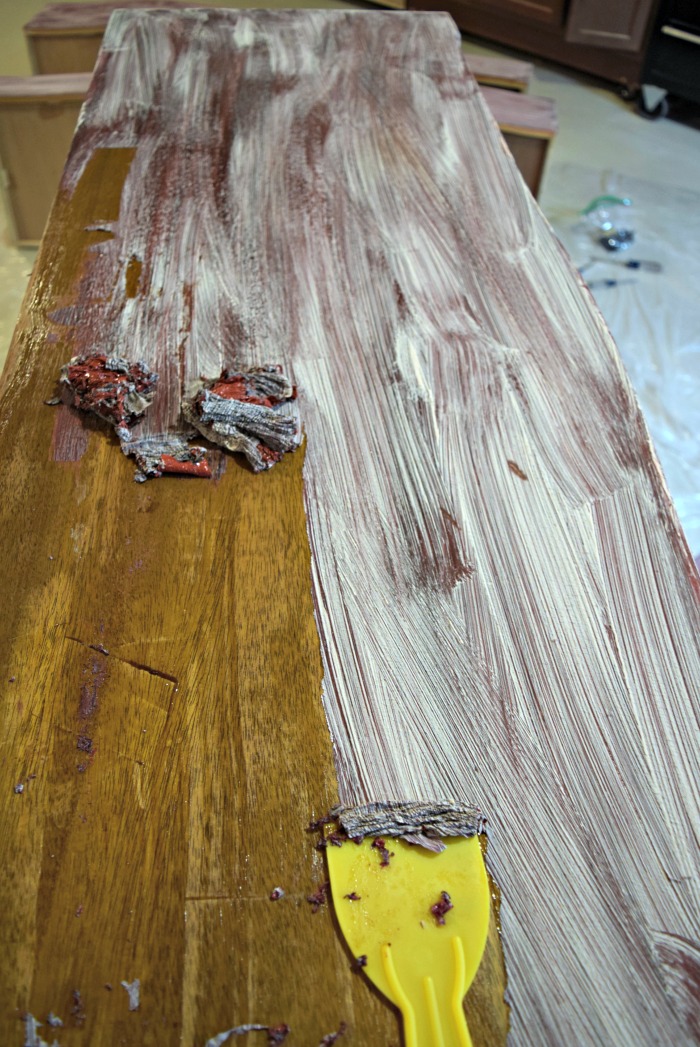
Paint a very thick coat of the Citristrip on your wood surface. Be very liberal in your application. Don’t worry about using too much. I’m so frugal when it comes to painting supplies and it took me a minute to ‘let it go.’ Once I started applying it thick and saw the immediate changes, I was convinced, that in this case, more is better.
Make sure to apply the chemical strippers to every nook and cranny on your piece. The paint won’t be removed unless there has been a product directly applied to it. Since the gel-liquid is so thick, I ‘painted’ the remover on the legs and sides and it didn’t budge too much.
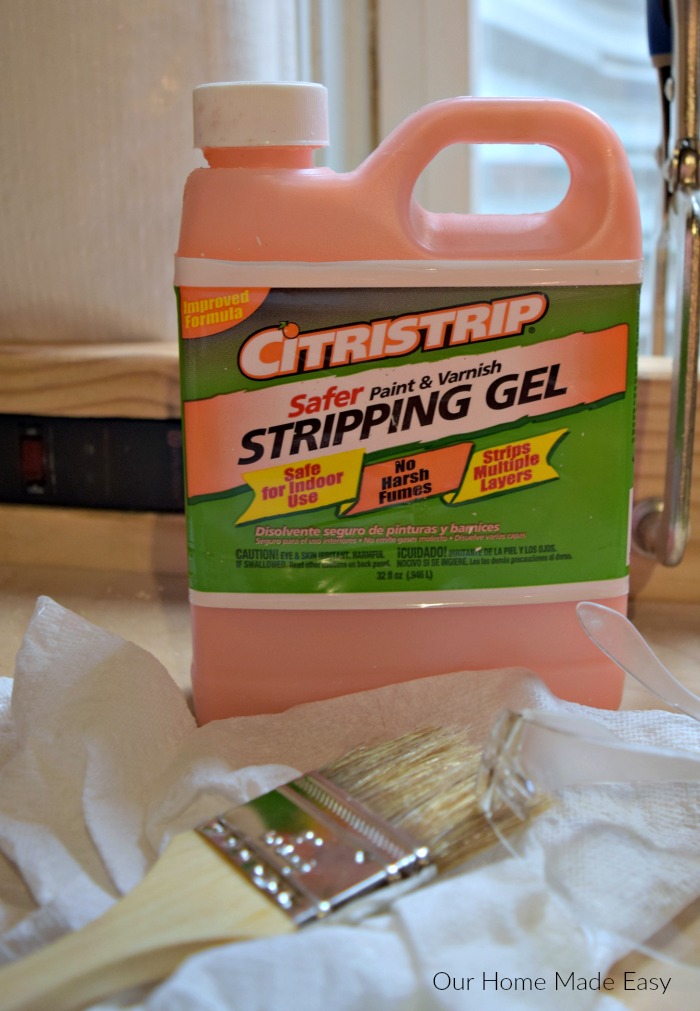
The best part about this product is that I wasn’t worried about removing the paint in our basement. It advertises low fumes so I felt comfortable diving in and DIY-ing even in the Michigan weather.
If you can, open a window to circulate the air. While it’s not necessary, it will help keep the orange scent moving through.
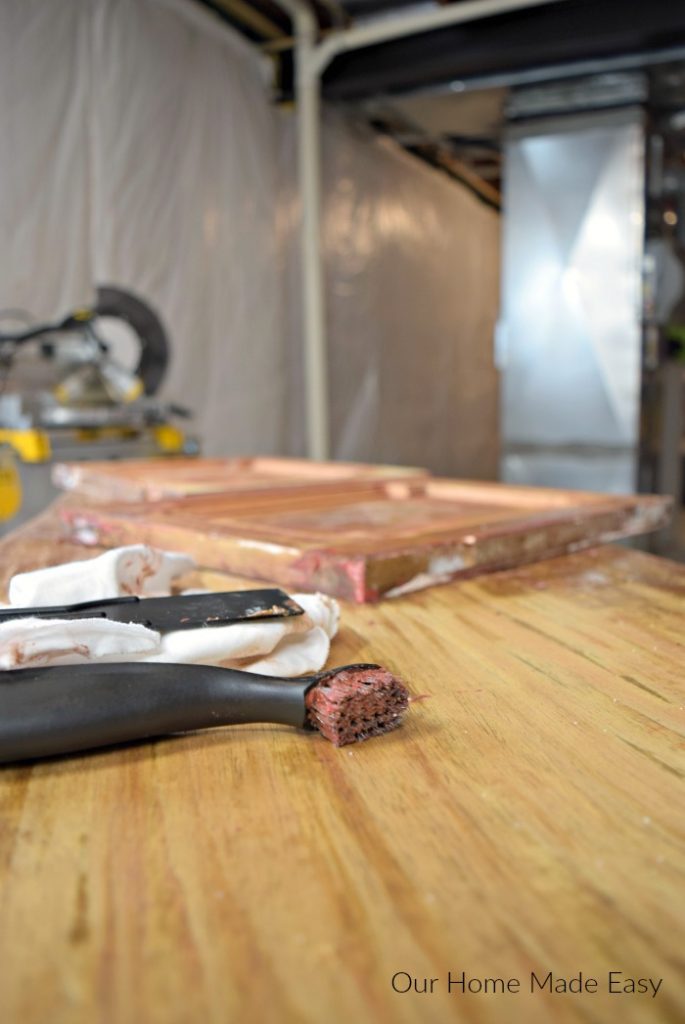
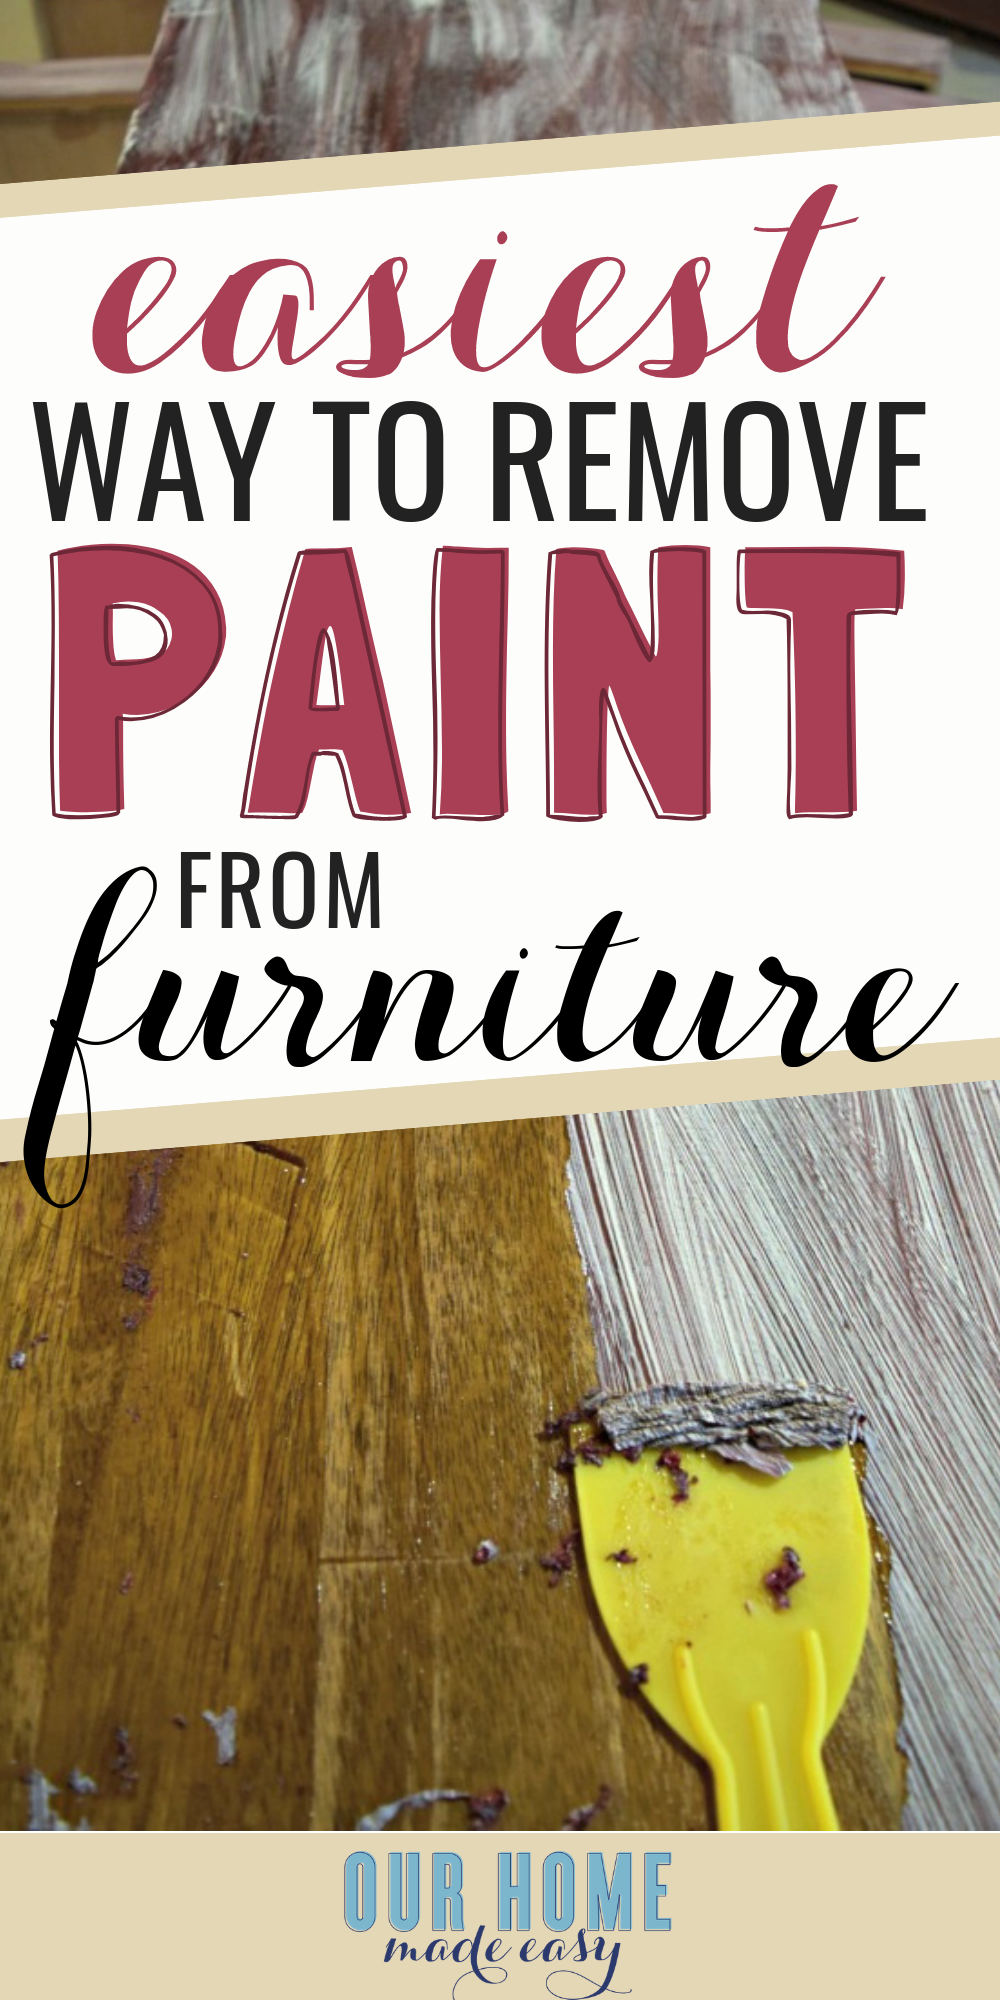
Begin Removing Paint
After about 2 hours of letting the Citristrip lying on top of the wood, begin removing the paint. Start off easy and use plastic putty knives.

You can see how the paint and varnish came right off. I thought it was pretty cool. The wood is still wet underneath and will be for at least 12 hours after you’ve finished removing the paint.
Use clean cloths to wipe up paint and residue as you go. Otherwise, you’ll end up with paint pieces all over the floor and you don’t want to be stepping in them.
Inevitably you will not be able to remove every piece of paint. I’d then recommend that you use a mini wire brush to help you out.

![]()
We used it for the nooks and crannies that aren’t practical for putty knives.

The wire brush quickly removed any extra pieces.
Reapply another coat of Citristrip, if desired.
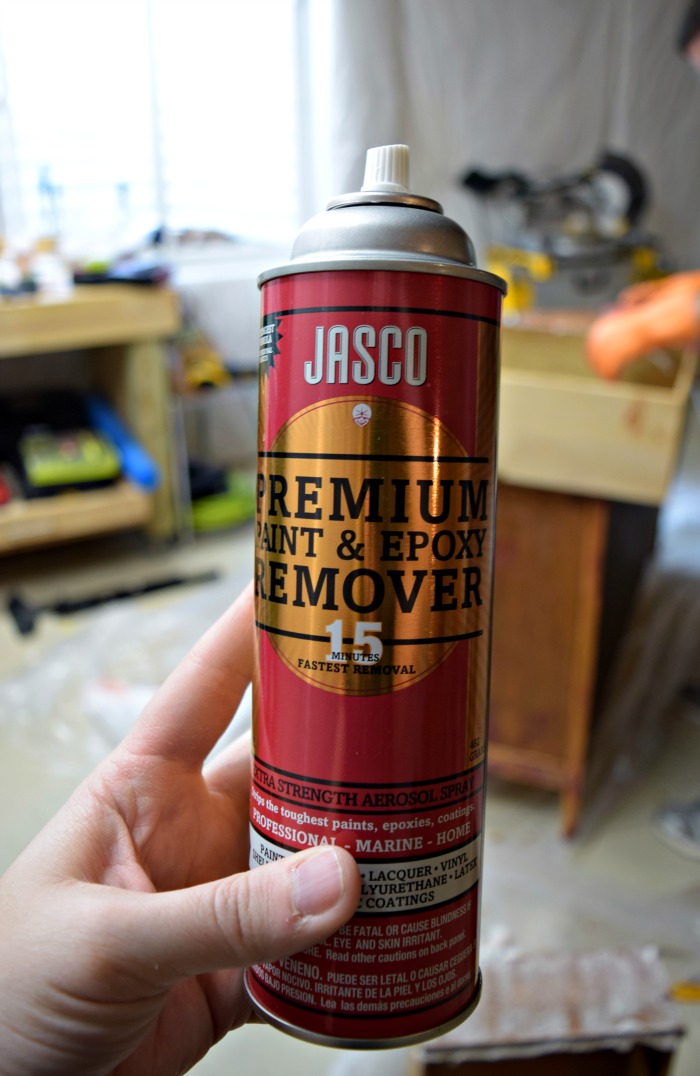
Now you can see that there are still some areas that need extra attention. For these, use a more potent paint remover.
My first goal was to use a low VOC product first, then go stronger, if needed. After at least 40 years of varnish and paint, this buffet needed just a tad bit more product. I then used this JASCO Paint Remover.
Want to skip to see the after? I created a beautiful two-tone furniture buffet!
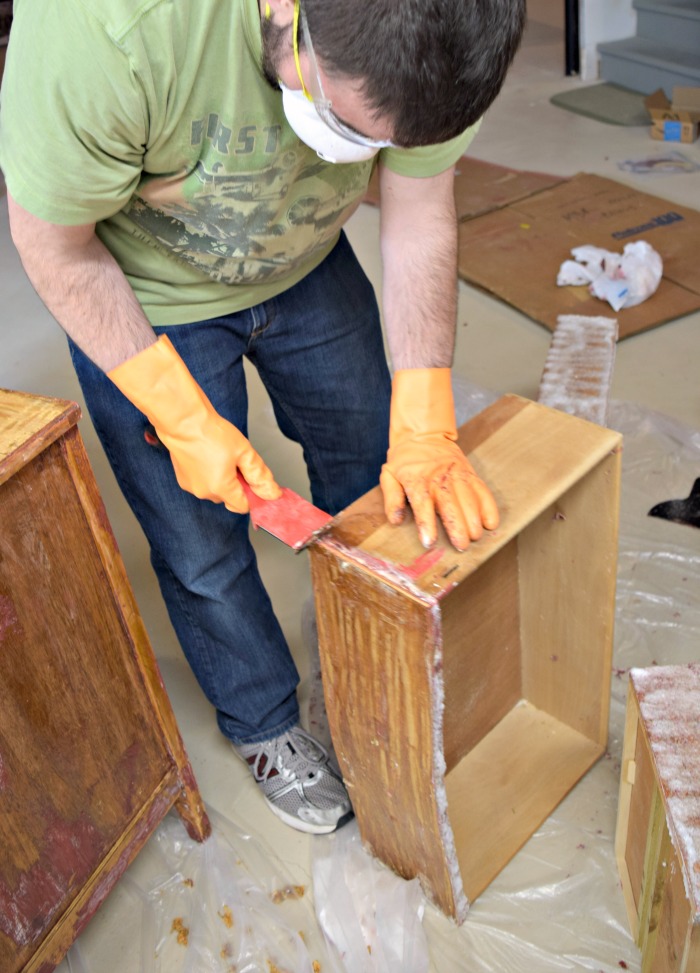
Spray or apply a thick coat to your remaining paint and wait according to the product. Then use a wire brush or knife to remove the last bits of paint! (Jordan used a wide wire brush to quickly clean up the last spots)
Don’t worry- you may not need to apply the second product. I needed to because I had latex paint AND a thick wax lying over it. It simply made for a difficult removal.
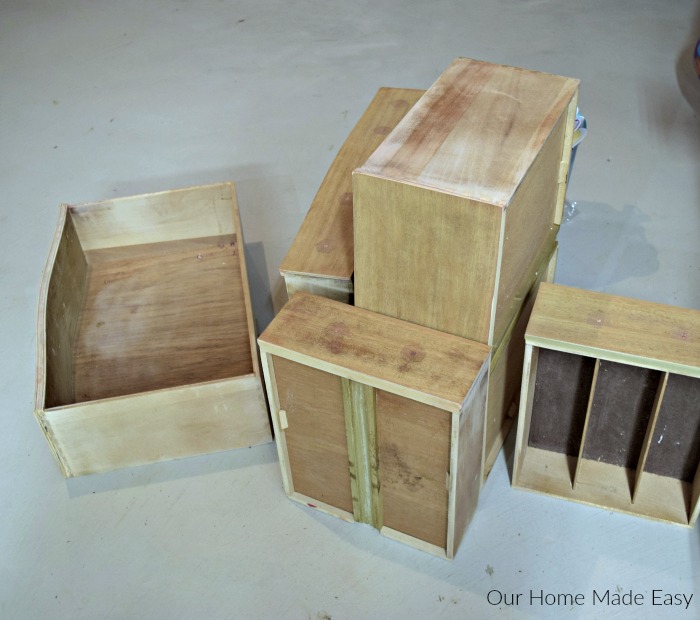
Deep Clean!
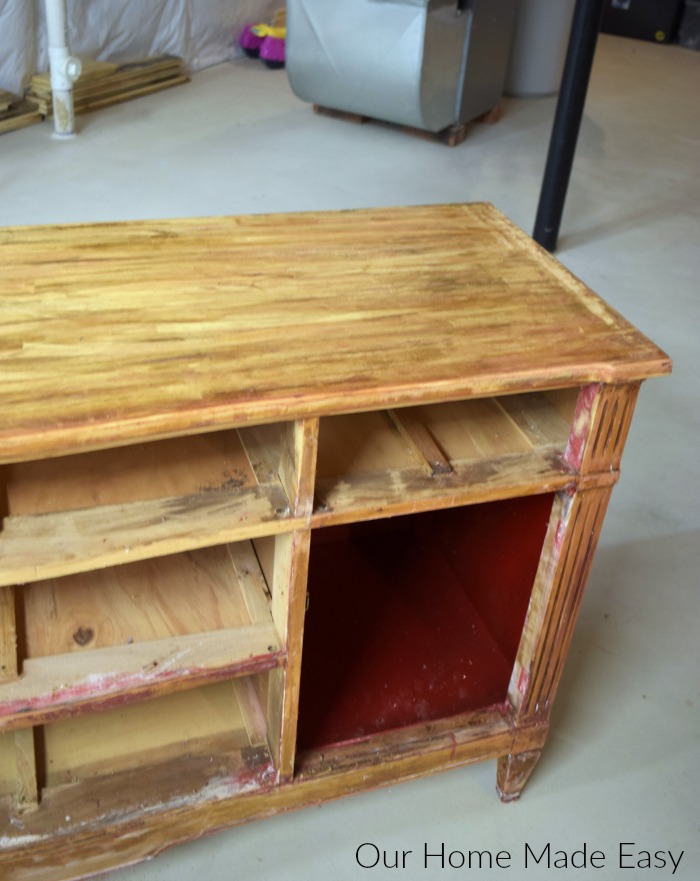
Finally, your furniture looks almost too perfect to paint over. 🙂 I even told Jordan “Wow, who knew ours would look so good?”
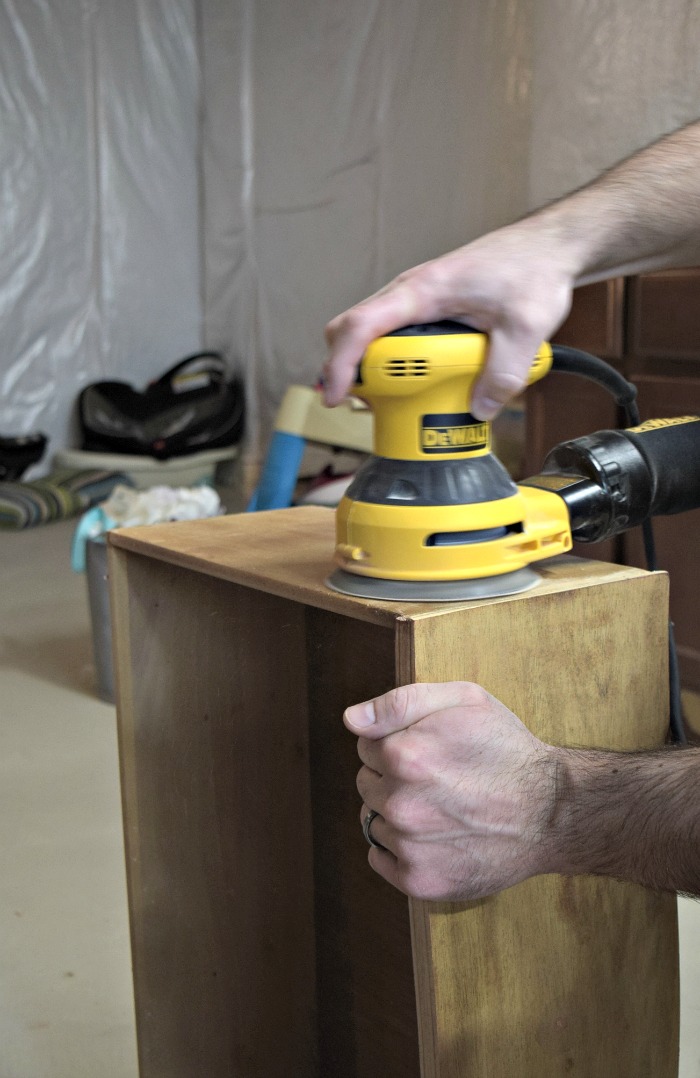
Using your cloths, wipe down your item. Then, using an orbital sander, sand over the entire piece using a fine grit.
Be sure to be firm while sanding and still going in the moving in the general direction of the wood.
Wipe off any sanding residue! Now your piece is ready for its next step– refinishing!
Get This Entire Project’s Shopping List Right Here!
Click the image below for the shopping list!
And ta-da! Super clean furniture ready for its debut in the house (Okay it’s really a re-debut, but you get the idea).
Frequently Asked Questions About Removing Paint & Varnish
We’ve received several questions over the years about removing paint from furniture.
Can I Use a Power Sander?
Yes! We used a high grit sandpaper to remove the initial layers. Test sand a patch of your wooden furniture before using the power sander.
What is the Best Way to Remove Paint or Varnish On a Small Area of Wood?
I would follow the instructions above and spend a lot of time using a small putty knife and wire brush. You won’t be able to use a power sander on small, detailed areas. Once your initial paint is removed, you can keep moving through the steps and sand with a 150-grit sand paper and wipe the surface with tack cloth.
What safety precautions should I take before removing paint and varnish?
Safety is so important! Set up a workspace in a covered, but well-ventilated area. Consider an outdoor patio or garage where you can open the door for airflow or if you must, work in a basement next to a large open window.
Once you have a well-ventilated space, always use eye protection and safety gloves to avoid chemical burns.
Is Saran Wrap Really necessary for removing paint and varnish?
Yes– saran wrap keeps your varnish stripper wet, which keeps it working. If your chemical paint strippers dry too quickly after application, you won’t find them as effective. When in doubt, cover your varnish with Saran Wrap.
Removing paint and varnish from old furniture isn’t always quick, but it’s not hard either. Prepare yourself with a few handy tools and a bit of patience. You’ll be excited about redoing furniture and no longer wonder what it really takes to make a cheap find ready for your home!
Check out the ‘AFTER’ for the second part of this post where I show you how to create a two-tone piece of furniture that is taking over all your favorite home blogs!

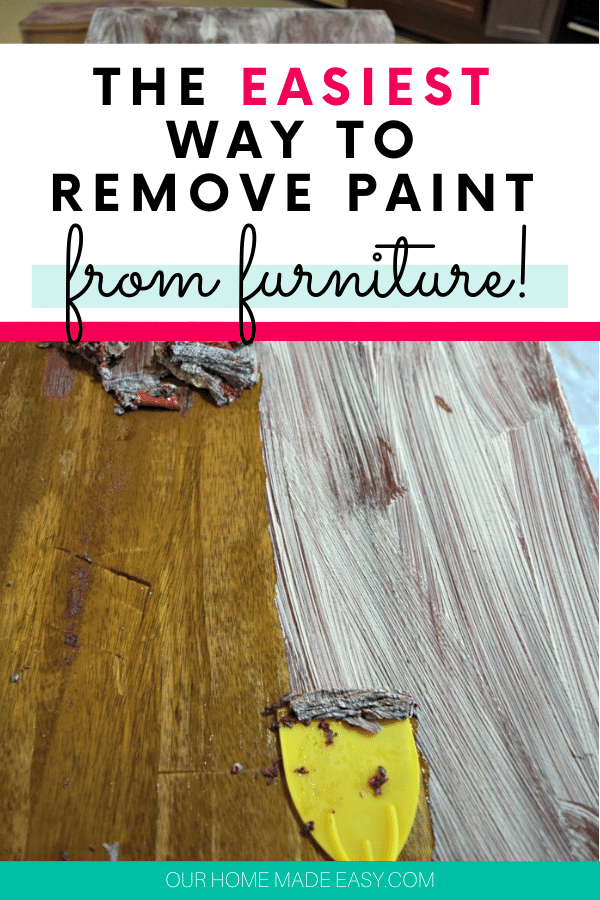
Want to remember this for later? Pin this image!

Hi, I’m Brittany, and I believe life at home should feel easier, not heavier.
I’m the creator of Our Home Made Easy, a space for busy women who want dinner on the table, their homes running smoothly, and a little breathing room at the end of the day.
You won’t find perfection here, just realistic recipes, smart shortcuts, and simple routines that work in real life. The kind that help you feed your family well, stay organized enough, and still have time to actually enjoy it.
If you’re juggling work, kids, schedules, and everything in between, you’re in the right place. I’m so glad you’re here.


This is a great post! I’m saving this for later because I had no idea how to strip off the paint from a piece of furniture like this. I’ve avoided buying already painted pieces from thrift shops and other places because of that! Thanks for walking me through this 🙂 I can’t wait to see the finished product tomorrow.
>> Christene
Keys to Inspiration
Thanks Christene! After doing it once, you’ll feel super comfortable picking up those random finds we bloggers always seem to acquire 🙂 🙂 -Brittany
Awesome post!
Who knew you could take the paint off of your furniture! Thanks for sharing. 🙂
Blue bear Soy Strip is a much safer product! Soy based and safe even in marine environments. I’d feel much safer using around the children and pets in my family. http://www.greenboatstuff.com/frsoystmacor1.html
Hi Jaime, I am happy you found a product that works well for you. Thanks for stopping by! -Brittany
Thank you for the tips….have started painting old finds….all advice is welcome
You’re welcome! Good luck on the adventure! -Brittany
Thank you for sharing your knowledge and skills. Great job and you have no idea how many people you help.
Thanks J.D.! I appreciate that you stopped by! -Brittany
In 1975 took a furniture refinishing course at our local community college and was told by the instructor to NEVER use sandpaper on an old piece of wood. Instead use extra fine steel wool; .It’s so much gentler on old wood.
I have been stripping furniture since, I paint on the product (I’ve used a variety of brands) After brushing it on I scrape off the paint remove the paint I go over I wipe it down with a liquid paint remover or some sort of solvent with ex fine steel wool to remove any bits of paint and to smooth out the piece. I use extra fine steel wool for getting into crevices and edges as well.
I apply one or two layers of liquid stain with cheesecloth , depending on the depth of color I prefer,letting it dry for 8- 12 hours in between. The I brush one or two applications of the the finish, I sue a product call ZAR, then buff it after waiting 8 hours in between. That’s my method, it’s time consuming but the results are spectacular!
Thank you so much for the tips, Theresa! I’ll remember the steel wool trick in the future. Thanks for stopping by! -Brittany
Thank you for this in depth tutorial. I have an old exterior door that I’ve been wanting to redo and use as our front door but I had no idea how to get rid of the layers of paint on it and I’ve been afraid of ruining it. This has inspired me to give it a try.
A front door sounds like an awesome project. Thank you for stopping by! –Brittany
Oh my goodness! This article is awesome! The Citristrip was the best recommendation ever! It was taking the paint off as I was painting it on! Made the rest of my DIY job so much easier. Thank you thank you thank you!
Awesome to hear Beckah!
Great article, pictures and tips! I have a mid 1800’s tiger wood dresser that is only stained and sealed…..no paint. Do you think this product is still the best choice? I want to strip and refinish it with fresh stain……don’t plan to paint over the pretty wood grain
Hi Heather! Since it is so old, I’d try a small corner in the back of the piece first to test it out first! Thank you for stopping by! -Brittany
Heather I just stripped a dresser that was stained and sealed. I used paint thinner and denatured alcohol.. 50/50 let it sit for less than a min used a scraper and scraped it off. you may have to do it a few times however it works… then i just sanded and now im getting ready to re stain it….
Thanks Summer! Are you re-staining it or painting it?
hello Britanny,
Amazing transformation from old furniture to new furniture. Such an informative post you share that give me a plenty of help for my home DIY project.
i wanted to thank you for explaining how you can remove a paint varnish from furniture. you mentioned it’s important to try to first remove all the hardware. It sounds important to make sure the hardware is removed safely so it doesn’t damage the rest of the furniture.
Where is the finished product? I didn’t find it. I wanted to see cause
Hi Yvonne! This post was about removing paint & varnish. You can see the piece painted here: https://www.ourhomemadeeasy.com/how-to-paint-two-tone-furniture/ Thank you for stopping by! –Brittany
Hi Brittany, I have just read your instructions on how and what to use in stripping 40 years of varnish and paint on a exterior door. My question is can this be done in cold weather in the garage. I’m going to make a hall tree with it. Thank you for your advice.
C
Hi Chris! I’d make sure you can keep some fresh air moving through your garage to keep any fumes you have low.
Such a great tutorial! I have featured it in our article (with a link back), Amazing Coffee Table Upcycles for everyone who is wanting to strip the paint off their coffee tables. I hope you are happy for me to do so, if not let me know. You can view the article here if you like, https://www.diythought.com/amazing-coffee-table-upcycles/
Thanks!
Hi, thank you very much for the help!
I just want to let you know some of the links to the products are broken, it says error or items not found. Just thought I should let you know.
Thank you ?
Thank you Maria! I’ll go look& update those, now. –Brittany
Hello Brittany!
You have inspired me to strip and refinish the bedroom set that we were gifted when we were first married that was my husbands grandfathers! It’s solid wood and made in the early 70’s. I hope you can answer this question for me. The headboard has a LOT of nook and crannies and I’ve been using my wire brush to get to them. My wire brush keeps getting ‘gunky’ (technical term) and I keep switching brushes. Is there a way to clean this brush or am I doing something wrong? I also tried wiping it with my rag and it’s just sticky.
Thank you for your detailed blog and I hope to hear from you!
Cassie
Thanks Brittany! You have been a big help to me. You make it look so easy.