How to Create a Birthday Poster Using Canva!
Are you wanting to create a quick birthday chalkboard poster– but want to do it for free and as easy as possible? Me too! One of my most popular posts over here on the blog is about birthday chalkboards created in PowerPoint. Since I created that post, I’ve made more birthday chalkboards in even less time. And I couldn’t wait to share. I can’t wait to show you how to design one for free and print it off quickly. So let’s start building an easy birthday poster in Canva!
(This post contains affiliate links. Please see my Disclaimer)
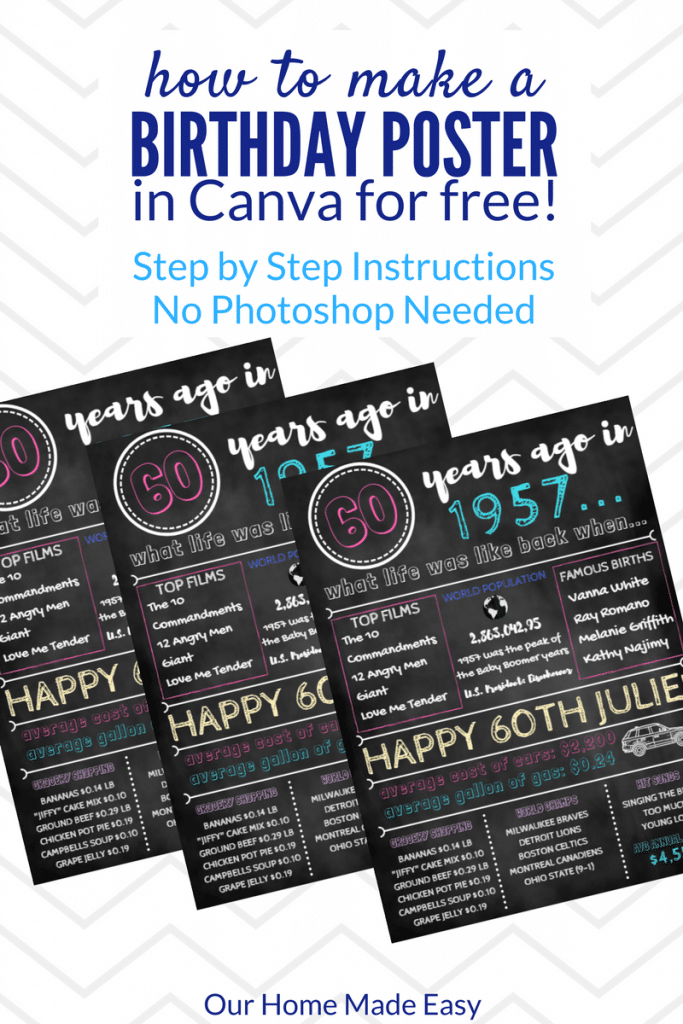
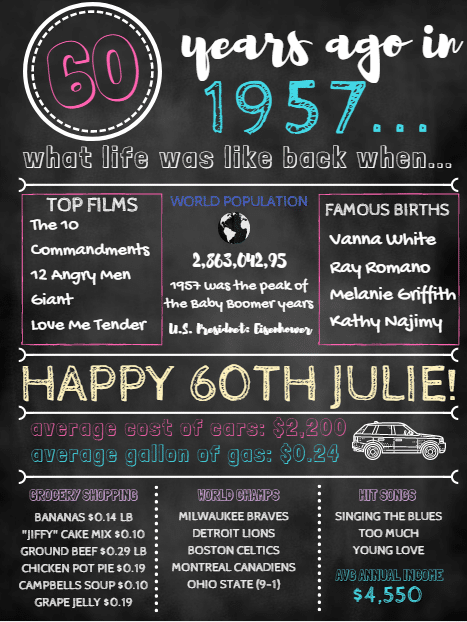
For this tutorial, I am going to show you how I created my mother-in-law’s birthday poster in Canva. The total printed size of her poster was 18″ wide by 24″ tall. It was great for hanging on the wall with washi tape. Total cost? Less than $4!
What is Canva?
If you aren’t familiar with Canva, it’s a free tool for creating images. All of my graphics are created within Canva— and it’s all free. Sure, you can add some upgrade elements and pay a few dollars, but that is totally unnecessary.
- Related: 5 Secrets You Need for Hosting a Birthday Party Easily
- Related: Minnie Mouse Birthday Party
- Related: Construction Birthday Party
- Related: Rubber Ducky Birthday Party Ideas
How to Create a Birthday Poster in Canva
Create a Blank Page

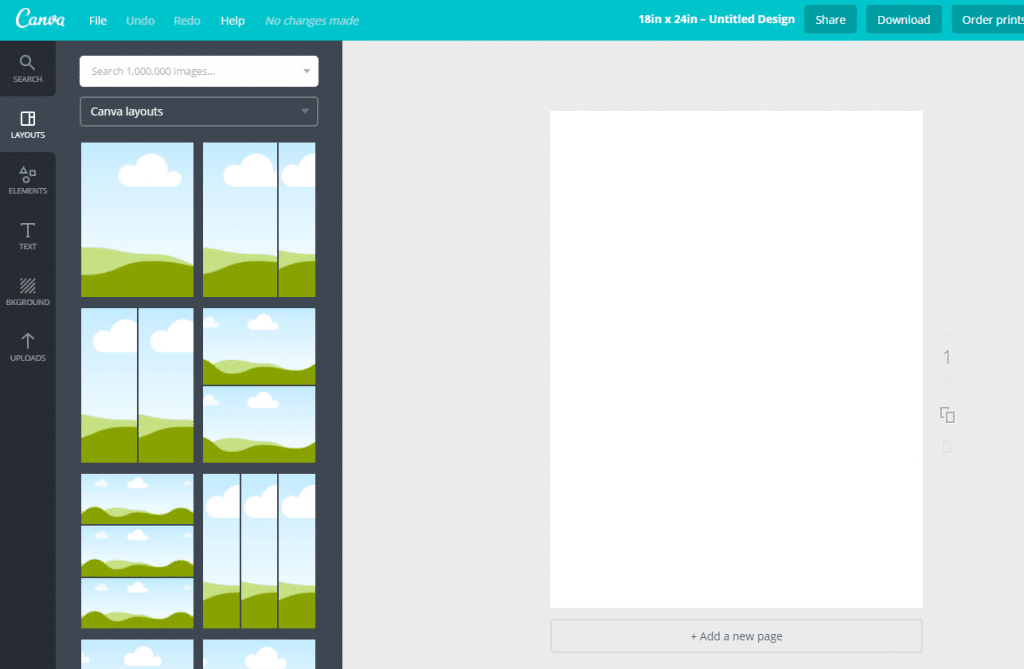
First, you want to navigate to Canva.com. From there you want to choose “Choose Custom Dimensions.” 18″ x 24″ was a great size for us, however, you can enter in your own dimensions in inches increment by choosing ‘in’ from the drop down. It defaults to pixels,but can be quickly changed to inches.
Design Your Birthday Poster in Canva
Add a Background
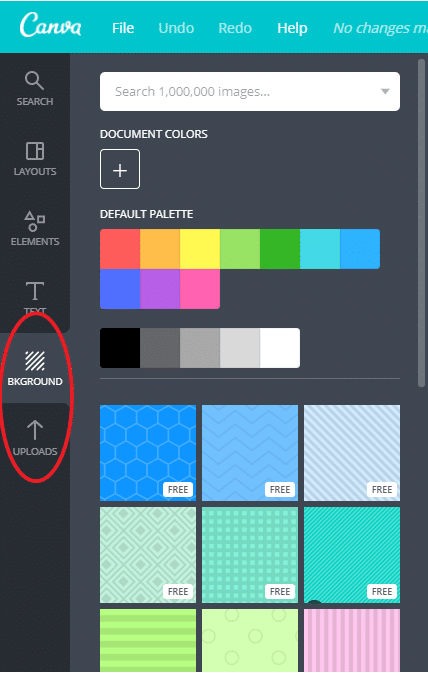
Now, you’ll want to upload a chalkboard background. Like the other birthday chalkboard tutorial, I used this background. But you don’t have to choose chalkboard, you can use any background you find online or any in Canva’s library. Or, you can go all-out and leave it blank. Totally up to you!
Caution: To keep it free, avoid any Canva option that has a $$ in the lower right corner!
To upload an image, go over to the left hand side of your screen and click on ‘uploads’ and from there click on the green ‘Upload your own image.’ Browse to your image and select it.
Then, you should see it appear under the uploads folder. Once it’s fully uploaded, click on it and drag over onto your blank page. Drag the corners until it fits.
Add Your Text
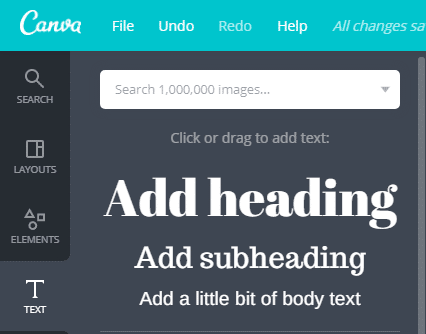
Now you’ll want to add the fun stuff– text for the birthday girl or boy! You can do this by clicking on ‘Text.’ Click once on ‘Add a Subheading.’ You’ll see a text box appear on your project. The first you must do when adding Canva text is: write something. You cannot change the font name, font size, or color until you’ve entered something. Type in Happy Birthday and click outside the box. Now you can click back in the box and change it.

To change any Canva element, click on the item once and change your text in the drop down above your project. You can change your font size here, too. Changing colors of any item in Canva is the same– click on the color swatch and choose the “+” to pick any color in the spectrum!
For the “Happy 60th Julie,” I used the Cabin Sketch font, size 64.
Fonts I used in this poster (to give you some inspiration)
- Cabin Sketch
- Brusher
- Londrina Shadow
- Gochi Hand
Add Decoration
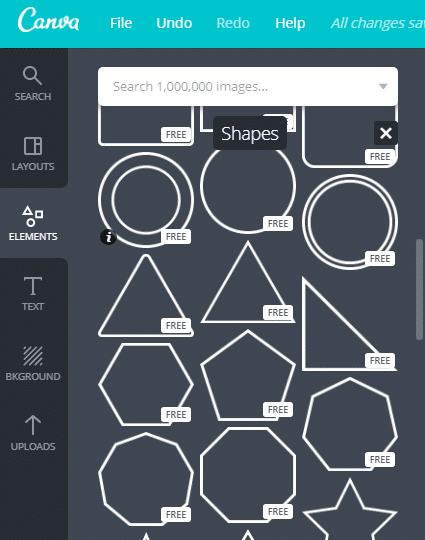
Now, you get to become even more creative! To make Julie’s circle, I went over to “Elements” and clicked on “Shapes.” I chose the circle with a solid & dotted line that was empty inside, not a solid. Then, I changed the color to white. Once it was on the page, I dragged it over to the upper left corner. I added a text element and sized it to fit inside the circle.
For the Earth, I searched for earth images over on the left-hand menu. I found a simple one that was free (it was the 2nd search result). Then I sized it on the poster and changed the colors to make it black & white.
For the car, I did the same thing. I found a free car photo under search and chose “Illustrations.” It was in the second row, on the right side. I made it white to pop against the chalkboard background.
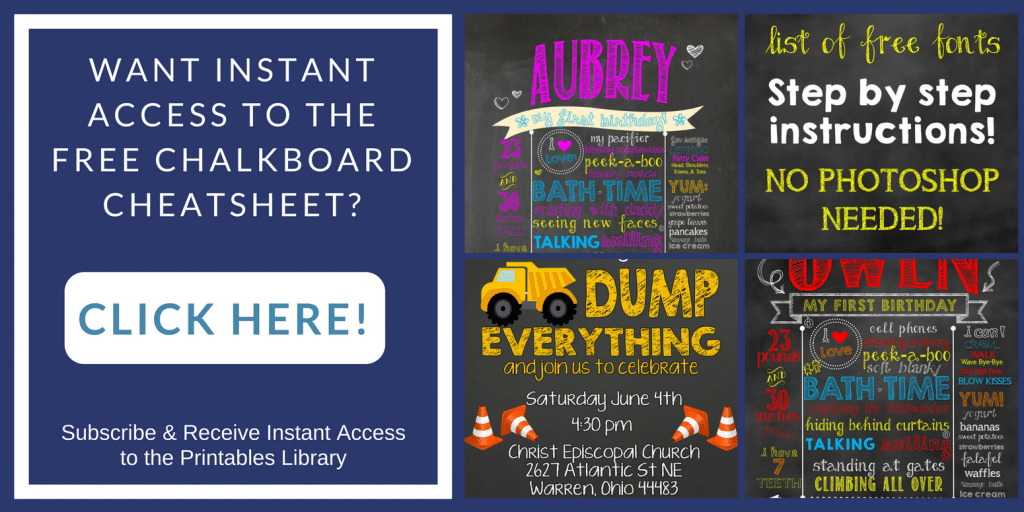
Get Your Free Chalkboard Cheat Sheet Here!
Add Lines & Separators
To give your board some reading clarity, add in lines. You can do this by clicking on ‘Elements’ over on the left-hand side. Then choose ‘Lines.’ Choose any of the free options. For Julie’s poster, I used 2 different types of lines and one box (found under Elements > Shapes). Like the text, you can change out the color of the lines by clicking on the swatch above your project.
When you add lines, you may need to move them forward, so that they are visible above the background. You can do this clicking on the background image, and then clicking on ‘Arrange’ in the upper right corner and choose ‘Send backward.’
Change Colors
Now that you’ve designed your birthday poster, you’ll want to go back and change any colors. For most of my original designing, I left the colors white, because I didn’t know how I’d fit them on the board. It will save you time and frustration of putting like colors together when you can do it at the end.
Download Your Poster
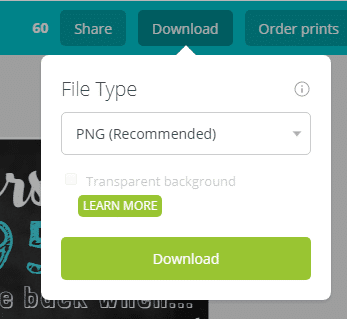
The download will be named the file name that is to the left of the download button. You can easily type over the Canva given name to make it easier to find when you download it. Download your birthday poster by clicking on the “Download” button in the upper right corner, above your project. You’ll want to save it as a .PNG or .JPG.
Print Your Artwork
The secret trick in this poster making process is how cheap it is to create! And that continues with your printing service. You’re going to want to buy this from Office Depot . Why? Because they print Engineering Prints. Traditionally engineering prints were used in business, but they are quickly becoming popular due to their quick print turn around, cost-effectiveness, and the ability to print color!
Every time I’ve used Office Depot, the engineering print was ready in just a few hours. To find Engineering Prints, Go to Office Depot.com , find “Print & Copy,” then choose “Document Printing Services.” There you will see blueprints, that is what you will want to choose. Next, you upload your image and order it online.
Whew! I know that seemed like a lot to read! I hope that I covered any question you might have about creating an easy birthday poster in Canva! If you are planning a child’s birthday party, definitely download my free birthday chalkboard cheat sheet. It’s perfect for figuring out what you want to show on your chalkboard. I can’t wait to see your designs!

Hi, I’m Brittany, and I believe life at home should feel easier, not heavier.
I’m the creator of Our Home Made Easy, a space for busy women who want dinner on the table, their homes running smoothly, and a little breathing room at the end of the day.
You won’t find perfection here, just realistic recipes, smart shortcuts, and simple routines that work in real life. The kind that help you feed your family well, stay organized enough, and still have time to actually enjoy it.
If you’re juggling work, kids, schedules, and everything in between, you’re in the right place. I’m so glad you’re here.


Thanks, I love it!!!
I did the first chalk board for my first kid in powerpoint (all the explanation were perfect!) and now I am working on the second one, I´ll try canva this time!