How to Applique a T-Shirt
Have you ever seen super cute shirts on little kids for special occasions? I love finding a holiday/sporting event/birthday excuse to make a new tee for the kids. It’s such a Southern thing that I am trying to slowly bring to Michigan! Sure you can buy an applique t-shirt online, but why do that when you can do it yourself? It’s super easy! This post will show how to applique a t-shirt with your sewing machine. I am not using the machine embroidery hoop, it’s purely completed through the zig-zag stitch. In other words, anyone with a sewing machine can do it!!
(This post contains affiliate links. If you shop from my blog, I may be compensated for clicks or purchases that you make. Read my disclaimer page for more information.)
Supplies Needed for Applique T-Shirt
- Fun fabric for the applique pieces, I find mine at Jo-Anns and Fabric.com
- T-Shirt
- Iron-On Adhesive
- Pencil
- Iron
- Applique Shape Printed Out on Regular Computer Paper
- Paper Scissors
, Fabric Scissors, Micro Scissors
- Tear-Away Stabilizer
- Straight Pins
- Coordinating Thread
If you are a new beginner, check out my post here of must-haves for new sewers and applique for beginners. If you love this tutorial, don’t forget to get your own copy of my Applique Step by Step checklist. It’s at the bottom of this post!
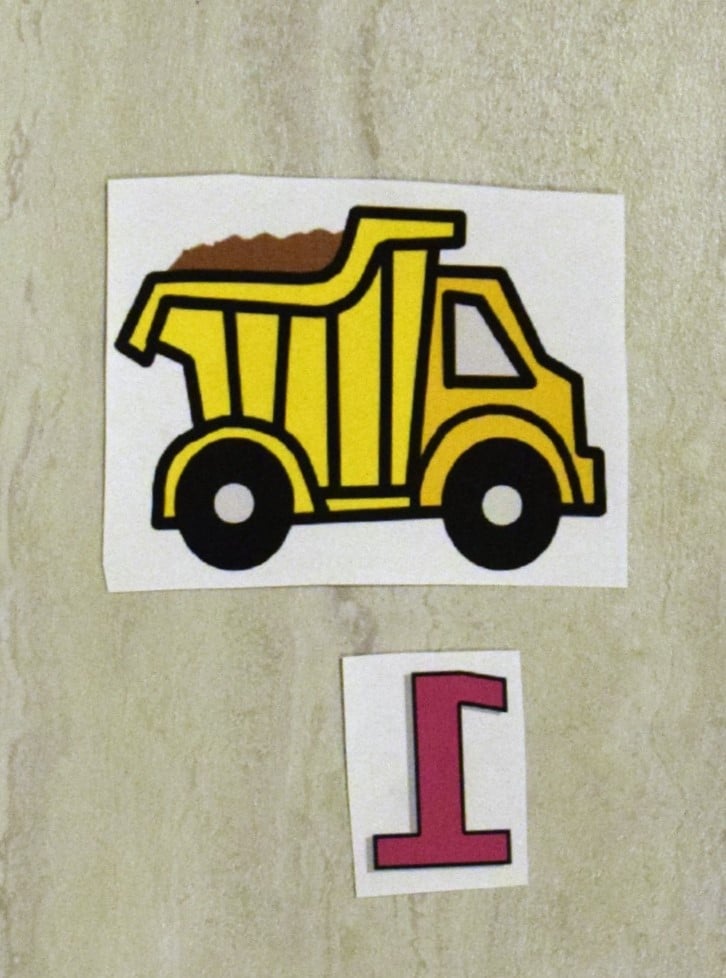
Now that you have everything to begin applique, let’s start! Start by choosing the design of your applique item. Once you have the design, print it off so that you make sure that you fit the item on the t-shirt. Once you choose the design size, flip it horizontally.
How Applique a T-Shirt
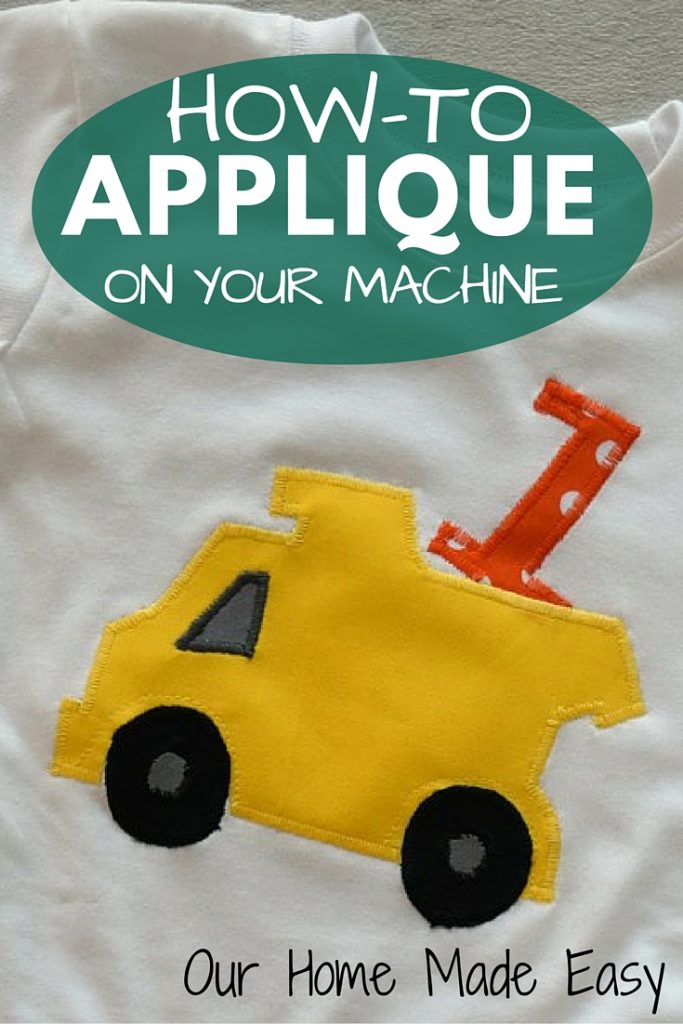
I am going to explain how to do this by showing you how I made my son’s first birthday tee! His party was centered around a construction theme. Picture lots of yellow, orange, and black.
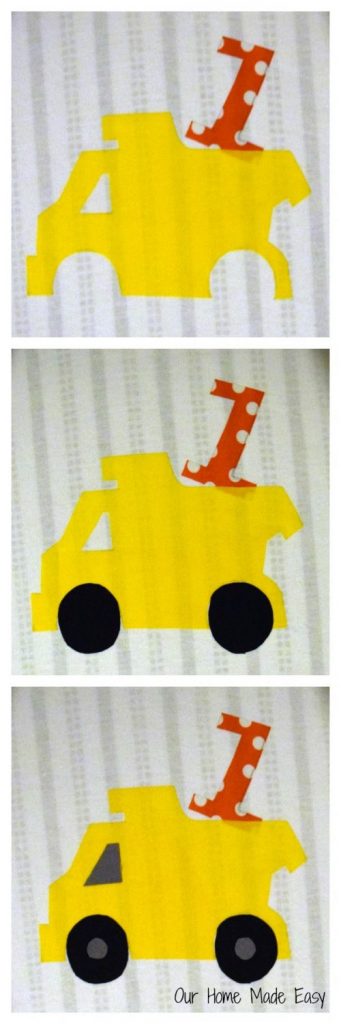
Look at your flipped backwards picture. Envision the layers of fabric that you’d like. For the truck, there is a body, wheels, window, and the number 1.
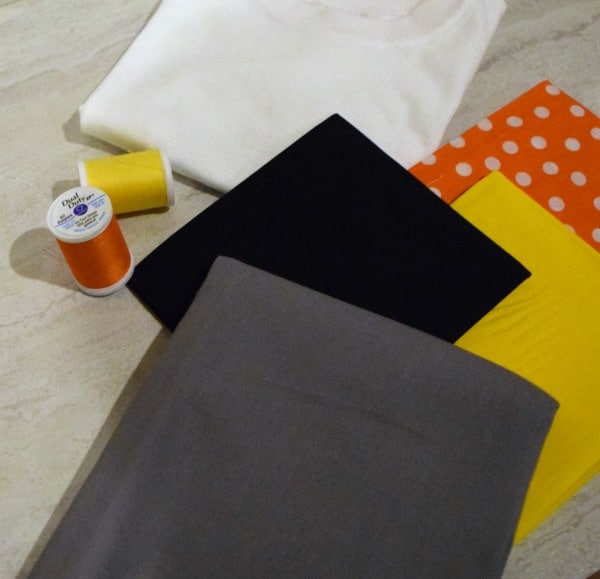
Since t-shirts use such little amounts of fabric, you will need less than a quarter yard for all the fabrics. I found a Fat Quarter sale at Jo-Ann’s and I stocked up. On a side note, I need to find another occasion to use more orange polka dot!
- Related: Easy Applique on Your Sewing Machine
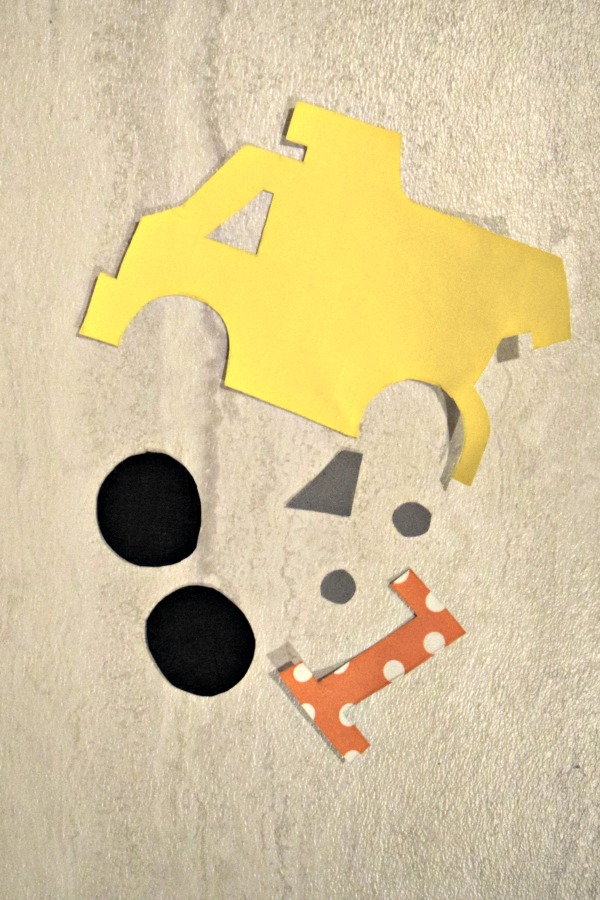
Place an iron on adhesive over your printed off design. Lightly trace each piece of the image on to the paper. Imagine truck parts for my design. To save some adhesive, you can trace the pieces close to one another. You don’t need a lot of white space between the items. Stack them nearly on top of each other! 🙂
Cut out the adhesive loosely. You need just enough to iron onto the wrong side of the fabric. Place the adhesive on top of the fabric. The wrong side should be facing you. Place your fabric that will be the letters face down. Now, you can see why you want the design to be backwards! Follow the adhesive instructions and lightly press (not move) over the pieces.
Once cooled, trim the pieces out of the adhesive. Once the pieces are trimmed, light peel off the backs of the adhesive. Here you are left with backwards appliques with a shiny residue on them. It’s exactly what you want!
Next, gather your t-shirt. If it has any wrinkles, give it a quick once over with the iron. With your t-shirt facing you, lay it flat. Position your pieces on the tee. This will give you an idea of how you’d like to position the design. Now, start with your main piece (the background) and keep in on the tee. The shiny side should be facing down. Next, gently press down with the iron. Do not move the iron around. In sewing, always lift and press.
Continue layering the design with each piece. Press down and lift with the iron. Check out the layering process. I know the photos are not fabulous, but I do not iron in the most well-lit areas!
Now, your applique should be set in place on your item. It’s ready to be sewn in place. Next comes the stabilizer. A stabilizer helps the applique keeps its shape and makes the item lay better and look more professional. Trust me, use the stabilizer. For this example, I used the Pellon Tear-Away Stabilizer. Any tear-away stabilizer for appliqueing will suffice.
Cut a rectangle of stabilizer that more than covers the applique area. You’ll want to make sure the pins will not impede your sewing. Put the smooth side down onto the fabric and pin the corners of the stabilizer. You do not need to iron it on.
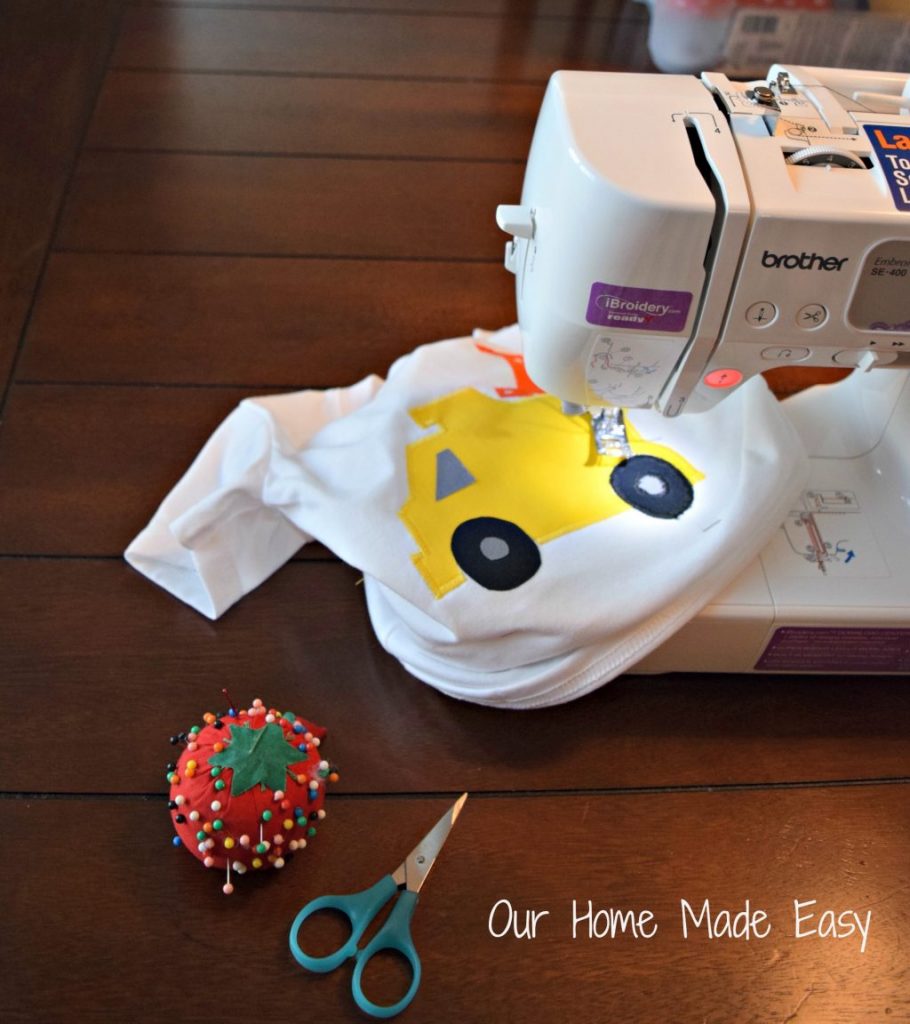
Next, you will want to set up your machine. My machine is a Brother SE400![]() . I’ve found that it’s perfect for beginners and is robust enough to handle lots of Pinterest inspired projects! Appliqueing typically uses a satin stitch. You can also choose a straight stitch that will allow some fraying or a blanket stitch. In these examples, I chose the satin stitch.
. I’ve found that it’s perfect for beginners and is robust enough to handle lots of Pinterest inspired projects! Appliqueing typically uses a satin stitch. You can also choose a straight stitch that will allow some fraying or a blanket stitch. In these examples, I chose the satin stitch.
The satin stitch is the zig-zag stitch on your machine and its an extremely tight stitch that no longer looks like a zig-zag. Use a scrap piece of fabric and find the stitch width & length that you like the best. Once you’ve set your stitch settings, take a practice line of sewing. Its important in applique to ALWAYS know where your next stitch is hitting. When you need to make a turn or go around a curve, you’ll need to be aware of which side of the item you are sewing into. Don’t worry, you will catch on quickly. A quick tip of advice, when on a curve or angle, leave the needle IN the fabric and raise your foot to pivot.
With the t-shirt, be careful to keep it out of the sewing machine’s path! I’ve wasted too many little tees by catching extra fabric in the presser foot! If you are able to, remove the extra plastic casing around the base of the machine. This will give you a little more wiggle room for literally ‘wiggling’ the tee as you sew.
I try to sew 4/5 on the applique, 1/5 off. You’ll want to try to catch the border of the applique to create a nice line. After each finishing each piece, back sew to keep your applique in place. Trim any excess threads as you go so that they don’t get caught up in another piece’s line later.
Once you have completed your applique, turn the tee inside out and carefully tear-away the stabilizer. Be gentle, you don’t want to tug on the thread too much. For small areas, I use my little scissors to cut the excess away.
Last step? Press your tee with a hot iron.
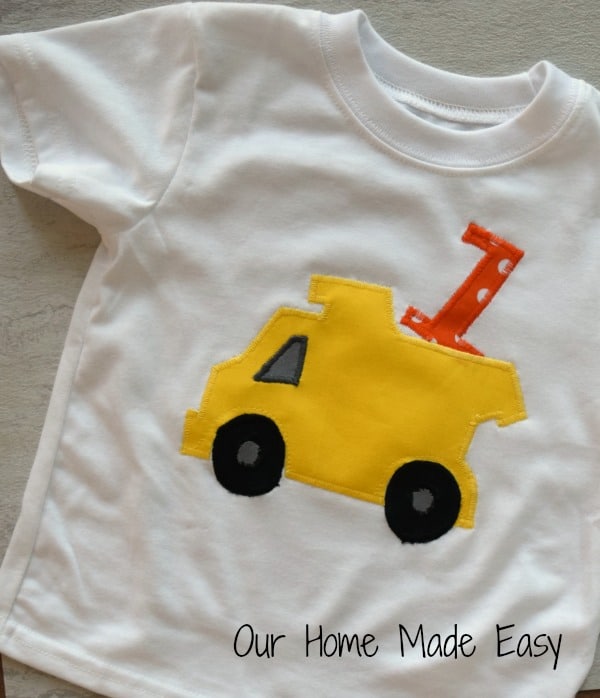
Now congratulate yourself! You’ve finished an applique on a t-shirt!

Hi, I’m Brittany, and I believe life at home should feel easier, not heavier.
I’m the creator of Our Home Made Easy, a space for busy women who want dinner on the table, their homes running smoothly, and a little breathing room at the end of the day.
You won’t find perfection here, just realistic recipes, smart shortcuts, and simple routines that work in real life. The kind that help you feed your family well, stay organized enough, and still have time to actually enjoy it.
If you’re juggling work, kids, schedules, and everything in between, you’re in the right place. I’m so glad you’re here.


What’s up, just wanted to say, I liked this post. It was inspiring.
Keep on posting!
Thank you for the tutorial! I’m new to sewing and need all of the help I can get!
No Problem Karen! Thank you for stopping by! -Brittany
Thanks so much for this tutorial, you really inspired me and gave me a great idea for some Christmas gifts!
Wonderful information have you given here. Thanks for sharing.
Have you used knit fabric in appliqué?
Hi Kathy! I haven’t used knit fabric in applique yet. I would pre-wash and dry the fabric to minimize its movement after applique. –Brittany