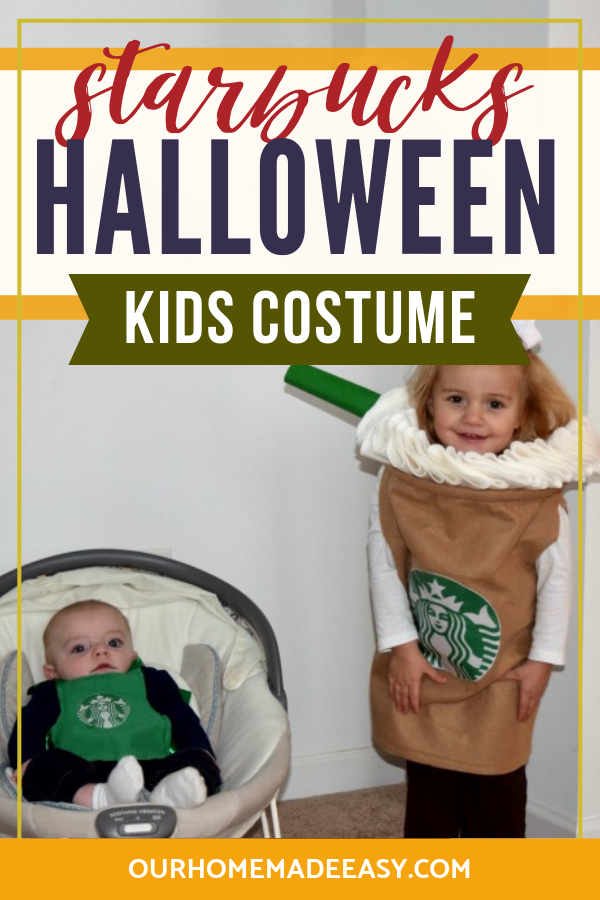
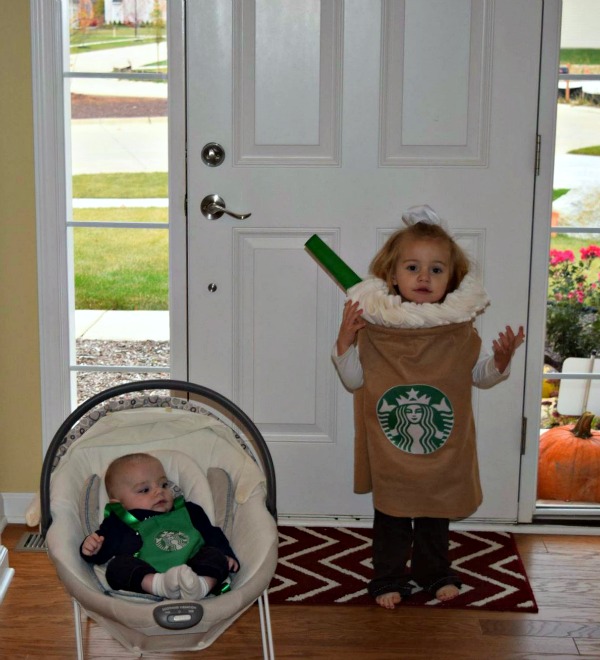
Starbucks Halloween Costume
These Starbucks kids Halloween costumes are easy to make! Plan to have the cutest kids at your next party with these costumes!
Last year when A +O were soooo little, I wanted to dress them in coordinating Halloween costumes. Why matchy? Because they aren’t old enough to complain yet! <– Such a mom thing, right?
Well, we decided we let Miss A tell us what she wanted to be for Halloween and O-Man would follow along (he was only a handful of months old). Off to the Halloween Store we went! I was incredibly disappointed to see how mature the little girl costumes were. But gosh, the little girl cop looked like something I would’ve worn when I was 21 and in college. The costumes were either too mature, too pricey ($45 for 2 pieces), or just not all that interesting. What to do? I decided to make our own coordinating Halloween costumes!
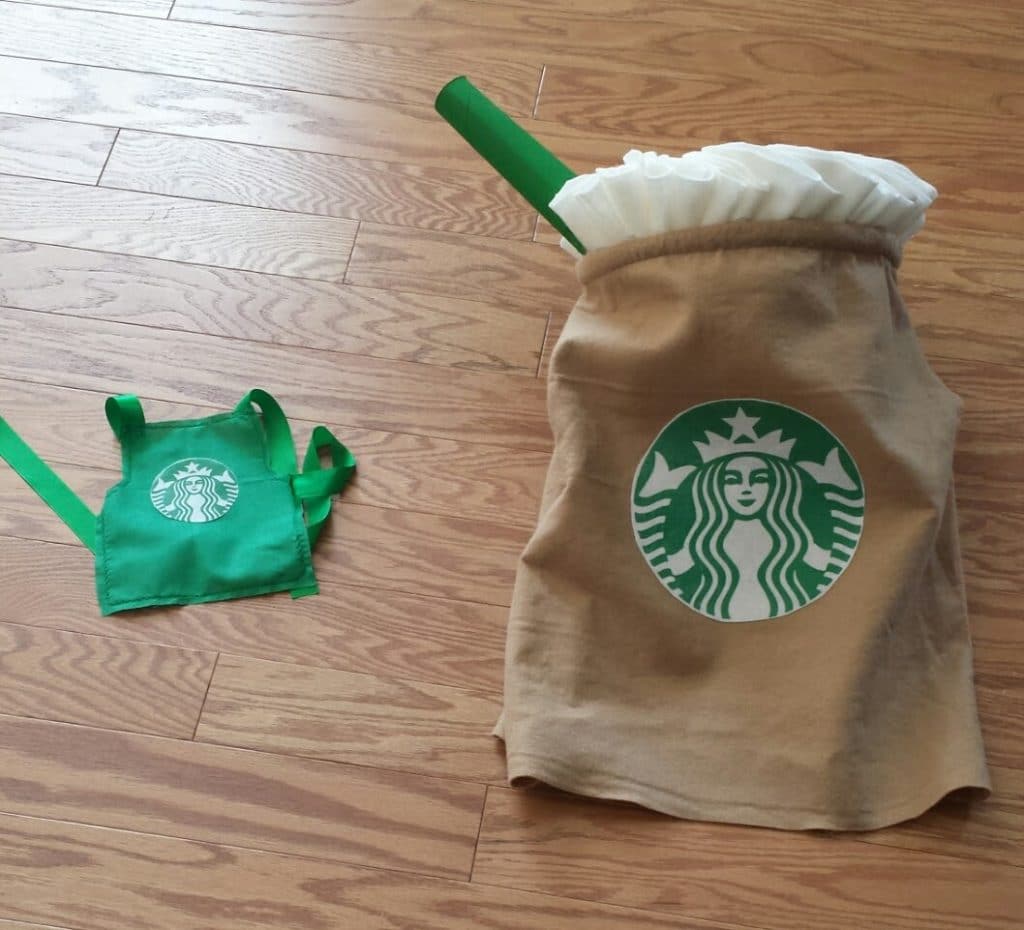
I affectionately title this project “Mama’s Favorite Things!” In my world, Coffee + My Kids are pretty fabulous. If you feel the same way, read on for a step by step tutorial on making your own Starbucks Halloween costume and coordinating barista apron. Why the apron? Even though he was only 3 months old, “O” Man needed a costume! 🙂
(This post contains affiliate links for your convenience. If you shop from my blog, I may be compensated for clicks or purchases that you make. Read my disclaimer page for more information.)
Supplies Needed for Starbucks Halloween Costume
- Light Brown Felt (I used this in Tan) Your fabric amount will be dependent on size of coffee body needed.
- Light Brown thread
- 1 yard of Cream Felt (I used this in Antique White)
- Cream Colored Thread
- Approx. 9″ Paper Plate & Pen for tracing
- Fabric Scissors
- Quilting Hoop
- Velcro Tape (Optional)
- Hot Glue & Hot Glue Gun
- Iron On Transfer
- Starbucks Logo Printed in Mirror
- Thin White Fabric (I used a muslin)
- Fabric Spray Adhesive
- Paper Towel Roll
- Kelly Green Paint (I used this)
- Sewing Machine ( I have this one)
Supplies Needed for the Barista Apron
- Kelly Green Fat Quarter (I used this one)
- Coordinating Thread
- Green Ribbon (I used this one)
- Iron On Transfer
- Logo (in Mirror)
Making the Starbucks Halloween Costume
I’ll break it down by section. Hopefully, you’ll find this make sit easier to assemble the costume. I promise, it isn’t difficult, it’s just a few steps!
Other Post I think You’ll Enjoy:
- Easy Mickey & Minnie Mouse Halloween Costumes!
- The Easiest School Halloween Treats You Can Make Today
- 15 One Hour Fall Crafts
Making the Drink Body
Purchase a wood hoop that will fit squarely on your child’s shoulders. This will be the foundation of your costume! For my two year old, I used a 12 inch hoop. Once you find one that fits, remove the inner hoop (the one that isn’t adjustable). Set your hoop on your child’s shoulders. Measure the length from shoulders to end of the costume. I tried to hit just below my little girl’s knees. Add 3″ to the total length to accommodate for making a sleeve for the hoop. If it’s helpful to know, for mine, the finished length (shoulder to knees-ish) is 19.5 inches. I would’ve added 3 extra inches to find my cut length.
Now you’ll need to decide the width needed for the body. Loosely wrap the fabric round your child. Add 1.5″ to the width. Cut the fabric to the preferred length & width.
Sewing the Drink Body
Don’t fret about the sewing! The great thing about felt is that it doesn’t need a hem! Once you cut it, you really don’t need to do anything else with it. Easy. But before you get so excited that you can’t wait, you will have to make two straight stitches. First, sew a 3″ hem along the top of your costume. This will be where the outer hoop feeds through.
Next, fold the material length right sides together with the top hem touching. Starting from the bottom , sew a straight 1.5″ hem until you reach the last 6 inches. This will now be an arm hole. If you make the arm hole too large, you can always sew it up later. But I found the more wiggle room you have, it’s easier to get the costume on & off. Now you should have an inside out cylinder!
Turn the “coffee body” to the right side. Slide the outer hoop through the opening. Optional: Sew a straight stitch over the opening of each hoop to secure the hoops inside the felt. I did this to avoid irritating A. Press the hoops in as far as you can, stitch and release to allow the hoops to stretch back out within the felt.
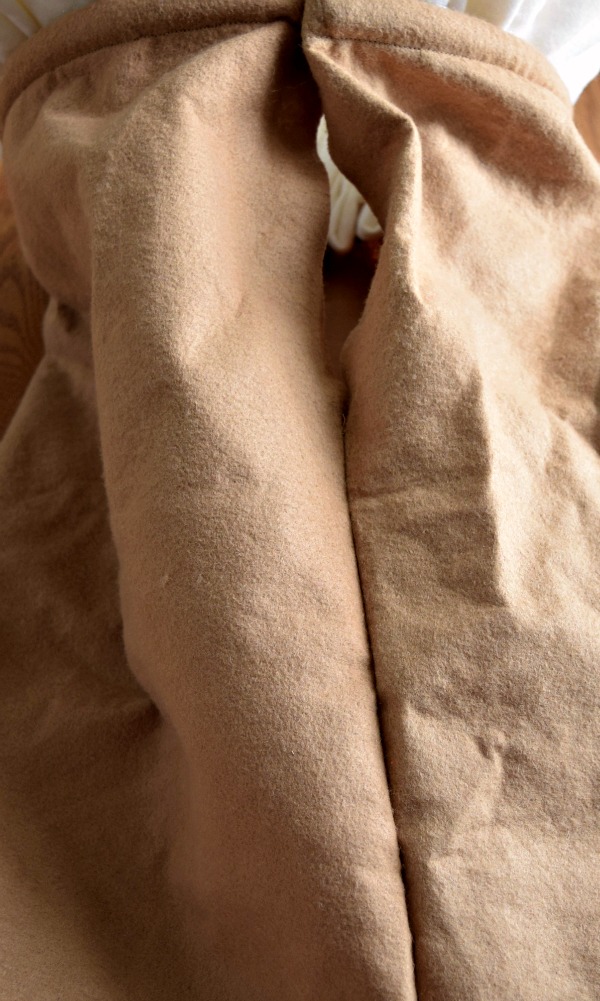
Next slide the hoop body over your child. Place the seam along your child’s side. With the coffee body on, lightly measure the size of cut for the second arm hole. Cut a straight line along your mark, but under the hoop. I’d recommend that you cut small, try on the costume and slowly cut further down as needed. While you won’t want the slits too large, you’ll want them large enough to make on/off easier. And if you live in cold Halloween climate like we do, there needs to be enough room for an extra layer of clothes!
If you have the seam on the side, that leaves the entire back to ‘customize’ your drink order. Yea? Imagine the square box possibilities!
- Related: How to Applique a T-Shirt
Making the Drink Whipped Cream / Foam
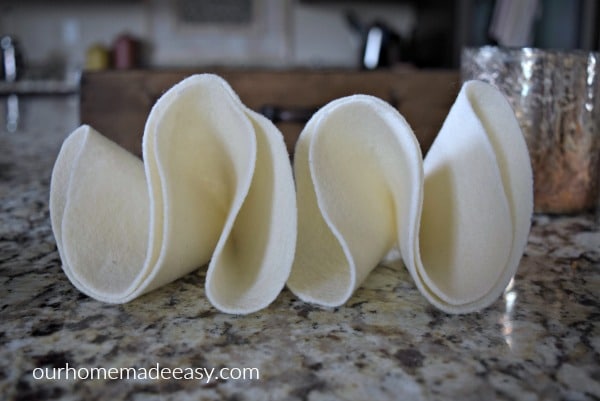
Gather your cream felt, paper plate, pen, and fabric scissors. Lay out your felt on an open area. Trace the paper plates on the felt. Try to get them as close together as possible. For a 3T sized costume, I cut out 30 circles. Next, you will want to cut out each circle.
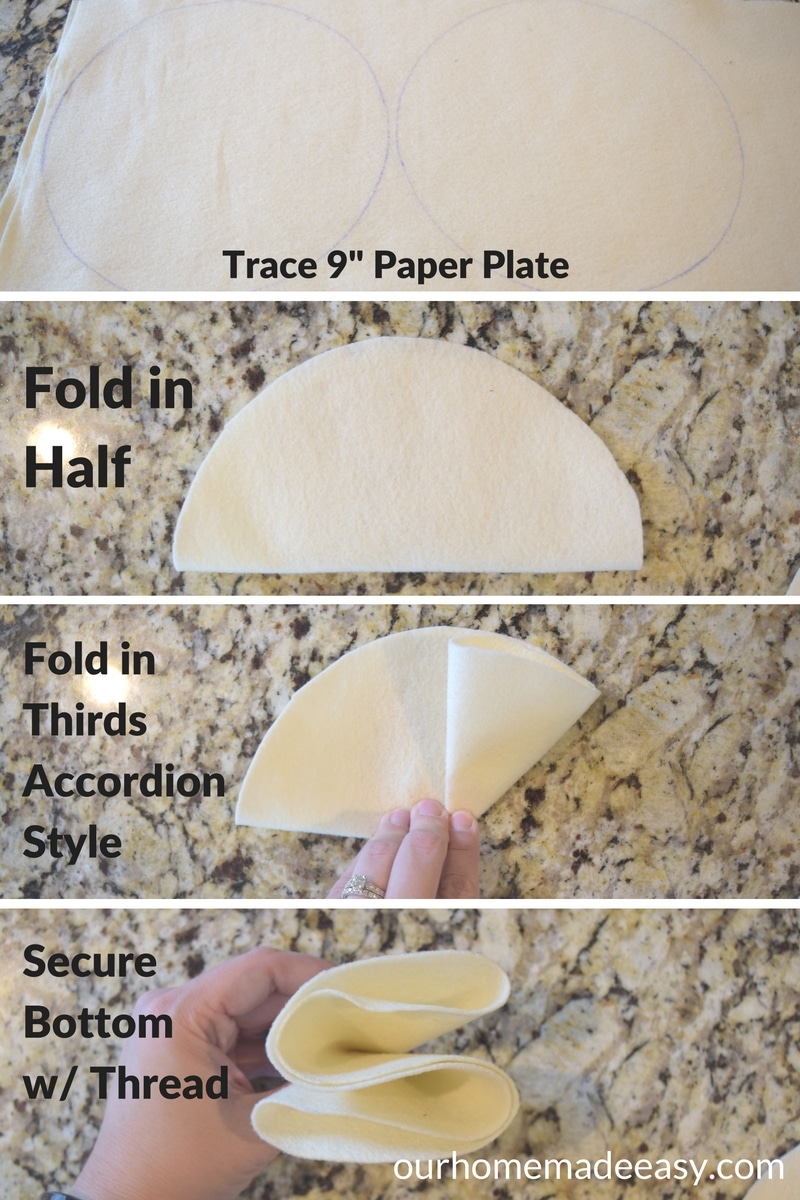
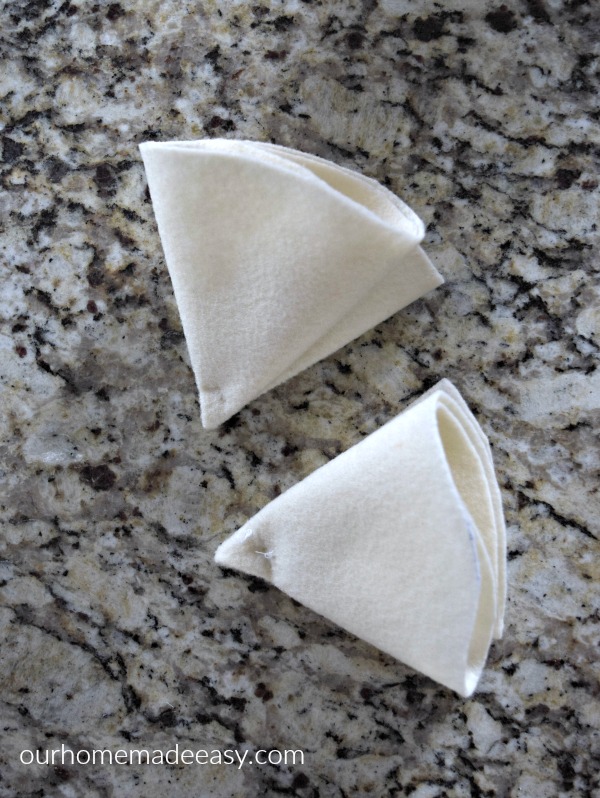
Now you will want to fold the circles into thirds, like an accordion. Once you have them like this, pinch them closed with some coordinating thread. I did this by hand watching reality TV one night. I suppose you could do this with a sewing machine, but them I would’ve trimmed every 30 seconds. I’m not sure which way would be less work. Either way, it’s easy, just time-consuming depending on how much “foam you need”!
For this project, I ended up cutting and pinching more than 30 “foam” pieces, but didn’t need to use them all.
Applying the Logo
Find a colored image of the logo you’d like to use. Once you have the image. Flip it horizontally to make it “mirrored.” Next print it off on printer paper to confirm the size. It took a few times before I found the exact size I wanted the finished product to be. Now, use iron on transfer paper and print off the logo. Since this was titled “Momma’s Favorite Things,” I specifically sought out the Starbucks cold cup logo that was used for the year. (That is probably the overly detailed engineer in me!)
Follow the iron on transfer paper directions and adhere it to plain white muslin. I used an extremely thin fabric that I had lying around from another project. Trim the iron-on logo and white fabric so that they are the same size. Next, use spray adhesive to adhere it to the body of your coffee cup! How adorable is this thing going to be?! If you are careful about watching for bubbling, you could try to use hot glue for adhering the white backed logo to the felt coffee cup body.
Assembling the Foam to the Body
This first step is entirely optional. Shocker…but I do not have 4 hands. What is a busy mom to do? Apply a line of Velcro tape to give the felt foam something to cling to! Using a line of hot glue, I applied a band of Velcro to the inner ring of the body, slightly below eyesight. By gluing the Velcro around the hoop, you are able to close in the hoop and avoid any pokes from it.
Take this opportunity to lightly stick the felt foam to the Velcro to get an idea of how dense you’d like your foam. The foam won’t stick well, but it gives you an idea if you need more foam pieces, or how fluffy you want it to look!
Okay, if you are infinitely more flexible than I and don’t need the Velcro help, begin hot gluing your foam to the coffee body. As a piece of advice, rather than super glue the foam straight up from the body, light tilt it away from your child’s body. This gives a “fluffier” look and you won’t have to worry about the felt irritating their faces.
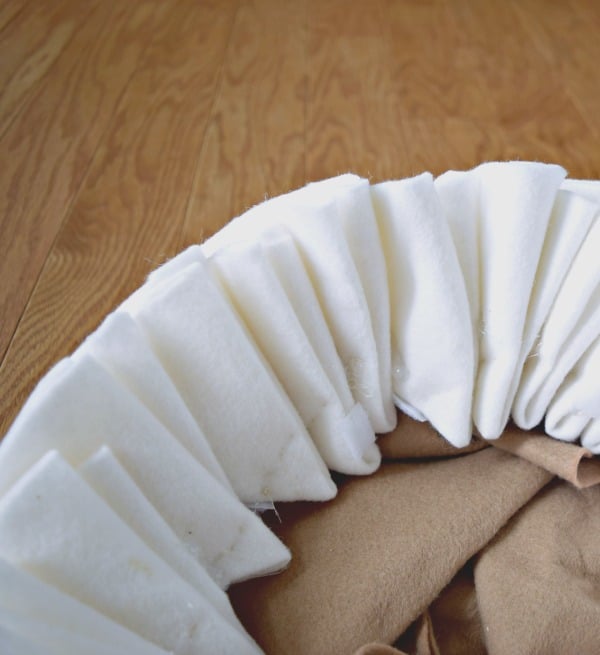
When you begin hot gluing the foam pieces, work in quarters around the neckline. This allows you control the density better. After 4 coffee foam pieces, you will have one at the top/bottom/left/right. Then, fill in on each side of each leading piece. This allowed me to feel like I wasn’t crowding the beginning and then slowly spreading out the rest because I became distracted (because it never happens!) or used too many in the beginning and ran out towards the end. By fanning them tightly, I used 23 pieces of coffee foam to fill in the neckline.
Once you have the pieces attached to the coffee body, begin gluing the foam pieces together at the top. This makes the entire costume lay better and stay stronger. Because I was worried with having an active 2 year old wear this costume, I went around and placed a line of hot glue “looking in” from the exterior of the coffee body. This reinforced the foam by hot gluing any areas that looked weak. I’m pretty sure that you cannot be too careful!
What I did: Glued the foam piece to the coffee body at its base. Placed a drop of glue at the top of the foam pieces where each foam piece joined one another. Ran a bead of hot glue on the pieces along the outside of the coffee body.
Now, you have a Starbucks Halloween Costume that is 90% completed!
Inserting the Straw
The finishing touch of this costume is the iconic green straw! Start making your straw by painting a paper towel roll. Repeat if needed. Allow to completely dry. Once the paper towel roll is dried, take the last 1/3 and squish it together, almost collapsing it length wise. Lightly wedge it into the costume foam pieces. Position the height so that it fits your child.
With it wedged into place, hot glue to secure it. You may need to be very liberal in your hot glue. Since my foam is so tightly packed, the pieces helped hold some of the tension. If your foam is less dense, you may need added support for the green straw. In our case, the remaining 1/3 of paper toll roll rubbed the neck of our little girl. I correct this by cutting it diagonally to avoid any rub.
Now, the costume is complete!! And I’ll bet it looks super adorable on your child!
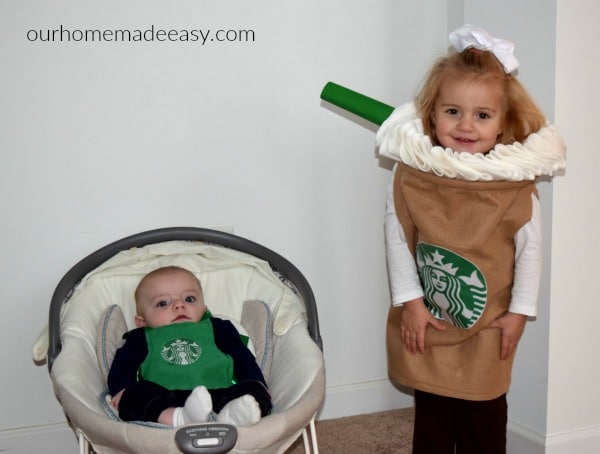
Who doesn’t love a costume that allows lots of layer underneath? Check out how to make the barista apron below!
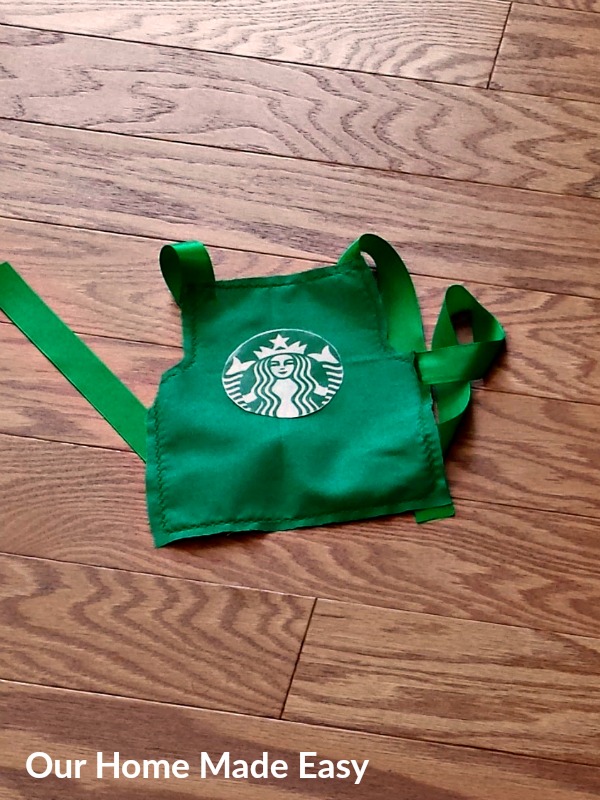
Making the Barista Apron
If you have another kid who doesn’t know what Momma is up to, make them a coordinating barista apron! Our little guy was only 3 months old at Halloween and I couldn’t picture buying a Halloween costume for him. Luckily for me, he was fair game for Mom’s imagination. 🙂
This is super simple! I’m almost ashamed at making a tutorial for it.
Begin by ironing your fat quarter. This will eliminate all the pesky wrinkles. Next, fold the material in half length wise. Measure the length of your poor baby. Add 1/2″ to your length. Measure the width of your baby’s chest. Add 1/2″ to that measurement.
With the material folded length wise, light draw the length start & end points. Then, divide the width measurement in half and mark it’s spot at the top of your height. Since the fat quarter is folded in half, no matter what you do in the next step, it will be symmetrical. 🙂
Lightly trace an apron shape on the fat quarter. The top was narrow and scooped out to wider base along his belly. Once you are satisfied with your free handed apron, cut it out.
Fold the edges over 1/4″ and iron it. Then do a quick straight stitch in a matching green thread. Now, how cute is this mini apron?
Next you will want to cut 4 ribbon pieces. I made them long enough to lightly tie around the neck and again at the waist. Sew an end of each ribbon onto the apron.
The last step? Using the same logo as above, iron on the Starbucks logo!
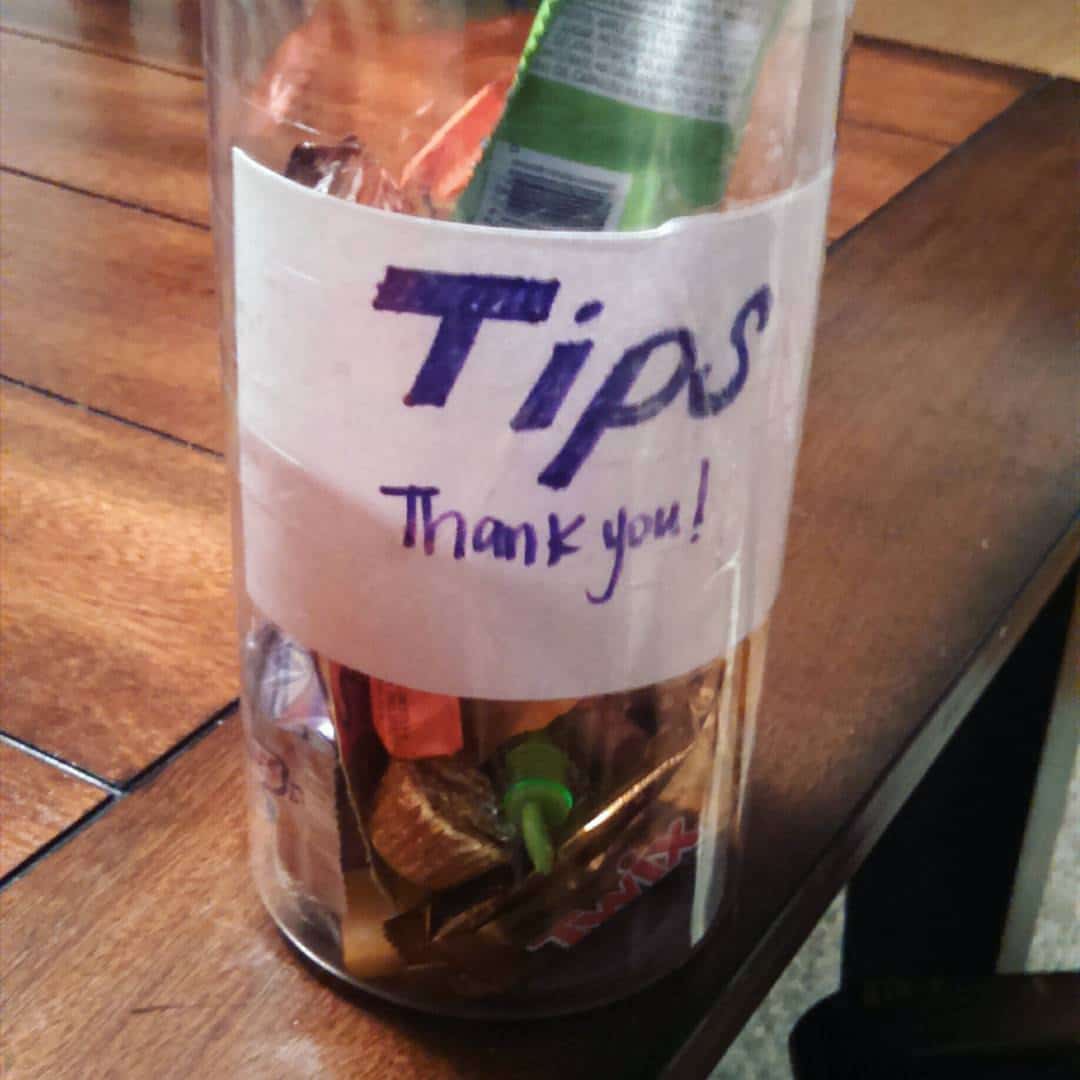
To take these Starbucks Halloween Costumes a step further, I made “A” a tips jar for candy. Don’t worry, as it filed she poured into her plastic bucket!
I cannot wait to see your Starbucks Halloween Costume! Tag me on social media! I can imagine the color/fabric variations based on your favorite drink!

Hi, I’m Brittany, and I believe life at home should feel easier, not heavier.
I’m the creator of Our Home Made Easy, a space for busy women who want dinner on the table, their homes running smoothly, and a little breathing room at the end of the day.
You won’t find perfection here, just realistic recipes, smart shortcuts, and simple routines that work in real life. The kind that help you feed your family well, stay organized enough, and still have time to actually enjoy it.
If you’re juggling work, kids, schedules, and everything in between, you’re in the right place. I’m so glad you’re here.


So my only question is why didn’t I think of this when mine were little? This is just adorable.
I never did co-ordinated costumes, my kids just picked what they wanted to do (usually the night before) and I facilitated! We had pumpkins, Chewbacca’s, mad scientists, lots of Dracula’s and Mummies, probably a bat or 2 and I recall a baby as a ladybird once, but nothing as fabulous as this.
I want a do over, maybe I could just make this is me size?
You are too funny, Julie! I have to admit, I haven’t thought of ideas for this year yet! I think my husband would love to have two little Chewbacca wookies running around. 🙂 Thank you for stopping by! -Brit