
Easy DIY Christmas Wreath with Holiday Picks
Turn a basic wreath into beautiful Christmas decor with holiday picks and ribbon. This easy DIY Christmas wreath is simple, affordable and beginner-friendly.

(This post contains affiliate links. Read my disclaimer page for more information.)
I originally made these simple Christmas wreaths because the three mirrors in our dining room were begging for a little holiday decorating. The problem? I needed three of whatever I chose, and buying multiples of Christmas decor can get expensive quickly.
Instead, I started with inexpensive basic wreaths and dressed each one up with pinecones, red berry picks and ribbon. They’re incredibly simple to put together, and you can easily change the colors or picks to match your own Christmas decor.
If you’ve never made a wreath before, this is a great place to start. There’s no complicated wreath-making technique involved. Arrange everything until you like it, secure the pieces, add ribbon, and hang it up.
Here is a view of the before….

Aren’t those mirrors begging for attention? I was more than happy to oblige 🙂

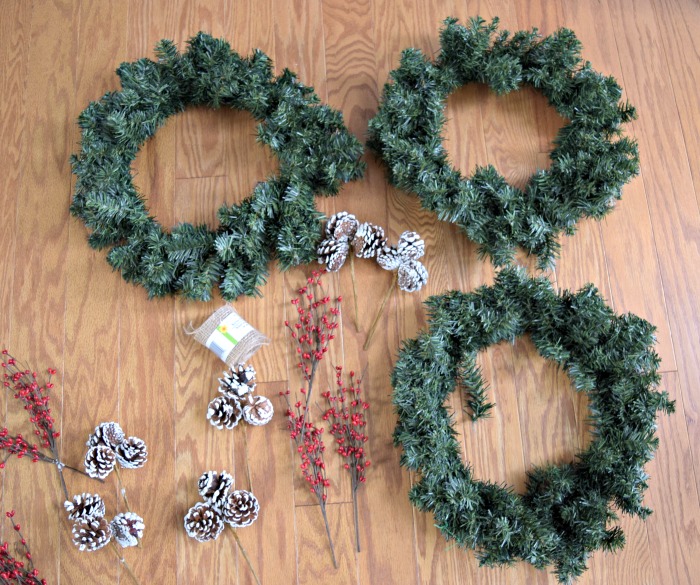
Supplies Needed for DIY Christmas Wreath
- Basic Faux Evergreen Wreath
- Holiday Floral Picks – I used red berries and pinecones.
- Ribbon – I used burlap ribbon to hang mine from the mirrors. (I used this one)
- Floral Wire or Hot GlueHot Glue Gun – If using hot glue.
- Small Suction Cups or Removable Hooks – Depending on where you’re hanging your wreath.
- Wire Cutters – Helpful if your floral picks need trimming.
Choose Your Wreath and Picks
I originally found inexpensive basic wreaths and then added a few berry and pinecone picks to each one. That’s still my favorite way to approach this project: start with an inexpensive wreath and spend your decorating budget on just a few accents that make it feel finished.
Holiday picks can add up surprisingly quickly, so arrange everything before buying a huge handful. I used two pinecones and three red berry picks per wreath, which gave me enough texture and color without overwhelming the smaller wreaths.
If you’re not familiar with wreath picks, think of them as versatile ornaments for a wide range of occasions. I love being able to swap out picks if they get damaged or my style changes. You can apply them quickly to whatever project you’re working on (wreath wire or hot glue), and they always add that extra little touch to any project.
- Related: One Afternoon Project: How to Make the Easiest 2 Step Wreath
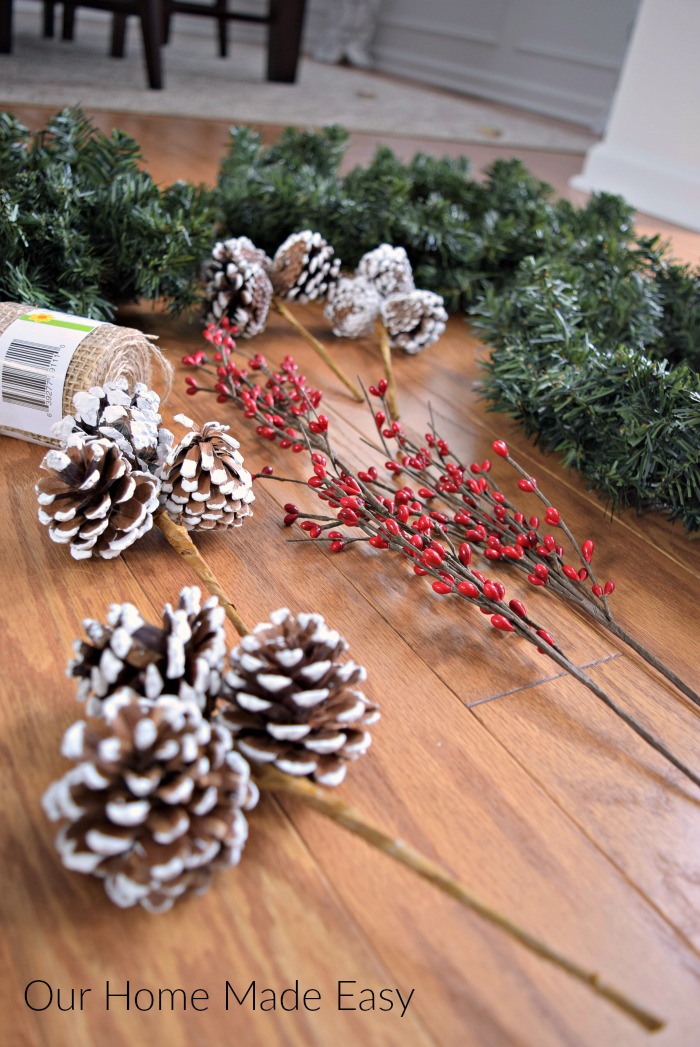
Arrange Everything Before You Glue
This is my favorite part of such a simple wreath project. Nothing is permanent yet! Fluff your wreath, tuck the floral picks into the greenery and move everything around until you’re happy with the arrangement.
I planned for my three wreaths to look slightly different, but apparently my love of symmetry won. I ended up using two pinecones and three red berry picks on each one.
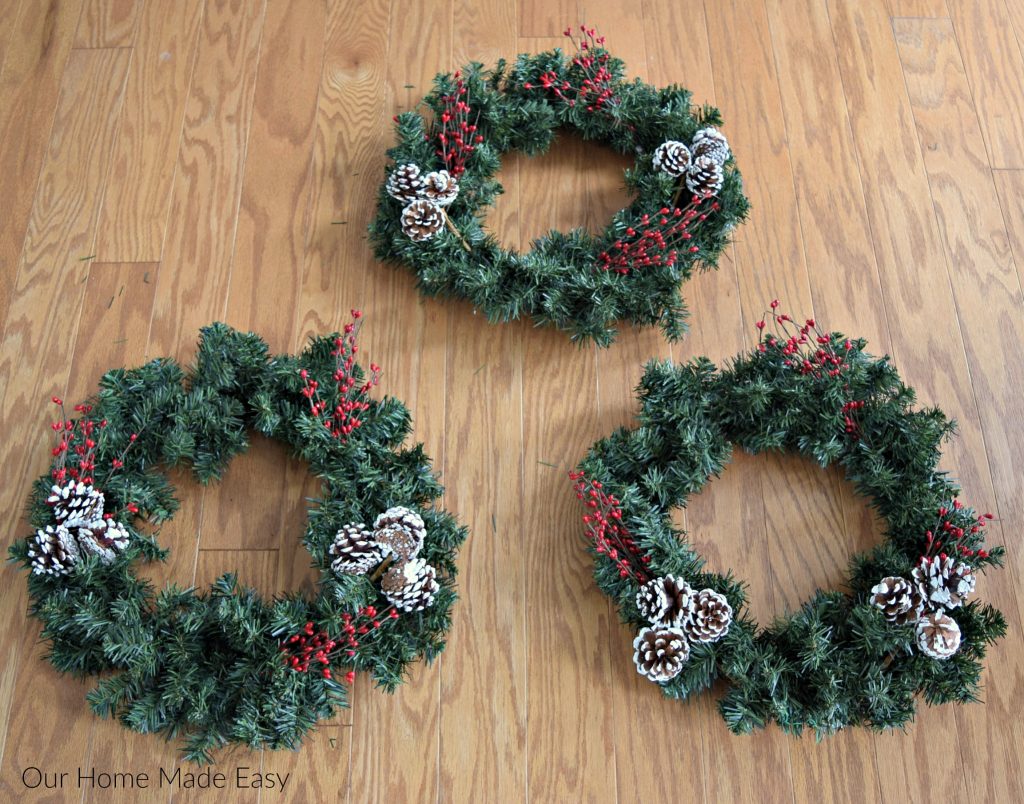
My need for symmetry at work here… despite my best intentions for non-identical…. turned out pretty similar 😉

Attach Your Picks to the Wreath
Using wreath wire or hot glue, attach your picks to the wreath. For the wire, I like to attach at the point where the base and the pick meet up. Then I attach it once more for added security. For hot glue, I like to apply a bead of glue in the same spots as the wire, and in a few more support locations.

Hang Up the Wreath!
This is such an easy and quick project. I love it. Now you’ll want to hang up your wreath. My hangers of choice are small suction cups. They are virtually invisible and you don’t have to look at large metal or clear hangers.

So I think these are super adorable…. BUT… I think they needed “more.”
For even more Christmas crafts, you will like these ideas:



How to Hang Your DIY Christmas Wreath on a Mirror Using Ribbon
I picked up a roll of burlap ribbon last week and thought these would be perfect for the job. How do I make the ribbon look like it’s holding up the Christmas wreaths? Cut a strip of ribbon long enough to wrap over the wreath and back up the top of the mirror. Mine was about 20 inches.
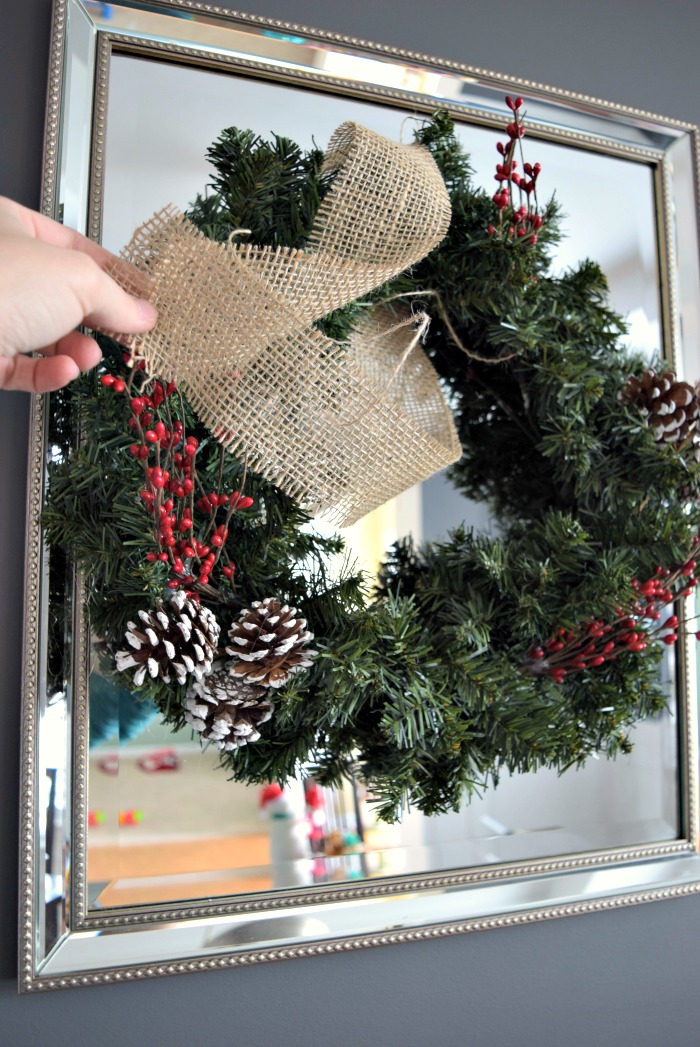
Thread the ribbon under the wreath. Pull until the sides are equal. Tuck the ends behind the mirror. And that is it!


With just a small bit of supplies, you can make your own wreaths in just a few minutes. You don’t need to go all out; simpler is better when you have multiple wreaths to hang along the wall. Start with a small base and keep adding texture!
FAQ: Easy Wreaths to Make for Christmas
What is the easiest wreath to make for Christmas?
A simple evergreen or grapevine wreath is the easiest place to start. You can add a few picks, ornaments, or ribbon, and it’ll look beautiful with minimal effort.
Can I make a wreath without hot glue?
Absolutely! Use floral wire, twist ties, or pipe cleaners to secure greenery and decorations. It’s mess-free and perfect for kids to help with, too.
How long will a DIY wreath last?
Faux wreaths will last for years if you store them in a dry, cool spot. If you use fresh greenery, expect it to look good for about 3–4 weeks indoors or longer outside in cooler temps.
What should I use to hang a wreath?
You can use a removable Command hook, a wreath hanger, or a simple ribbon tied to the top. For glass doors or mirrors, clear suction cup hooks work great!
Can I make this same wreath for other holidays?
Yes! Once you have the base, swap out a few pieces — try pastel flowers for spring or fall leaves in September. The process stays the same, just change the colors and accents.
More Easy Wreaths to Make
Once you’ve made this simple Christmas wreath, you’ll realize just how easy it is to get creative! If you have a few extra supplies or want to keep the crafting going, here are a few more easy holiday wreaths to make that look festive without the stress:
- Ornament Wreath – Grab a handful of inexpensive ornaments from the dollar store and glue them to a foam wreath form. It looks high-end but costs next to nothing.
- Grapevine Wreath with Ribbon – Start with a plain grapevine base, then weave in ribbon or greenery for a rustic farmhouse look.
Each of these wreaths uses simple, affordable supplies! Perfect for busy moms who want to decorate without spending all weekend crafting.

Quick and Easy DIY Christmas Wreath
If you love homemade Christmas decor, you'll love these easy (and affordable!) DIY Christmas wreaths! With just a few supplies and a few dollars, make these super cute Christmas wreaths for your home.
Materials
- Budget Wreath
- Decoration Picks
- Burlap Ribbon
- Small Suction Cups
- Hot Glue Gun
Instructions
ChooseYour Wreath and Picks
I found these wreaths at Michaels for only $2 apiece! Then, I found a great selection of picks at Jo-Ann Fabrics. The pine cones were $1.60 apiece and the red berries were about $1.20. Picks are so dangerous
because they are so inexpensive alone, but quickly add up as you spruce up your wreath.
Fit Together Your Wreath
This is the best part about this project, you can set everything in place and then change your mind if you don't like the result! Fan out your wreath as you'd like. Then insert your picks around the wreath. My intention was to not make them identical in layout. However, I still used 2 pine cones and 3 red berry picks per wreath.
Attach Your Picks to the Wreath
Using wreath wire or hot glue, attach your picks to the wreath. For the wire, I like to attach at the point where the base and the pick meet up. Then I like to attach once more for added security. For hot glue, I like to apply a bead of glue in the same spots as the wire, and in a few more support locations.
Hang Up the Wreath!
This is such an easy and quick project. I love it. Now you'll want to hang up your wreath. My hangers of choice are small suction cups. They are virtually invisible and you don't have to look at large metal or clear hangers.


Hi, I’m Brittany, and I believe life at home should feel easier, not heavier.
I’m the creator of Our Home Made Easy, a space for busy women who want dinner on the table, their homes running smoothly, and a little breathing room at the end of the day.
You won’t find perfection here, just realistic recipes, smart shortcuts, and simple routines that work in real life. The kind that help you feed your family well, stay organized enough, and still have time to actually enjoy it.
If you’re juggling work, kids, schedules, and everything in between, you’re in the right place. I’m so glad you’re here.