4 Steps to an Easy Spring Centerpiece
DIY this super easy Spring centerpiece in just 4 steps! Learn how to make your own centerpiece with almost no decor skills needed!
(This post contains affiliate links. Please see my Disclaimer for more information)
When it comes to decorating for Spring, I’m a bit behind the ball already. It’s March and I’ve happily kept the frost covered greens from January up on the table. Now that we are finally welcoming in Spring this week, I thought it was time to freshen up rather than dust. 😉
After all, it’s one of the first things our friends see when they stop by to visit. I should at least try in one spot, right? 🙂
In case you are wanting to make your own Spring centerpiece, I wanted to share how to make one pretty easily. I broke it down in about 4 steps. And the best part? Unless you want to, you won’t need to buy all new items! #budget
4 Steps to a Spring Centerpiece
Before you go shopping, start looking around your home for inspiration and fill-in with a few new seasonal items!
Start with an Open Tray
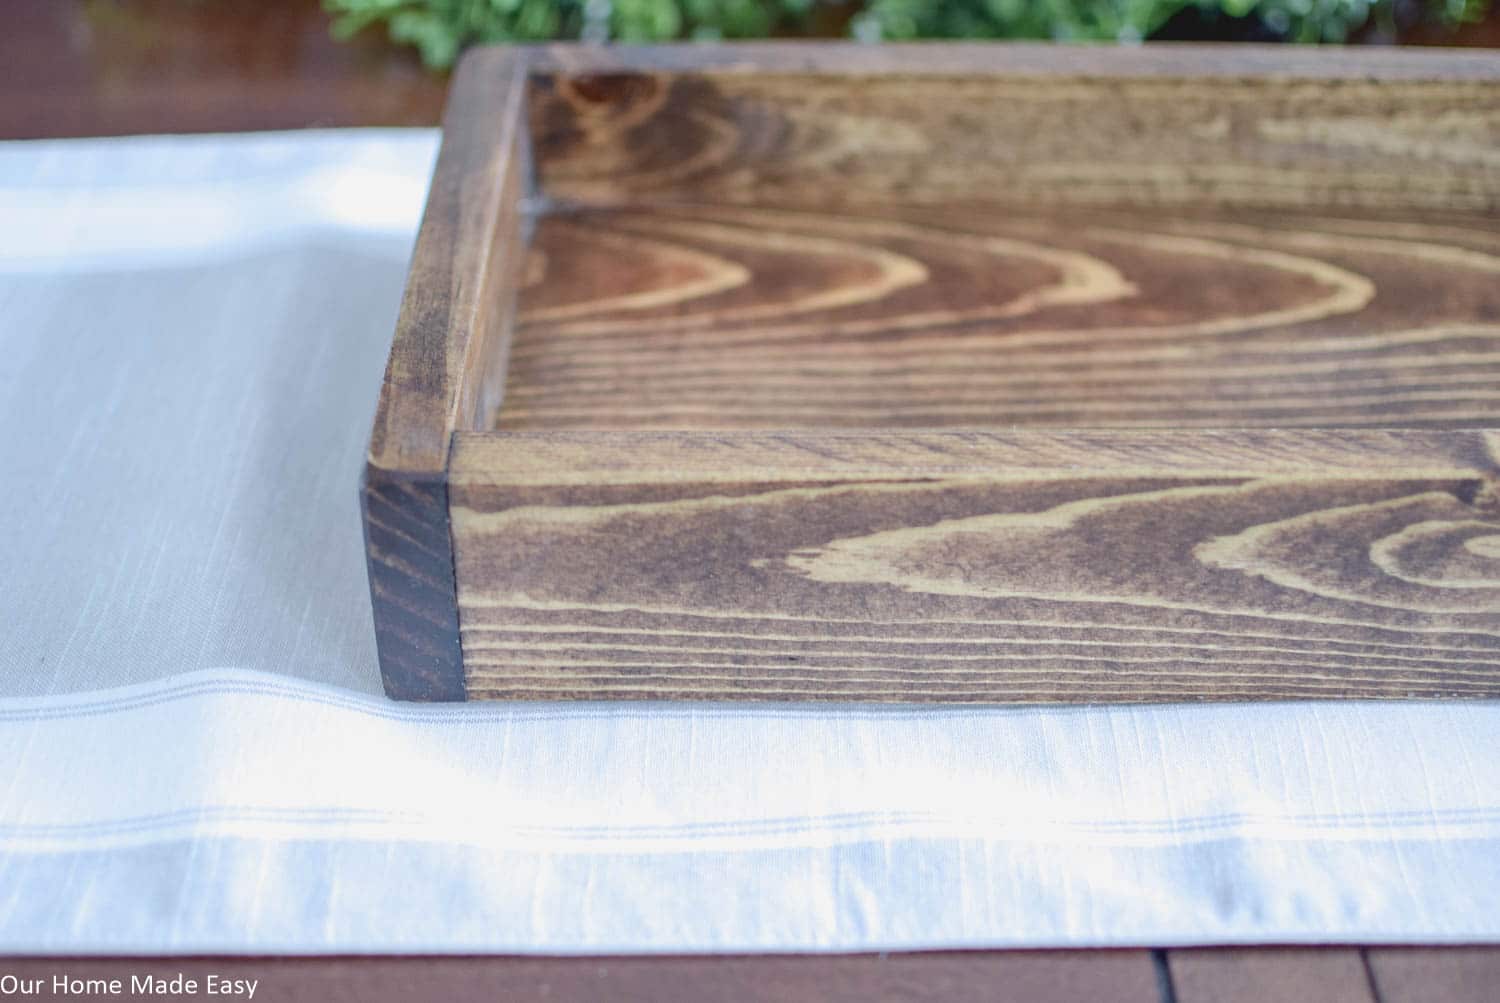
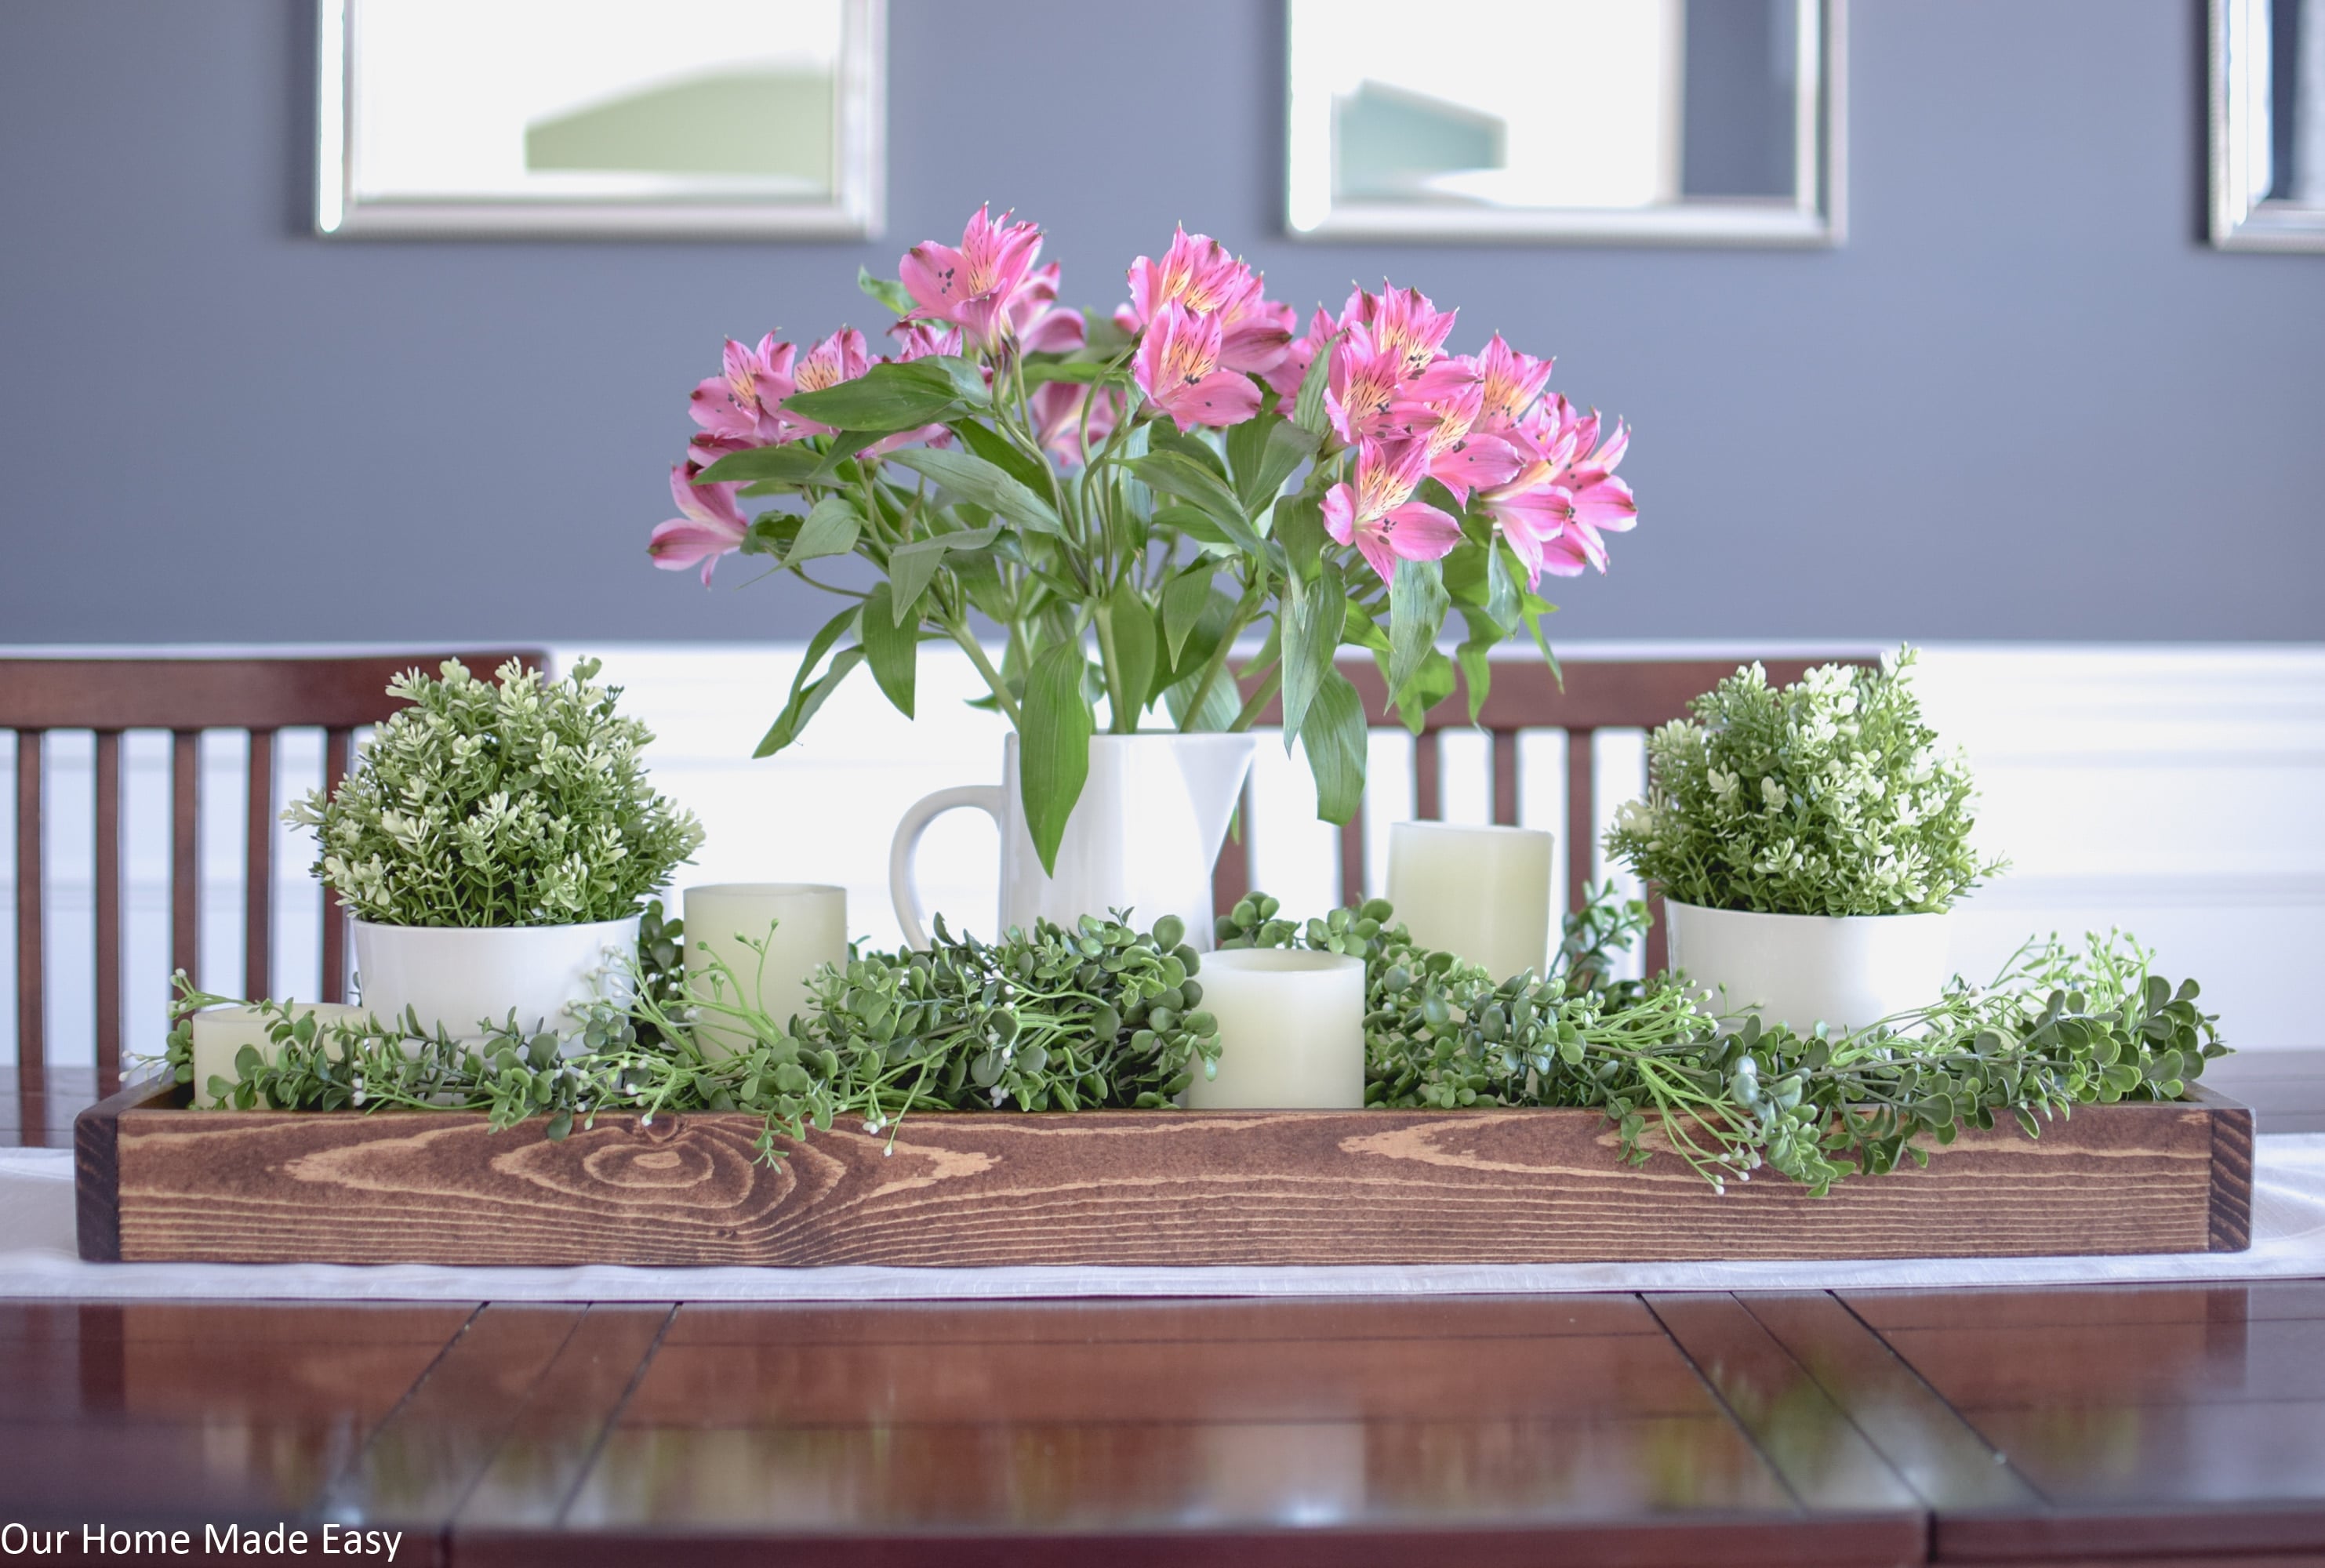
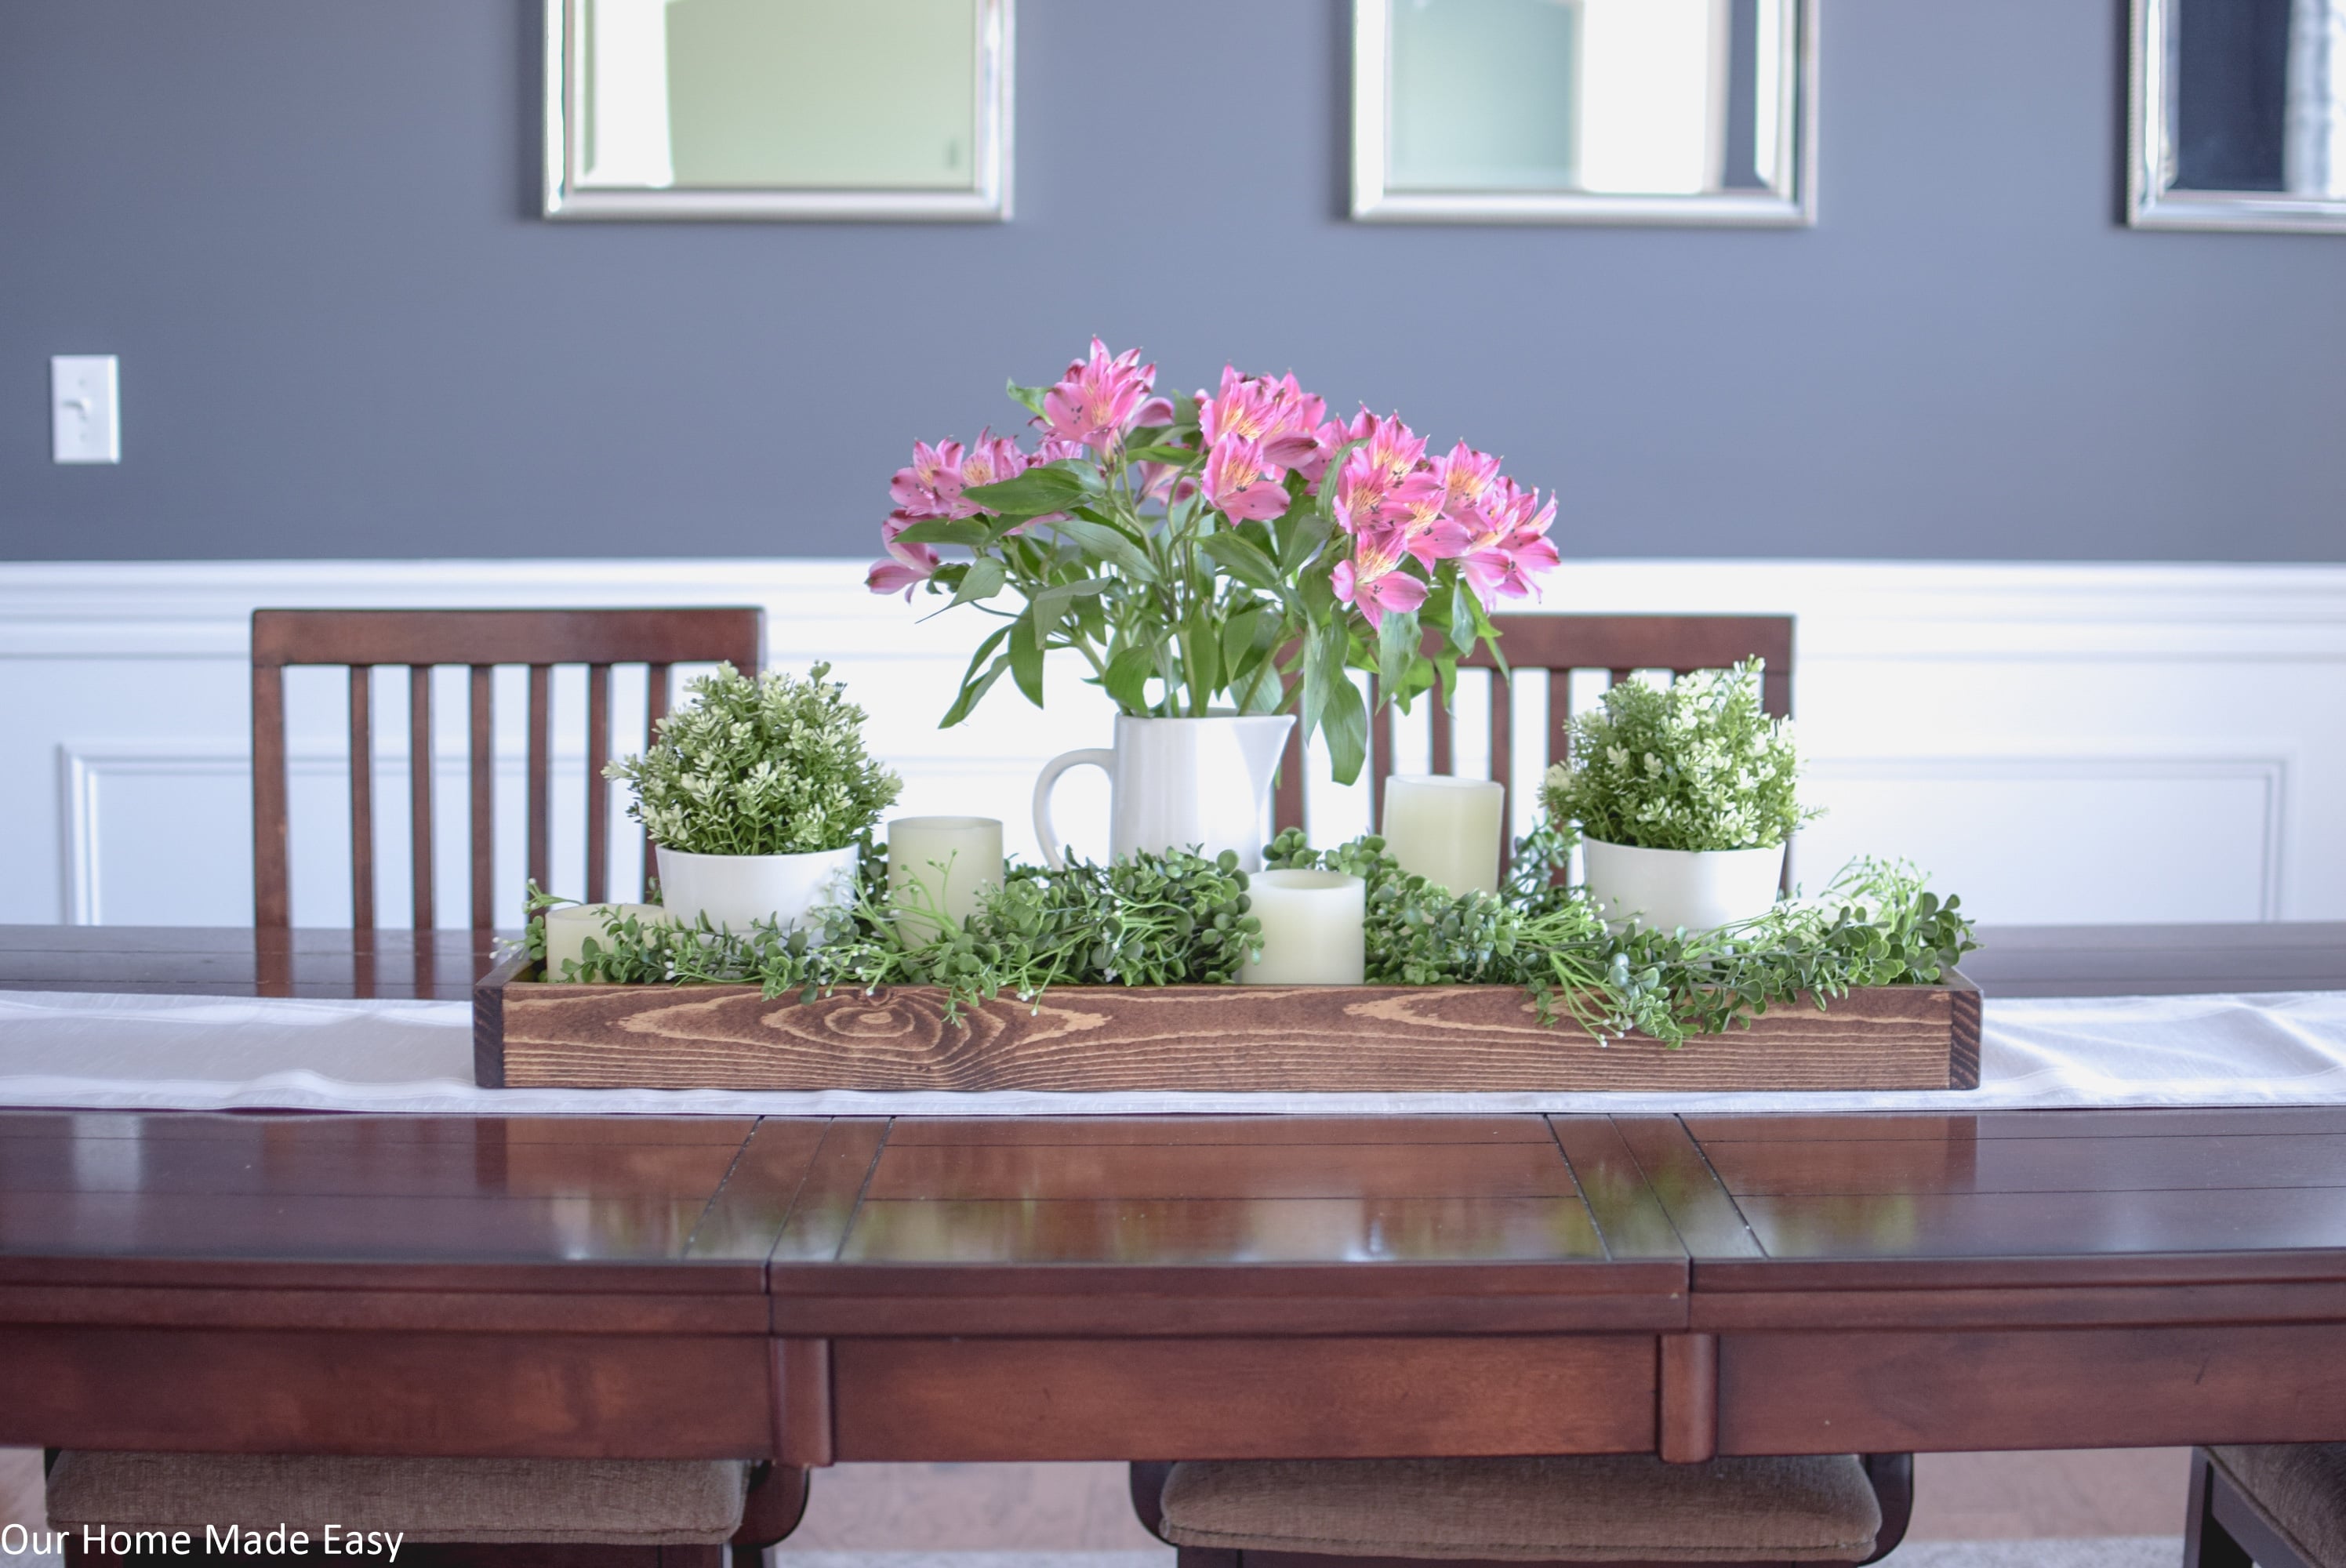
First, start with a base item that will contain your centerpiece. Whether you use a wood tray like I did (here is the $8 wood tray tutorial), or keep it simple with a runner, you need something that goes in between the tabletop and your centerpiece. I love using wood trays around the house because they are so easy to move around! When it’s dinner time, I can move away our entire decor and put it back in place in less than 10 seconds!
Tray / Container Inspiration:
- Wood Tray ( Easy $8 Tray & $10 Wood Tray with Handles)
- Flat Tray with handles
- Table Runner
- White Porcelain Tray
- Multi-Tier Tray
- Cake Platter
- Large Cutting Board / Cheese Board
Lay Down a Base
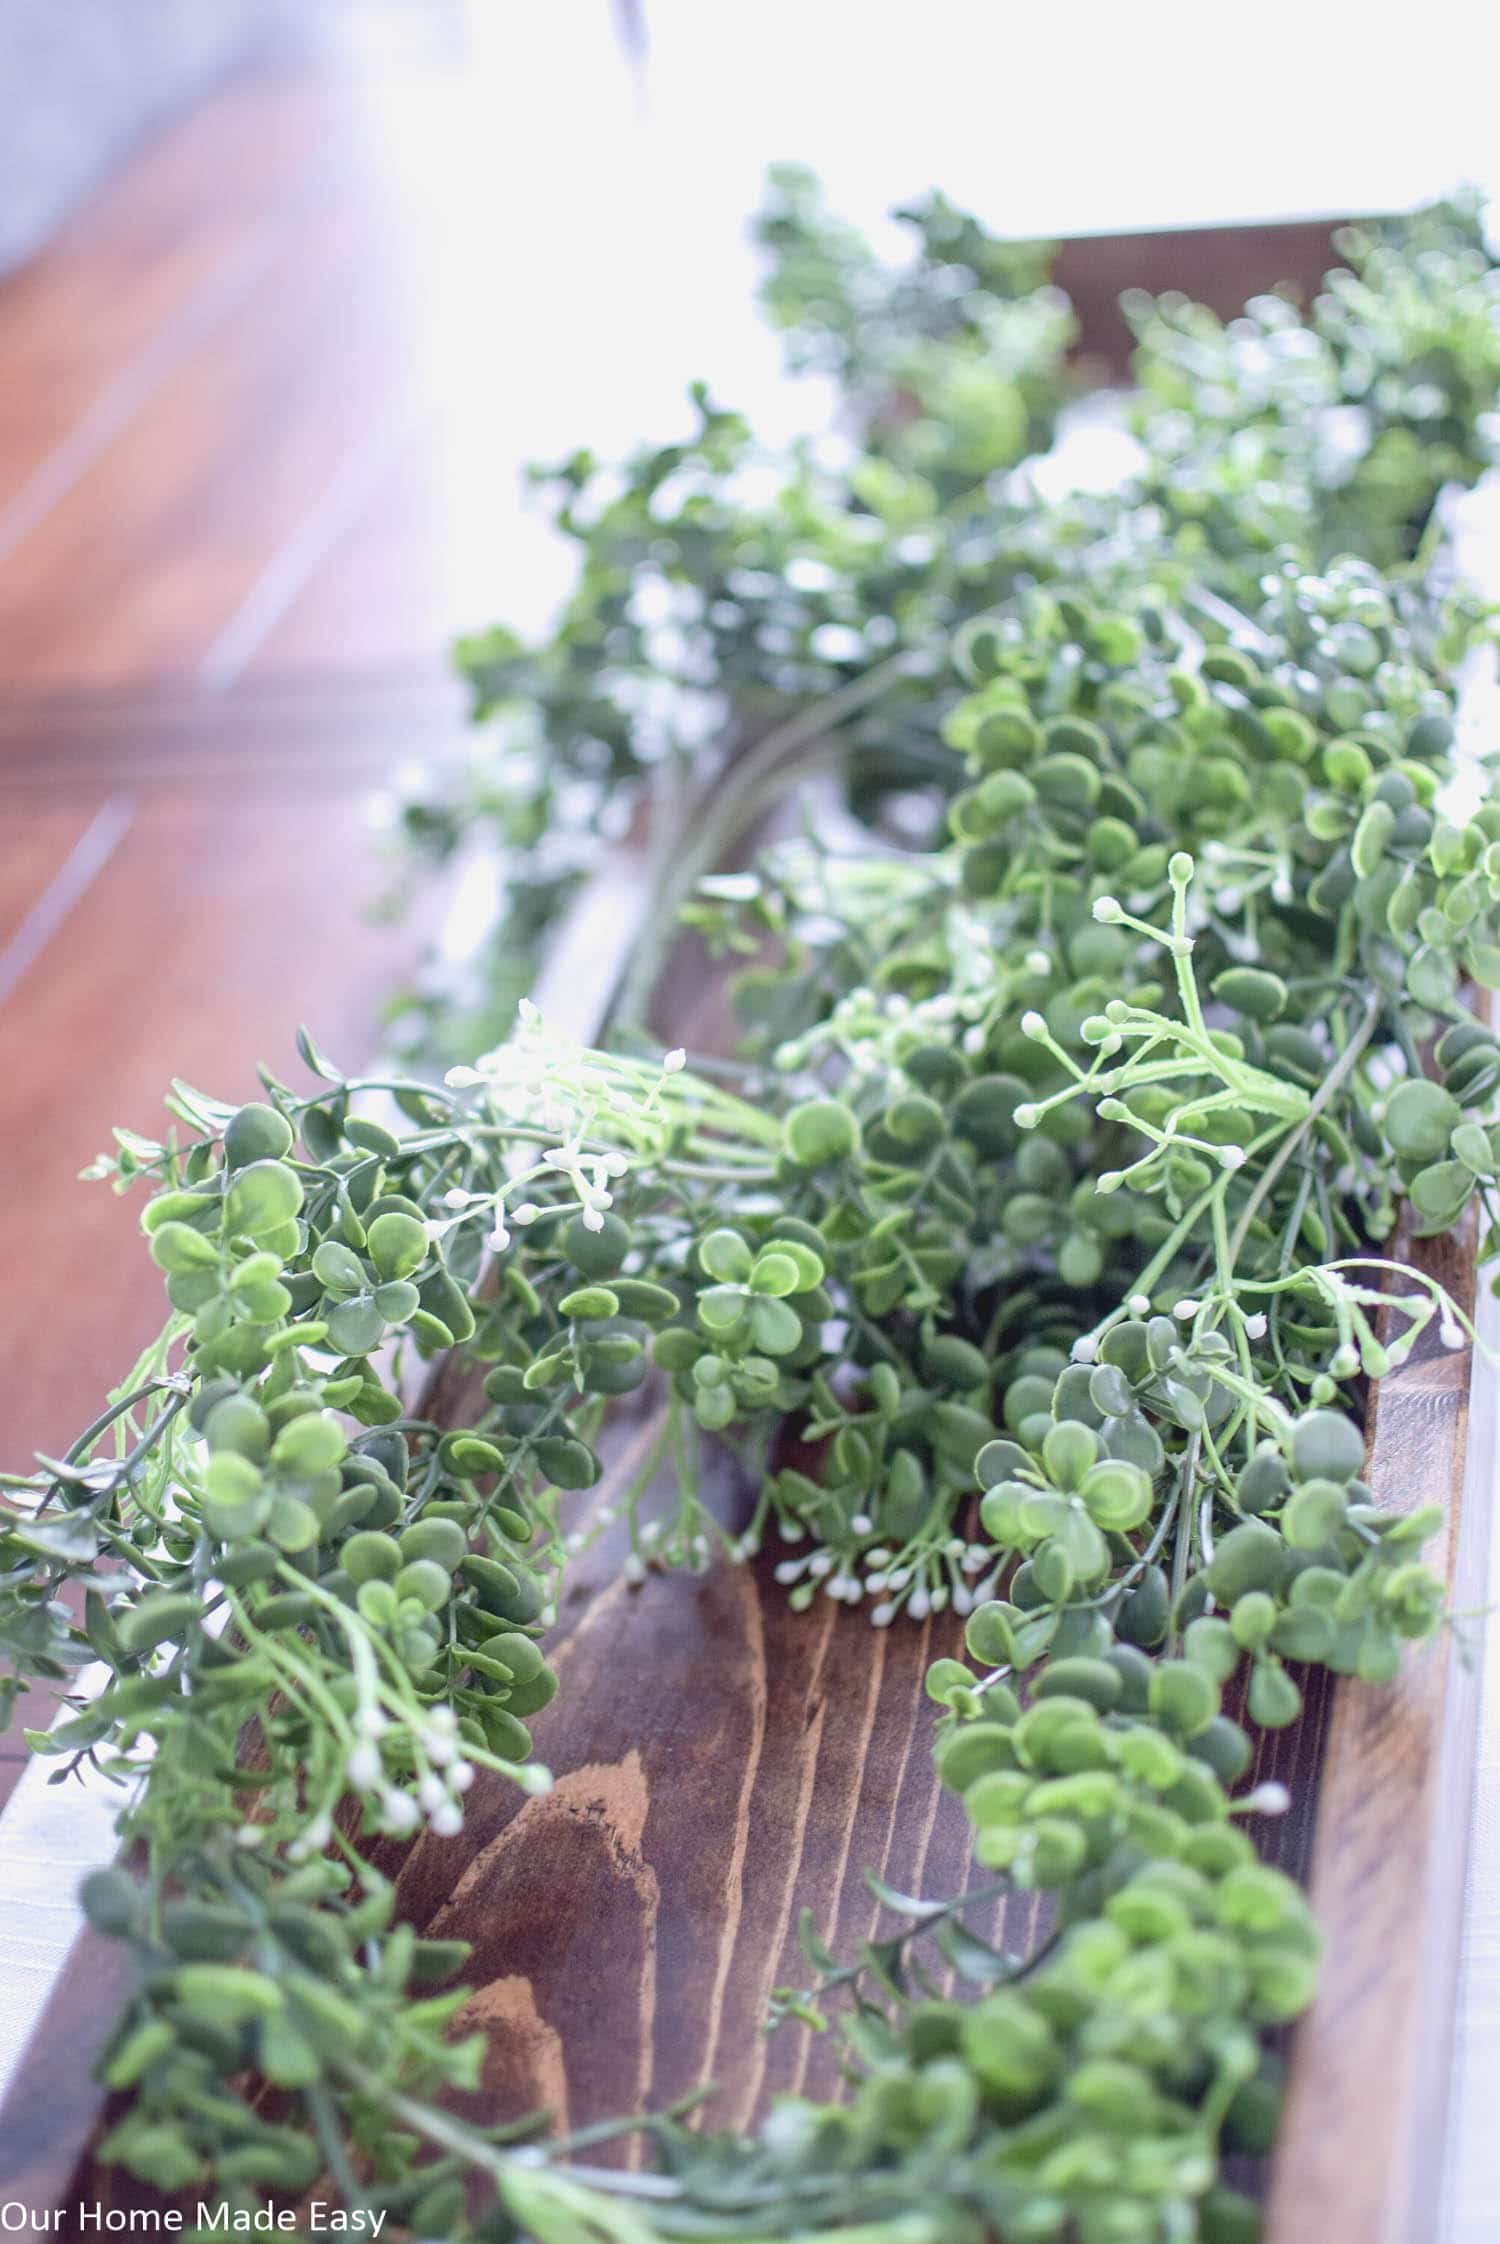
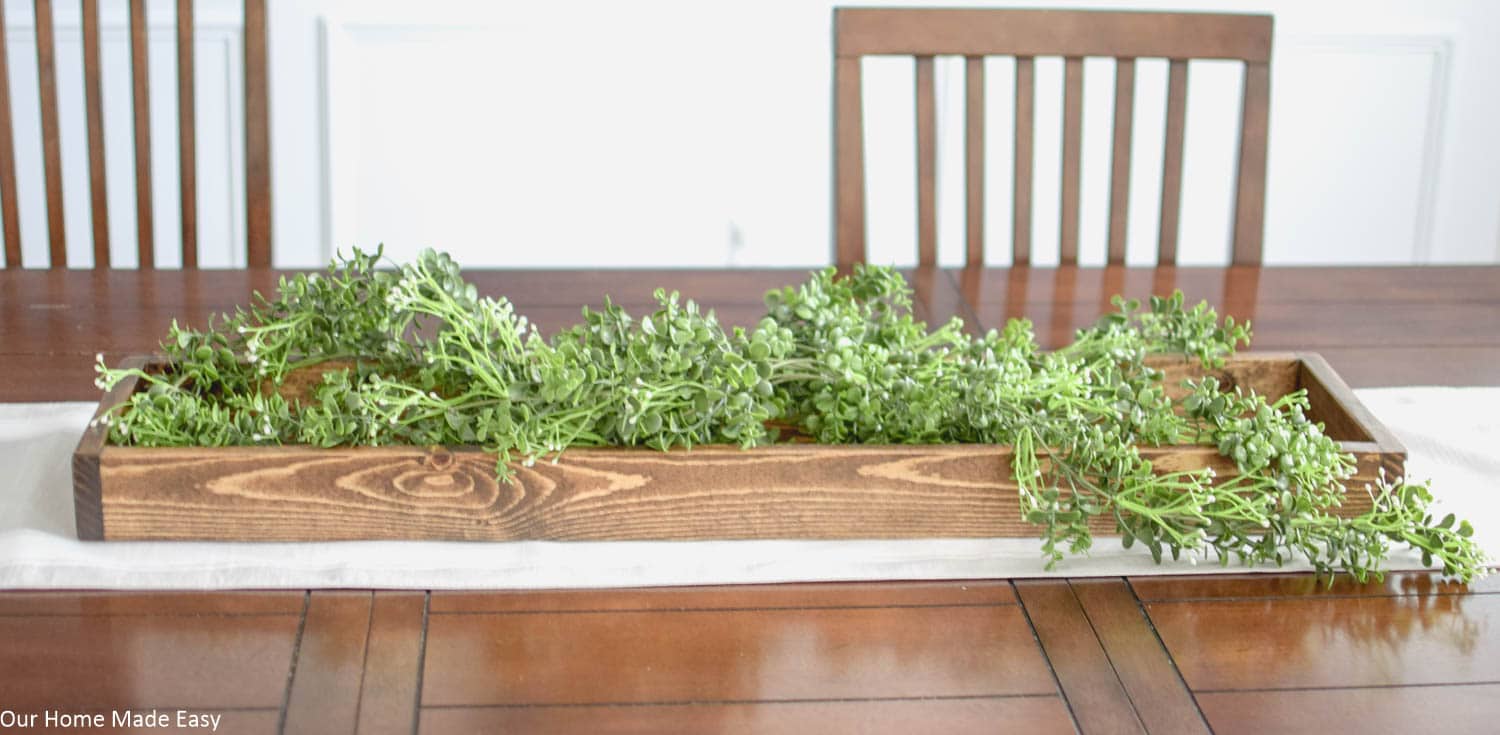
Next you’ll want to find a simple base that acts like the glue between your tray above and the height. For this centerpiece, I used 2 strands of this greenery. Not only is it super cute, but it’s perfect for several seasons, so I can reuse it over & over again!
Take your base and loosely set it on place along your tray. Leave openings to fill-in with your next items. This step will probably look the most chaotic, because you really just have a “mess.”
For my tray, I started in the middle with each bunch. Then I curves it like an “S” in opposite directions.
Base Inspiration:
- Faux Greenery [I love finding ones at Jo-Ann’s!]
- Faux Moss
- Florals
- Candle Rings
- Citrus Fruit


Add Some Height
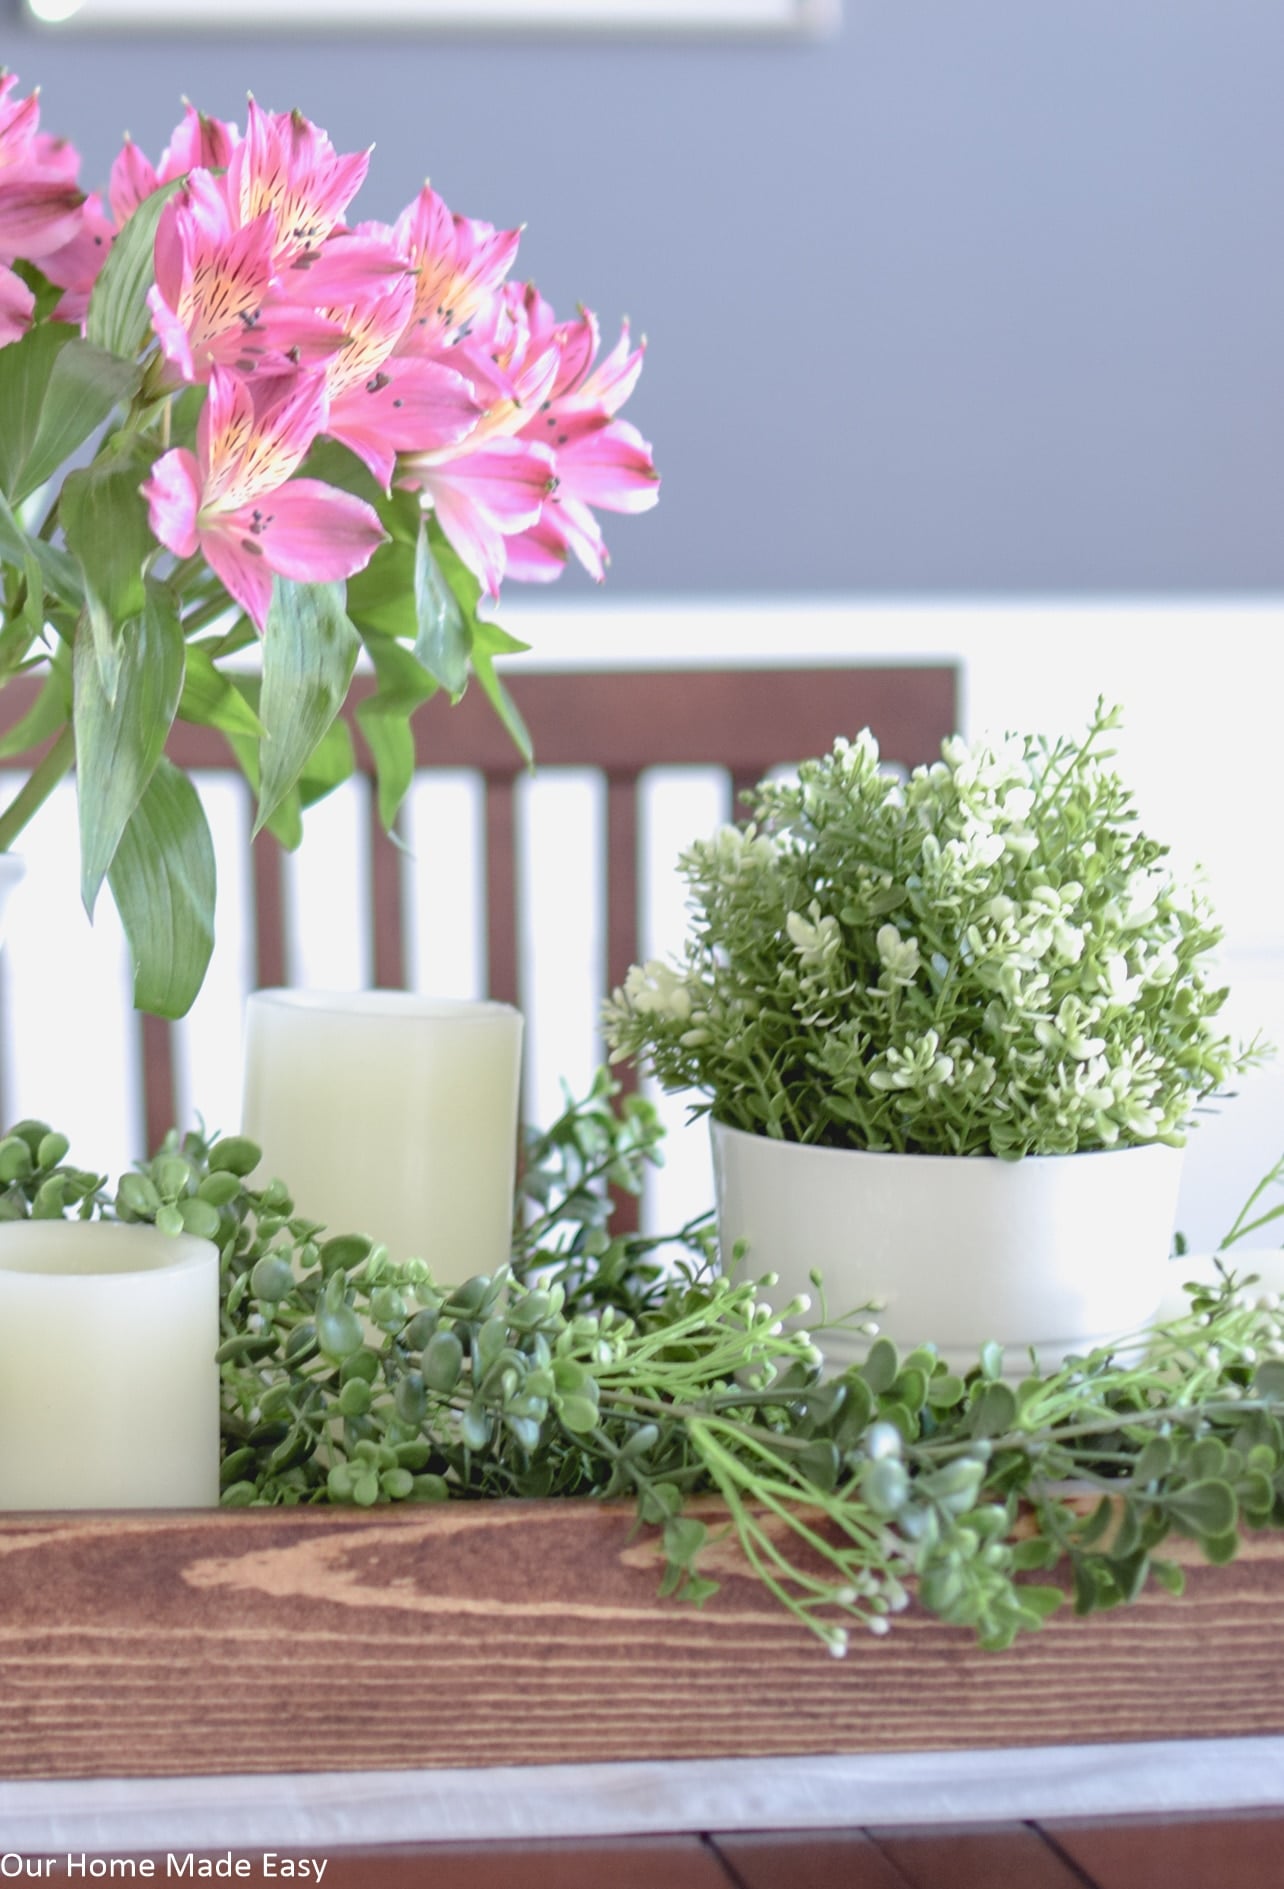
Now the fun part! Using an even number, start adding in some height to your spring centerpiece. For mine, I used two faux plants I picked up from IKEA. For just a few dollars apiece, they have a new home every single season. Best investment ever.
To add some extra height, I included a porcelain pitcher I found at Home Goods. Then I filled it with $4 Kroger flowers. If you haven’t found Kroger flowers, shame! I kid, I kid, but seriously — they have the best flower deals and these ones last forever!
Adding Some Height Inspiration:
- Glass / Milk Jars
- Lanterns
- Mason Jars
- Water Pitchers (Home Goods is the BEST place to find ’em)
- Vases
- Galvanized Buckets (This one is so cute)
- Bud Vases (A set where they aren’t identical!)
- Candleholders (Different texture/ Color than your tray base)
Fill-in with a Collection
Lastly, it’s time to add a few small touches to your centerpiece. You already have a tray or runner. Then you added a base covering to connect the tray & your height. Now it’s time to fill-in any open spaces.
I love to do this with something that I already have a collection of on-hand. I can count on always having a basket of faux candles nearby. Rather than go purchase something new, I set them up in the tray.
Do you have a Spring-y collection that you could include to finish your tray? While the collection doesn’t need to be identical like my candles, ultimately you’re looking for a cohesive look. You could even build a little height by adding 2 small books with a neutral colored binding under one of your collection items!
Fill-In Collection Inspiration:
- Candles
- Figurines
- Citrus Fruit
- Books
- Easter Eggs
- Succulents
- Anything else that adds a personal touch
Once you add in your collection, tuck your base layer around everything. It doesn’t need to be perfect, but you’ll want to make sure you aren’t hiding your collection among the greenery!
When it comes to creating your own Spring Centerpiece, don’t let yourself become overwhelms with how to create one that looks cute– but is still easy! Start by shopping your own space and then pick up one or two new items!

Hi, I’m Brittany, and I believe life at home should feel easier, not heavier.
I’m the creator of Our Home Made Easy, a space for busy women who want dinner on the table, their homes running smoothly, and a little breathing room at the end of the day.
You won’t find perfection here, just realistic recipes, smart shortcuts, and simple routines that work in real life. The kind that help you feed your family well, stay organized enough, and still have time to actually enjoy it.
If you’re juggling work, kids, schedules, and everything in between, you’re in the right place. I’m so glad you’re here.


