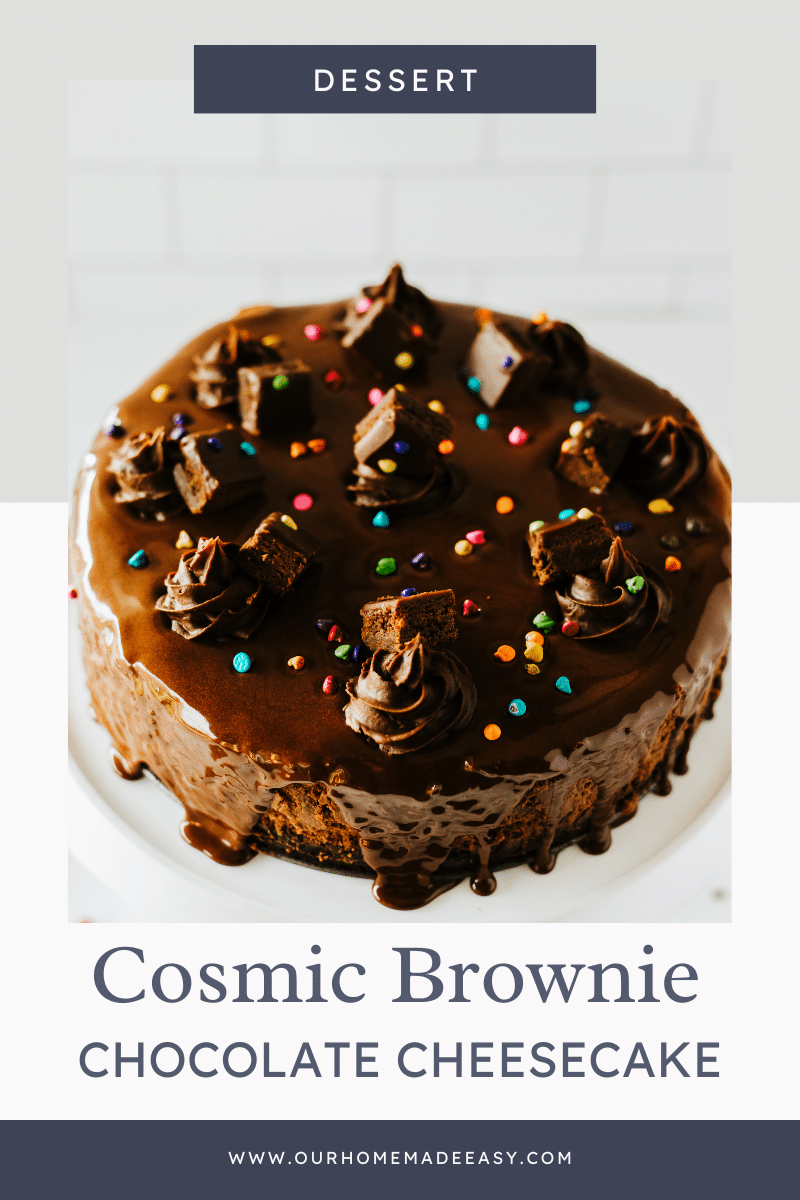
Best Cosmic Brownie Chocolate Cheesecake Recipe
Get nostalgic with our Brownie Chocolate Cheesecake—layers of Cosmic Brownies, fudgy Oreo crust, and creamy chocolate cheesecake filling. A heavenly treat for chocolate lovers!
(This post contains affiliate links. Please see my Disclaimer for more information.)
Growing up, were you always excited to see which Little Debbie treats were in the grocery bags when they arrived home?
Cosmic Brownies and Nutter Bars were always at the top of my list.
Today, I wanted to use one of my favorite childhood treats in a yummy, more “grown-up” dessert.
(Fair warning: expect numerous cosmic/starry puns ahead, sorry not sorry)
My brownie chocolate cheesecake, inspired by the beloved Little Debbie Cosmic Brownies, is a heavenly confection that combines the best of both worlds—fudgy cosmic brownies and velvety chocolate cheesecake.
In just a few steps, you can create a dessert masterpiece that’ll be the star of any gathering. Let’s dive into the magic of this indulgent treat!
The Perfect Brownie Chocolate Cheesecake
Creating the Perfect Crust and Filling:
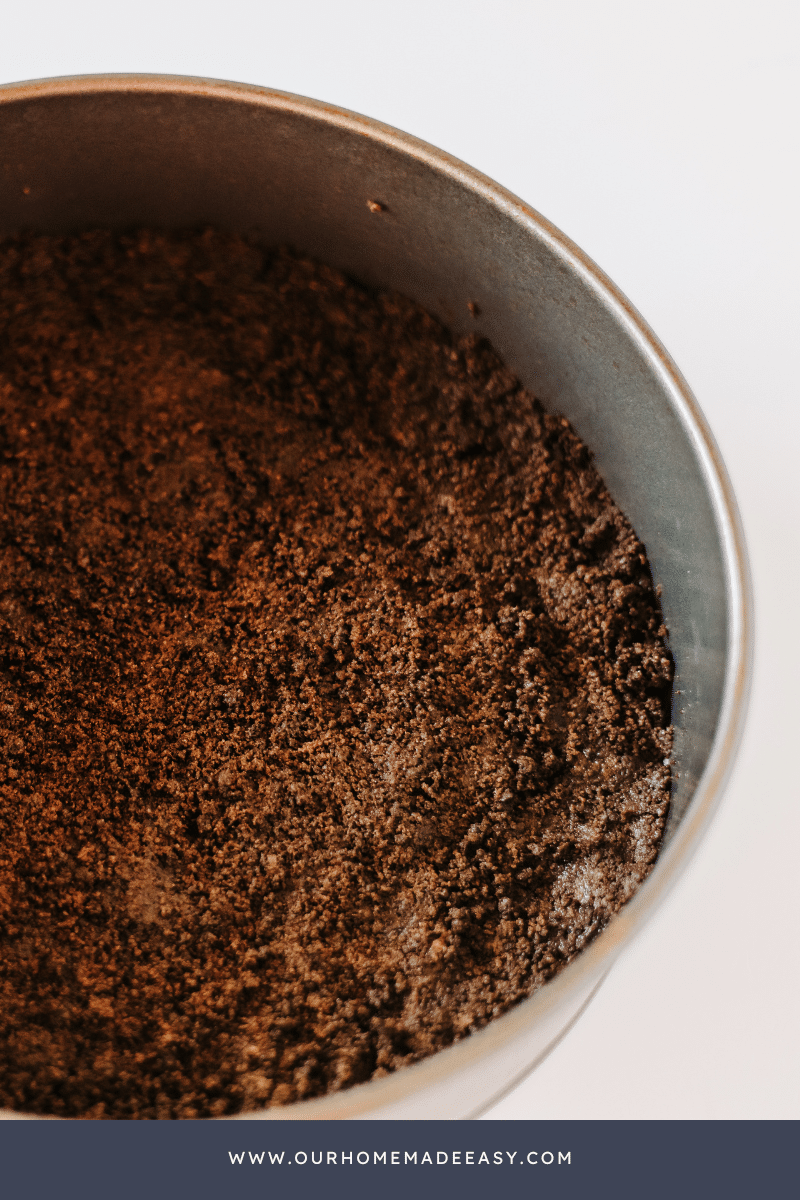
- Oreo Crust: Crushed Chocolate Oreos mixed with melted butter form the base—a delightfully rich and crumbly crust.
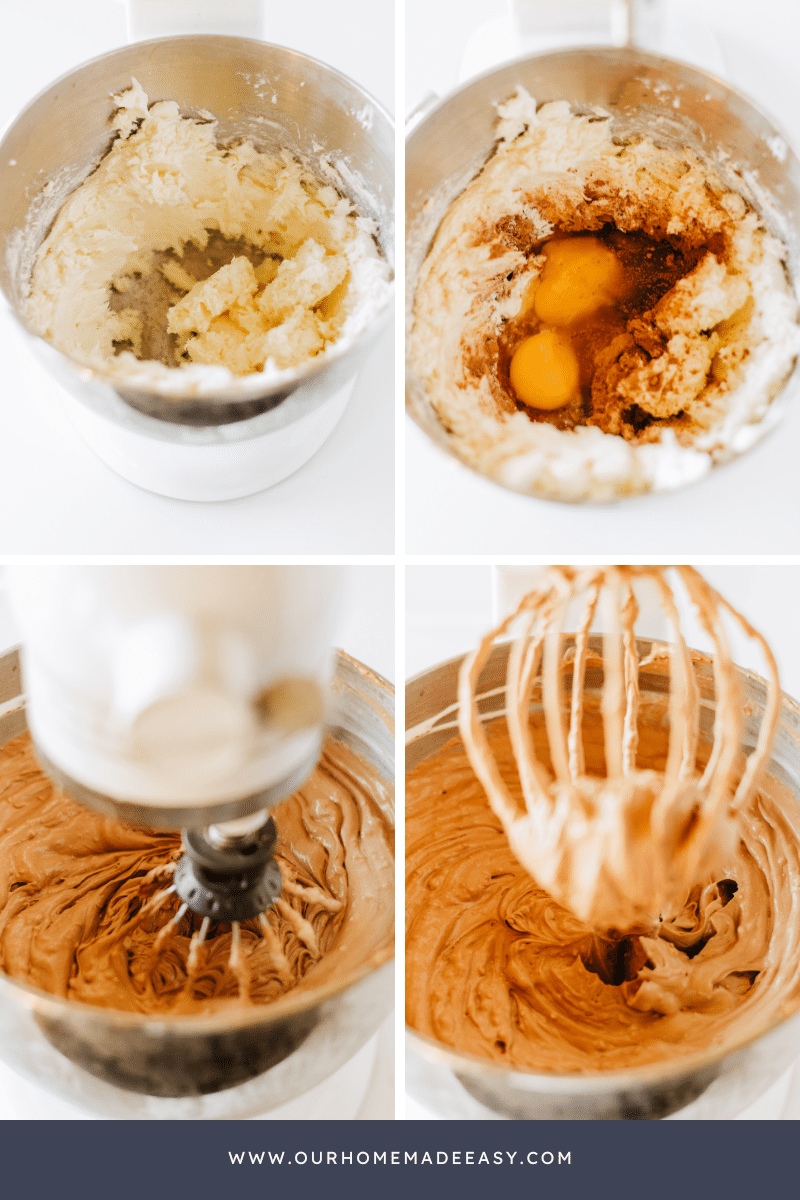
- Cheesecake Dream: A delicious chocolate cream cheese mixture, elevated with vanilla extract and melted bittersweet chocolate, creates the velvety cheesecake layer that promises to melt in your mouth.
- Cosmic Brownie Throwbacks: Chopped cosmic brownies are scattered between layers, infusing each bite with nostalgic fudgy brownies goodness.
How to Bake Your Brownie Chocolate Cheesecake
Baking homemade cheesecakes can seem daunting—but they are really easy to make!
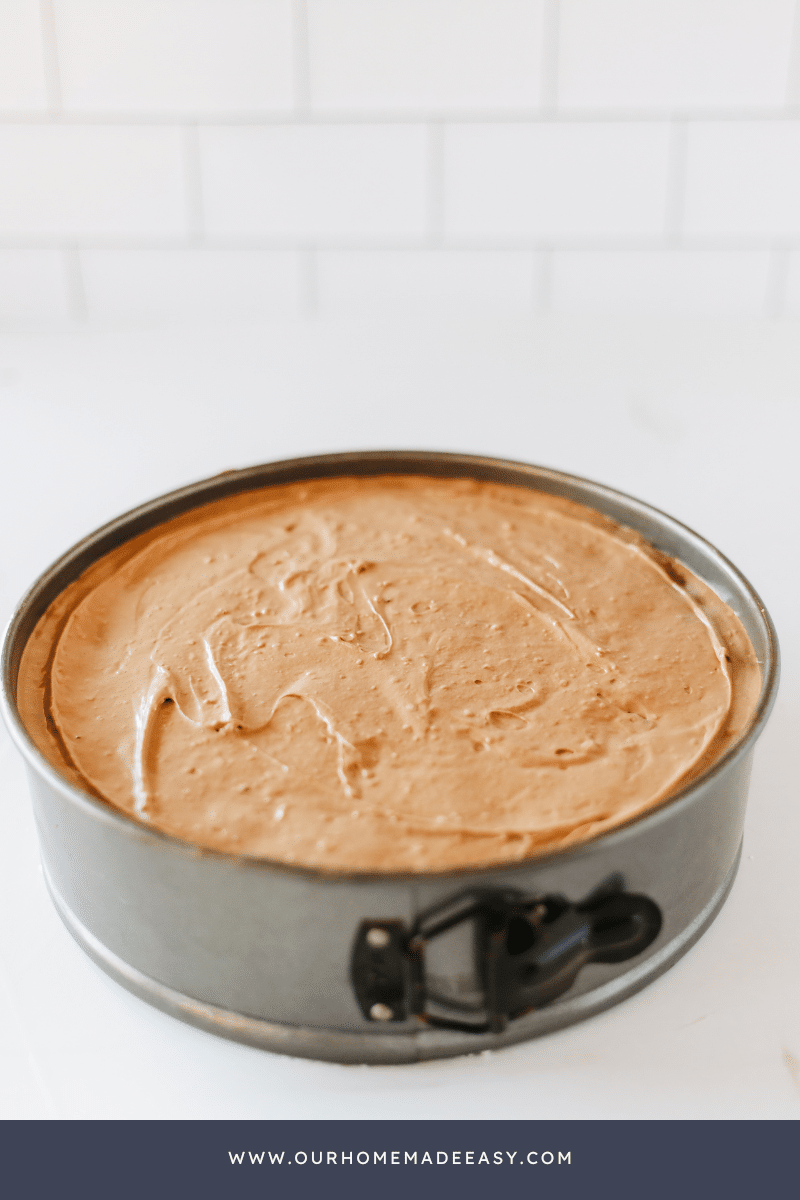
Once your cheesecake filling is mixed, you will pour half of your batter into your springform pan.
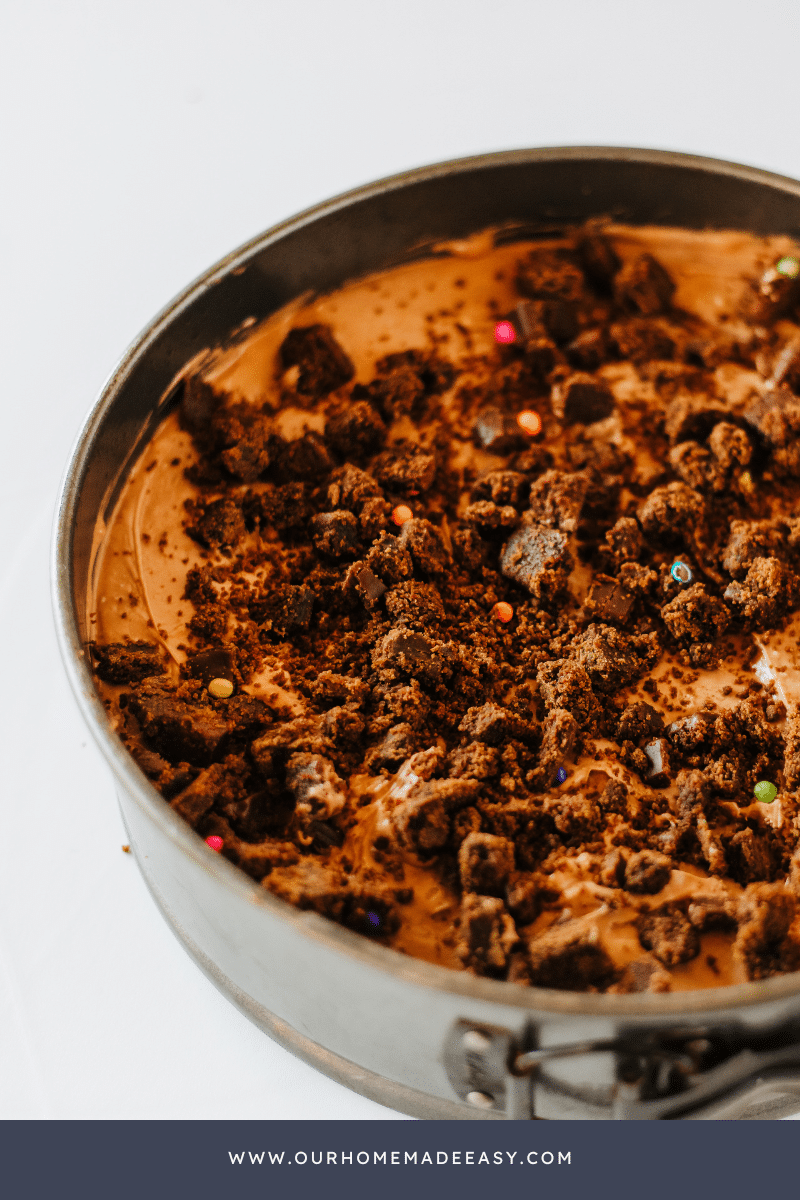
Top the batter with chopped Cosmic Brownies, as shown above.
Then, add the remaining batter on top of the chopped brownies.
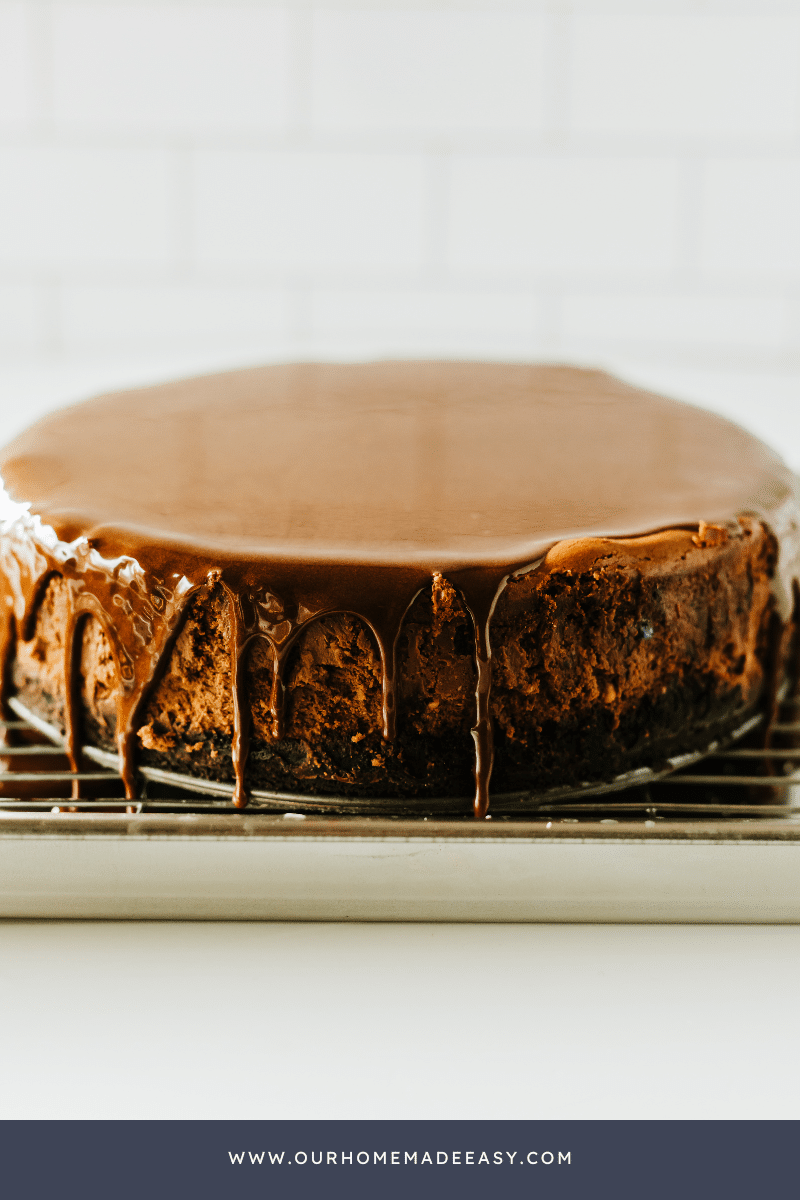
We bake our cheesecakes in a water bath, wrapped securely in aluminum foil, to ensure a moist and evenly cooked cheesecake. This method prevents cracks and elevates the texture to a silky, fudgy delight.
The Icing on the Brownie Chocolate Cheesecake—Literally
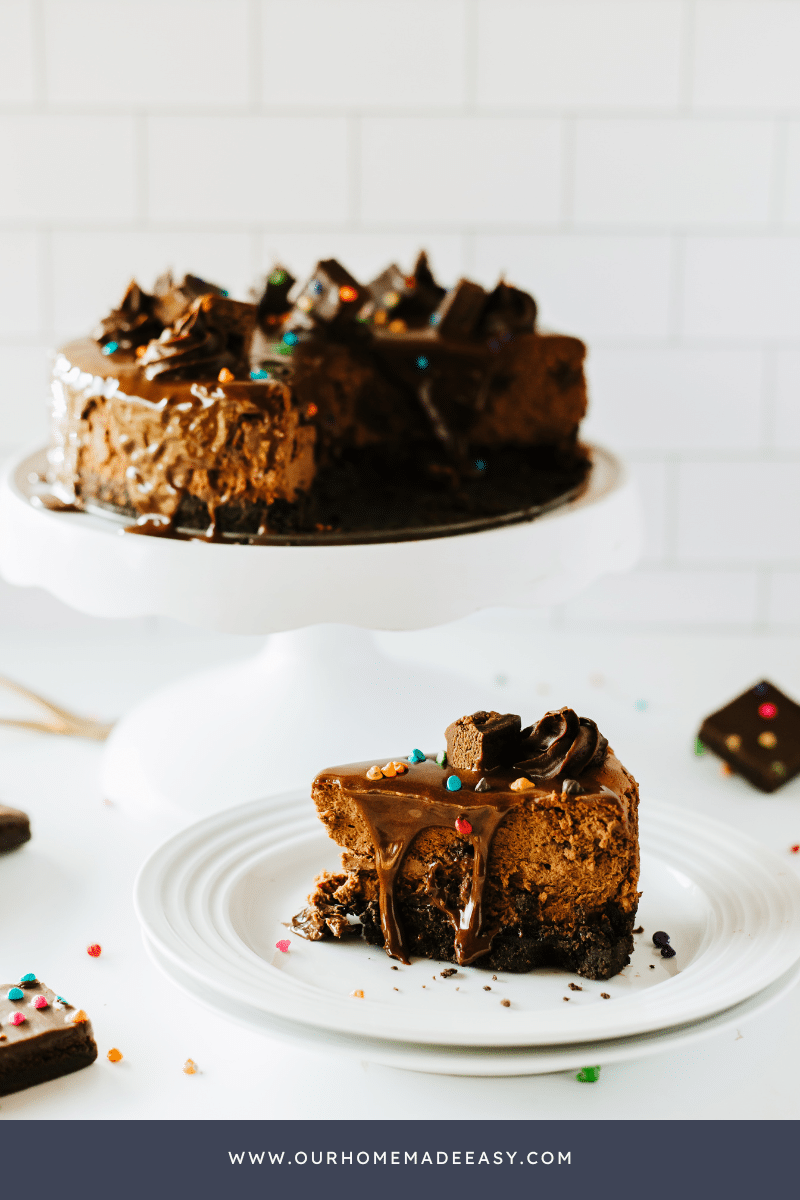
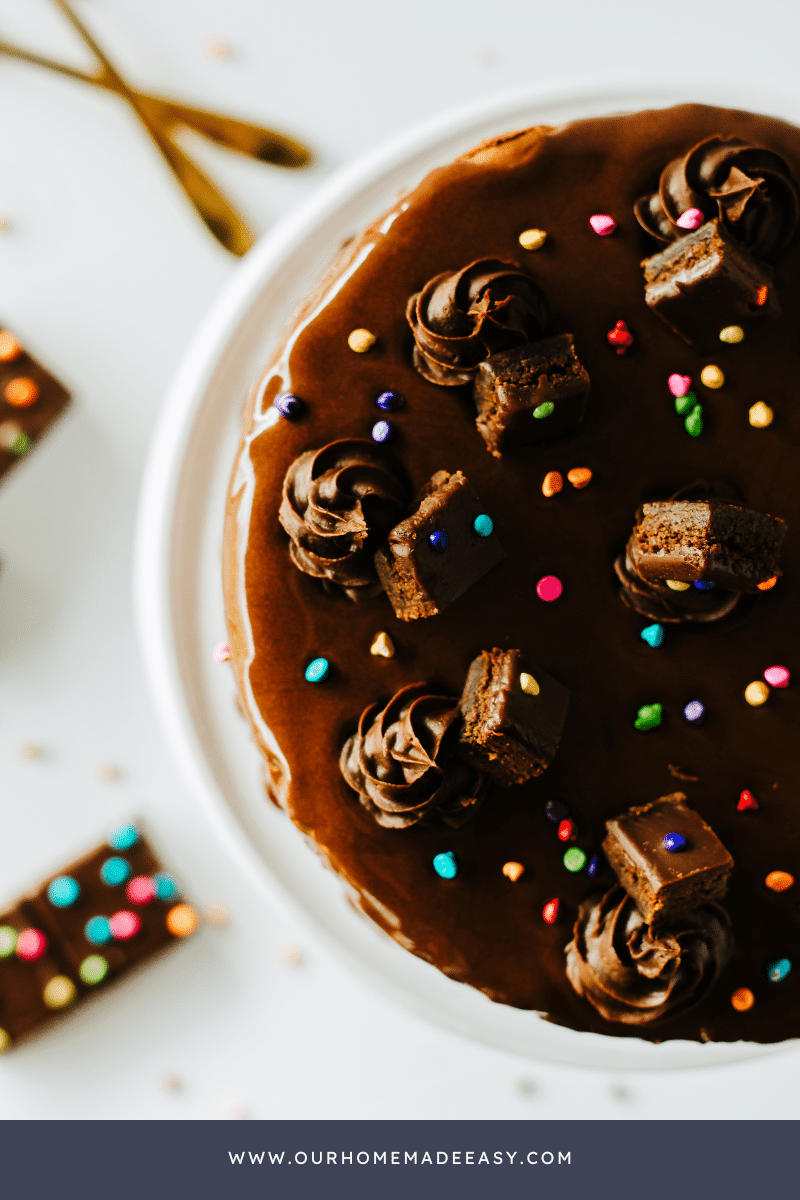
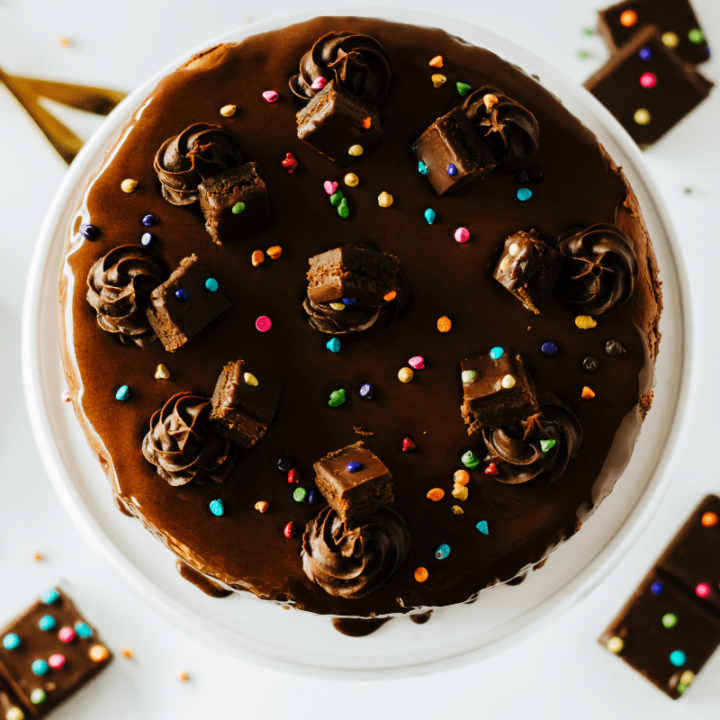
The final touch involves a generous layer of chocolate icing that cascades over the cheesecake, creating a glossy finish, similar to a chocolate ganache. Adding sprinkles and cubed cosmic brownie pieces is the pièce de resistance, turning this dessert into something you’ll feel proud serving at your next birthday party or family dinner!

Pro Tips for the Best Results:
- Use a High Quality Springform Pan: Invest in a high-quality springform pan for easy removal and presentation.
- Bake Smart: Use a water bath and the right oven temperature for a flawless, crack-free cheesecake. Here is my go-to method for how to make a cheesecake water bath.
- Chilled Goodness: Refrigerate the cheesecake overnight to let the flavors meld and intensify.
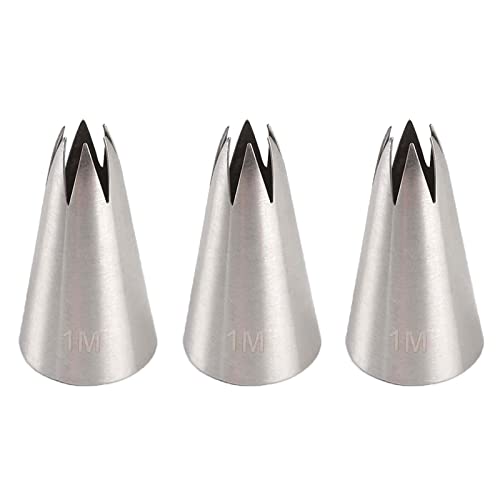
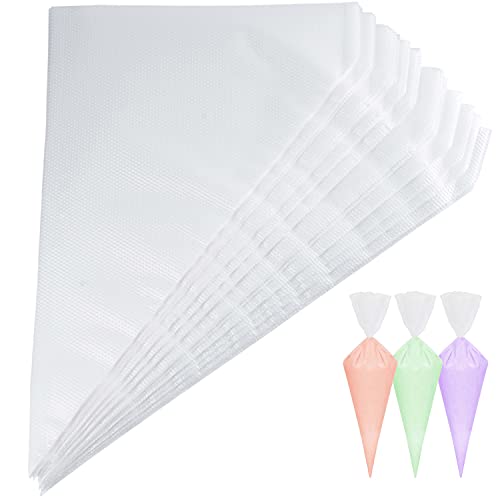
- Have Fun Decorating: We poured chocolate icing to create a chocolate ganache glaze. Then we used the remaining chocolate icing and piped it on using a 1M tip. Chop extra Cosmic Brownies and place them on top of the cheesecake! If you don’t have a piping bag, you could always use a gallon Ziploc bag.
Cheesecake Serving Suggestions:
- Slice and serve chilled for the ideal texture and flavor.
- Pair with a dollop of whipped cream or a scoop of vanilla ice cream for an extra treat.
- Sprinkle extra cosmic brownie bits on individual slices for a playful touch.
Storing Your Cheesecake:
After indulging in this “cosmic” creation, store any leftovers in an airtight container in the refrigerator. The flavors continue to meld, making each subsequent slice even more delightful.
Homemade Cheesecake FAQs
Can I use a different flavor of Oreo for the crust?
Absolutely! Experiment with your favorite flavors to customize the crust.
Can I make this cheesecake ahead of time for a dinner or birthday party?
Yes, it’s a fantastic make-ahead dessert. Refrigerate and add the final touches just before serving.
Can I freeze this cheesecake for later?
Yes, ensure it’s well-wrapped in plastic wrap and stored in an airtight container for up to a month.
How do I prevent cracks in my cheesecake?
Using a water bath and wrapping the pan in foil during baking helps prevent cracks.
Can I use milk chocolate instead of bittersweet chocolate?
It’ll give your cheesecake a sweeter flavor profile.
Share a favorite part of your childhood by making this Cosmic Brownie Chocolate Cheesecake. Share with your favorite sweet tooth fan and enjoy the chocolatey bliss!
More Favorite Desserts You’ll Love:
- Frosted Animal Cookies Circus Cake Pops
- White Chocolate Dipped Oreos
- Mini Chocolate Peppermint Bundt Cakes
- Butter Pecan Brittle
Cosmic Brownie Chocolate Cheesecake
Get nostalgic with our Brownie Chocolate Cheesecake—layers of Cosmic Brownies, fudgy Oreo crust, and creamy chocolate cheesecake filling. A heavenly treat for chocolate lovers!
Ingredients
Cheesecake:
- 30 Chocolate Oreos, Processed Into Fine Crumbs
- 6 tablespoons of Melted Butter
- 3 packages of Cream Cheese
- 1 cup of Sugar
- ¼ teaspoon of Salt
- ½ tablespoons of Flour
- 1 teaspoon of Vanilla
- 4 eggs
- 1 ½ cup of Heavy Cream
- 8 oz. of Bittersweet Chocolate (melted)
Topping:
- 4 Cosmic Brownies (chopped)
- (2) containers of Chocolate Icing
- Sprinkles
- (2) Cosmic Brownies (cut in cubes for topping)
Instructions
- Start by adding your processed Oreos and melted butter to a small mixing bowl. Mix until well combined and the consistency of wet sand.
- Press and smooth out evenly into a well-greased springform pan.
- Bake at 325 degrees for 10 minutes. Set aside to cool.
- Add your cream cheese and sugar to a stand mixer. Mix on high until smooth.
- Add in your vanilla, salt, and flour and mix until well combined.
- Begin adding your eggs two at a time and mix until smooth.
- Add in your melted bittersweet chocolate. Mix until well combined.
- Beat your heavy cream in a separate bowl until stiff peaks form. Fold your whipped cream into your cheesecake batter.
- Pour half your batter into your springform pan.
- Top with chopped brownies.
- Add the remaining batter on top. Gently tap your pan on the counter to remove any air pockets.
- Fill your sheet pan or roasting pan with 2 inches of boiling water.
- Wrap the bottom of your springform pan in aluminum foil. Make sure there are no holes for water to leak in.
- Place your springform pan in the middle of the sheet pan.
- Place in the oven at 325 degrees for one hour and 10 minutes.
- Turn off the oven and open the door halfway. Allow the oven to cool completely.
- Remove from the oven and let the cheesecake come to room temperature.
- Refrigerate overnight.
- Take one container of chocolate icing and microwave for 1 minute. Stir vigorously.
- Pour over cheesecake, while still in the springform pan.
- Refrigerate until your icing sets. About one hour.
- Gently remove it from your springform pan.
- Decorate the cheesecake with your remaining chocolate icing.
- Add sprinkles and cubed brownie pieces on top. Slice and enjoy this piece of heaven!
Notes
We decorated the top of the cheesecake using a piping bag and a 1M tip.
Recommended Products
As an Amazon Associate and member of other affiliate programs, I earn from qualifying purchases.

Nutrition Information:
Yield: 8 Serving Size: 1Amount Per Serving: Calories: 1063Total Fat: 71gSaturated Fat: 36gTrans Fat: 1gUnsaturated Fat: 30gCholesterol: 203mgSodium: 545mgCarbohydrates: 98gFiber: 7gSugar: 66gProtein: 14g


Hi, I’m Brittany, and I believe life at home should feel easier, not heavier.
I’m the creator of Our Home Made Easy, a space for busy women who want dinner on the table, their homes running smoothly, and a little breathing room at the end of the day.
You won’t find perfection here, just realistic recipes, smart shortcuts, and simple routines that work in real life. The kind that help you feed your family well, stay organized enough, and still have time to actually enjoy it.
If you’re juggling work, kids, schedules, and everything in between, you’re in the right place. I’m so glad you’re here.


