How to Install a Tile Backsplash Easily
Last month we wrapped up the One Room Challenge and after 6 weeks of working really hard in our spare time, we had a beautiful finished powder room. But I have to admit, we (okay, Jordan) stepped out of our comfort zone when it came to including DIY projects. The biggest worry for something we’d never done before? Installing tile work! This morning I am going to share our best advice to give you for how to install a tile backsplash! Let’s get started! 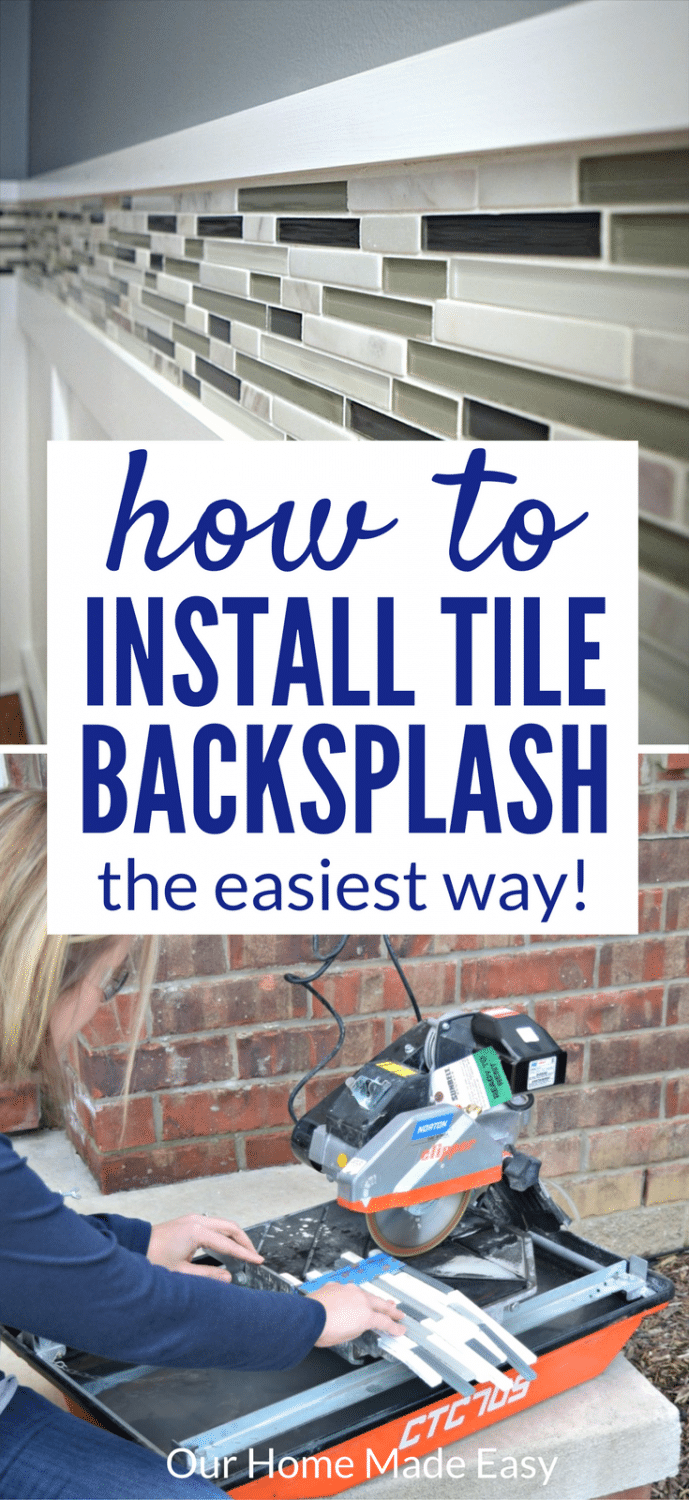
(This post contains affiliate links. If you shop from my blog, I may be compensated for clicks or purchases that you make. Read my disclaimer page for more information.)
One of the most dramatic DIY projects homeowner’s can do themselves is tile work. It’s relatively affordable, there are tons of options at any home improvement store, and we all know that tile seems to make or break a room. But honestly? We hadn’t tiled anything before, well because, the thought of mastic, leveling, and grouting seemed really overwhelming.
Love a great DIY project? Be sure to grab your list of my favorite weekend warrior projects below!
At our last house we bought accent tile for a backsplash and sat on it for years— I’m not even sure what happened to it when we moved out of the house a few years ago! Ooops. Our hesitation wasn’t for a lack of complete know-how, Jordan attended one or two workshops, watched videos, and it seemed easy enough for small areas. Just the thought of mixing mortar and applying it with a trowel never sounded like fun to us. We assumed we’d make a huge mistake and that fear left our cute little kitchen looking a little undone. Sorry sweet little ranch in Alabama!
How did we get over this fear?
We ripped it off like a band-aid and dove in on tiling. We thought one small band around a powder room seemed like a great place to start. And we had a secret weapon…. which made it so much easier. I can’t wait to show you!
How to Install a Tile Backsplash
Items Needed
- Tile (We used this tile)
- Wet Saw
- Utility Knife
- Painter’s Tape
- Hair Dryer
- MusselBound Adhesive Mat
- Float (This is similar to what we used)
- Grout (We used this in white)
- Tile Spacers
Plan Your Space
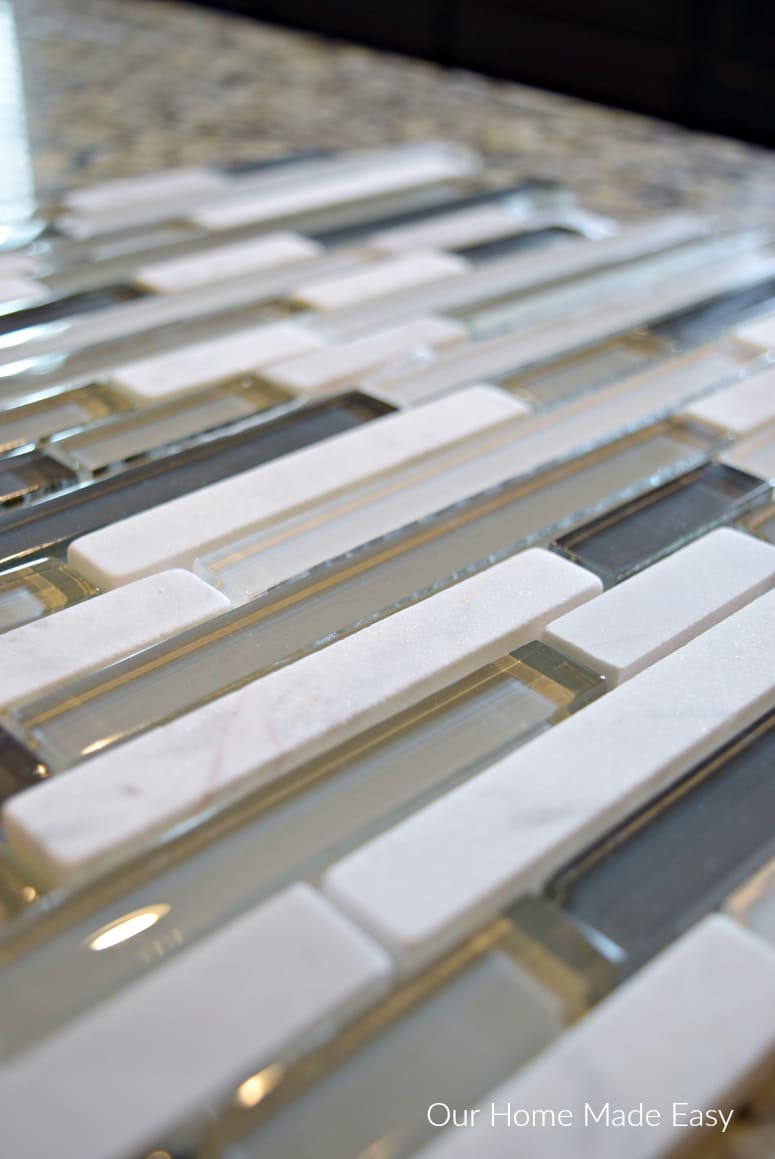
For this project, we wanted a small band lying against the pedestal sink. We didn’t have a particular preference to the height of the backsplash, so we decided to make it easy— use one-half of the square foot tile sheets.
Since our room is 6′-7′ square, we bought 13 sheets of mosaic tile and ended up using 11 of them.
When figuring out how much tile you need, over estimate! There is nothing more frustrating than running out of a material mid-project, or trying to skip a corner to make what you have last longer.
Related: Easy Storage Shelving Under $70
Jordan cut 10 pieces in half so that we had twenty 6″ by 12″ long tile pieces. They looked great. But there was something to consider— the transition from all bottoms halves to the tops. You’ll only want to transition once, which essentially means that you take a few loose mosaic pieces and ‘build’ your own mosaic column. Once you create it, you can move on with the top 6″ pieces for the other half of the room.
Start with a Flush Corner
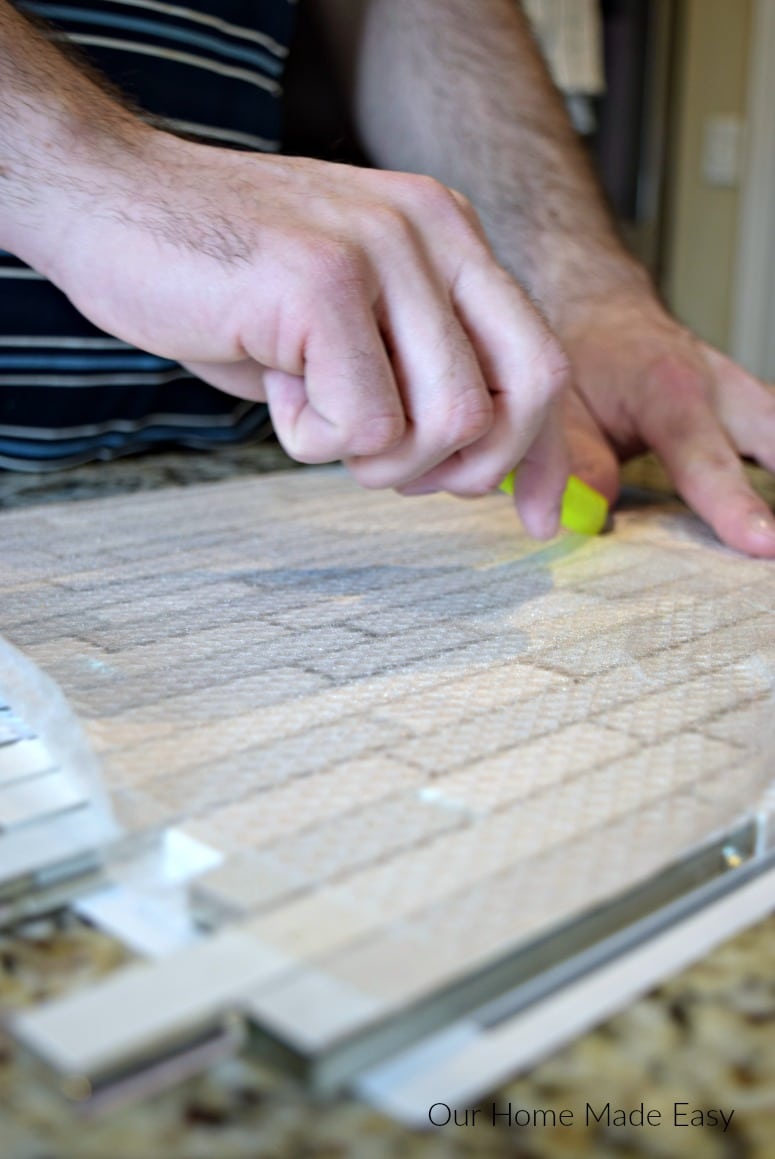
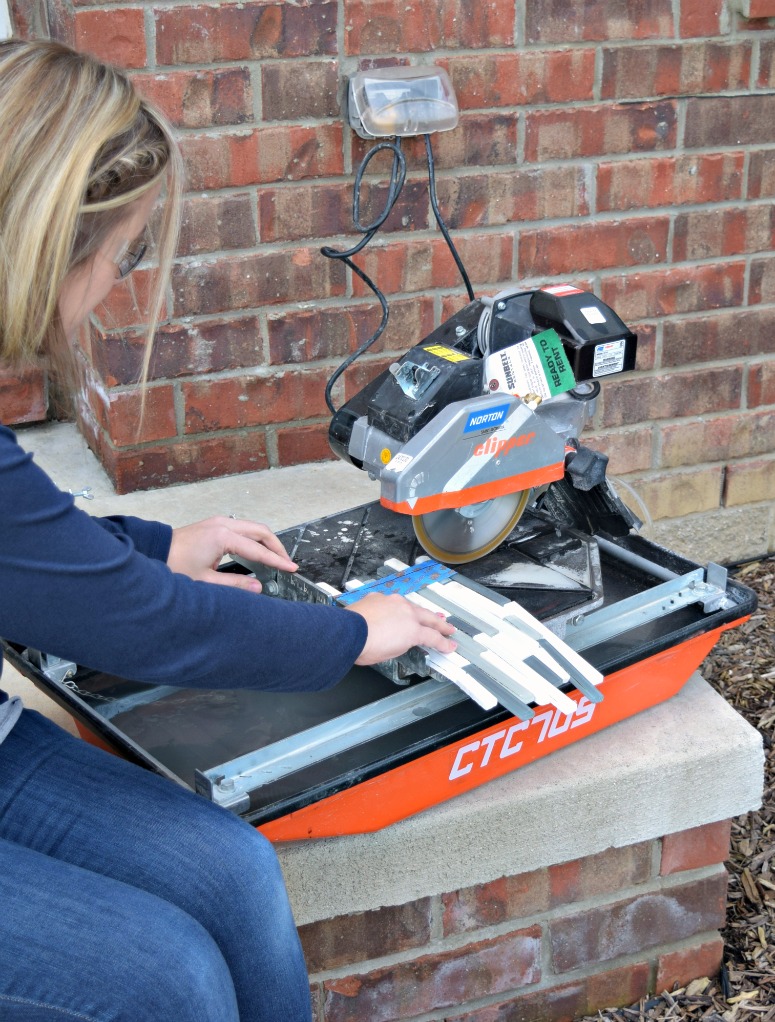
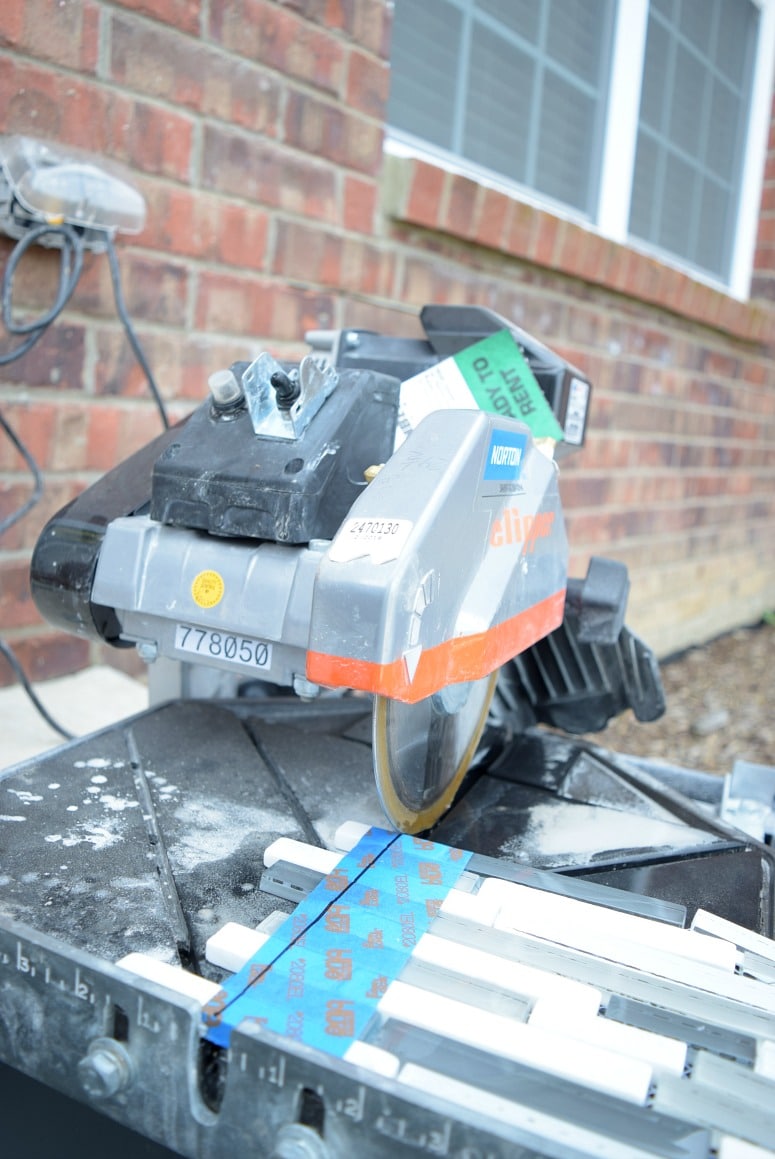
Take one piece of mosaic tile and cut the piece flush. Jordan cut in the spot that touched the least amount of rows so that we could use the most amount of the sheet as possible. Any tile work requires a wet saw. Since this was our first experience DIY-ing tile, we rented the wet saw from a local shop. If we were doing this more often, we agreed that we’d buy a wet saw to have on-hand and not worry about finishing and returning it back to the store by a certain hour.
This may be the industry standard– and I apologize if it’s redundant…
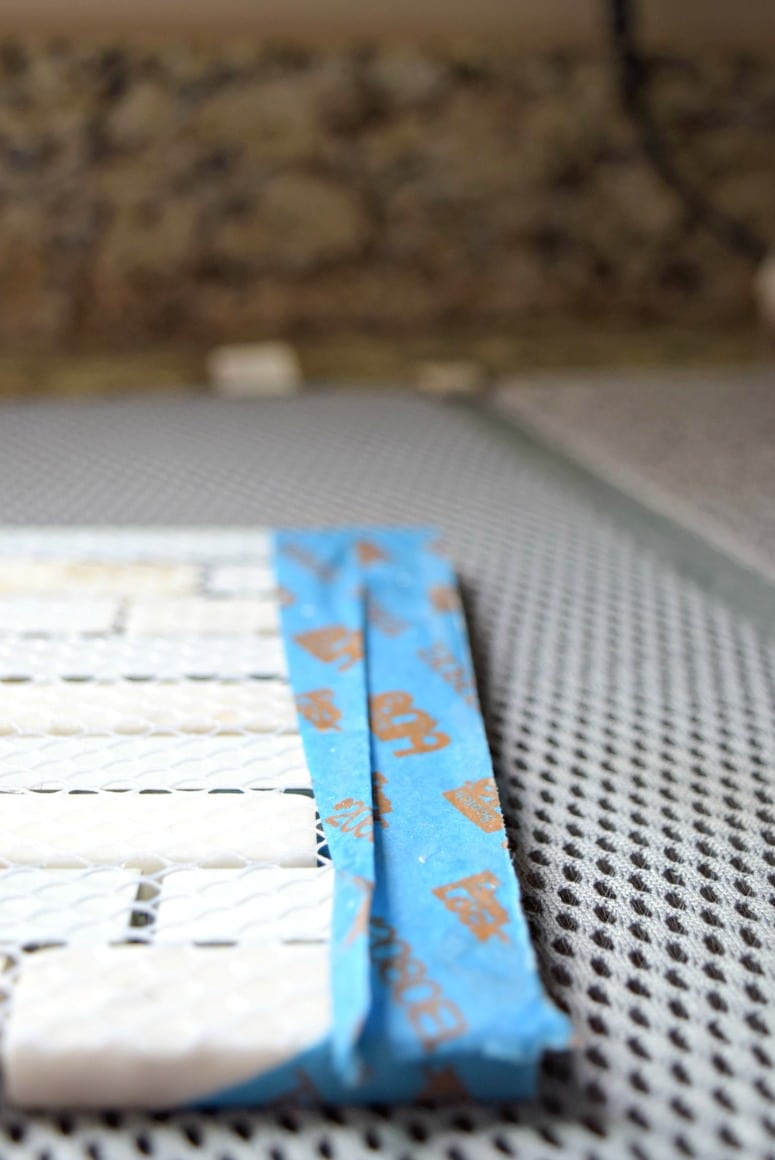
Jordan wrapped painter’s tape across the cut line and that made both seeing the cut line and holding the little pieces of mosaic intact! It’s the small things that keep us moving. 🙂
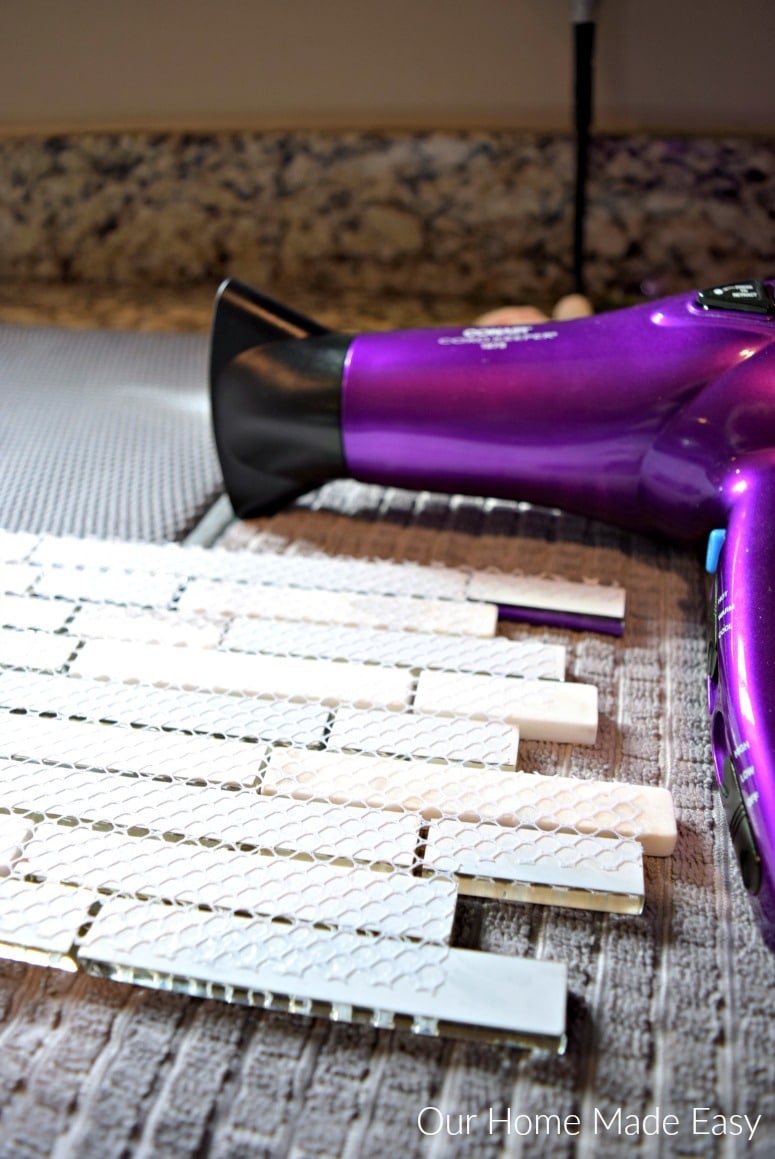
Prep Your Tile
Once your tile is cut, it’s not ready for hanging– yet! Each piece that goes through the wet saw is literally wet. You’ll need it to be bone dry for hanging. I used my hair dryer and blasted the tile to quickly dry it.
Before I dried the tile, I removed the painter’s tape and collected any small bits of mosaic. Some of the tile was used to fill in areas where they ‘fell’ out of place. For the first piece where we created the single flush line, Jordan used it help build his transition piece from bottom halves to top halves.
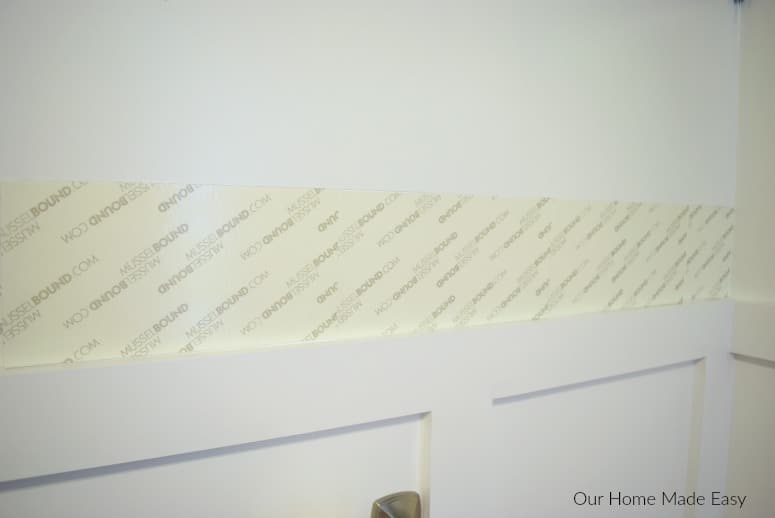
Apply Your Backer
You know how I admitted that we were scared to death about the idea of starting a tiling project? That little adhesive band in the photo above cured us. We had seen it in the stores for a few years, but Jordan was adamant that we were going to do a project “right” and use mortar. Whatever that means. 😉
But after seeing our in-laws’ recent kitchen backsplash install and realizing that Jordan was traveling for 4 weeks of our 6 week One Room Challenge, Jordan had to reevaluate what doing a project “right” meant.
And gosh, it was a total time saver.
If you’re looking to skip the mortar and trowel, we cannot recommend the MusselBound backing enough. Jordan was so happy he went this route.
When you’re applying the backer, read the instructions before you start. For us, we unrolled the backing vertically, as directed. Then, I was in charge of taking our float and applying firm pressure to the paper to make sure we setup a strong foundation.
MusselBound saved us tons of time, gave us lots of confidence, BUT did require two sets of hands to apply before installing the tile work. Just a small PSA from these weekend DIY-ers.
Apply Your Tile
Once the adhesive sheet is pressed firmly into your drywall, it’s ready for the tile itself.
Remove your first sheet of adhesive in a corner. Place a layer of spacers along your bottom piece to ensure proper spacing for grout later. In this project, the top of our board & batten was the bottom. Carefully position your mosaic tile across the piece you just removed. Use the float to firmly apply pressure to the tile and adhesive. Repeat each piece as you work across the room.
Luckily for this room, we only had to use the wet saw for corners and creating flush ends. But it would be the same process for working around electrical outlets, cabinets, or light switches.
Apply Your Header Piece
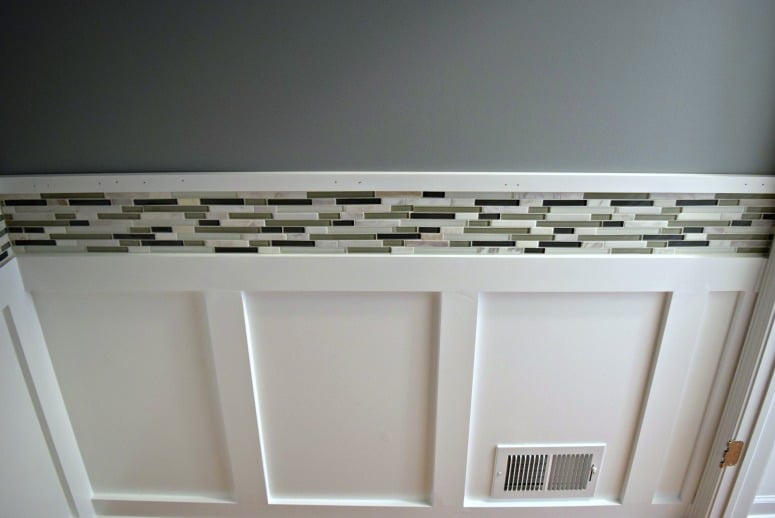
I apologize, I’m not sure what the technical terminology is for the piece of tile that ends your tile work. Essentially, you need to add a trim piece to end your tile and keep the grout in the areas you want it, when you apply it. For most projects, you’ll want a small metal rail that you can pick up when you choose your tile.
For us, we used a 1″x 2″ piece of select pine to coordinate with our board & batten. Once we had the tile in place, we put spacers above the tile and laid the 1″ x 2″ board and nailed them in place.
Lastly, Grout & Wash!
Now the fun part! Follow the directions on your specific grout. You’ll want to apply it, wait the specific time, and wipe it off. You should only need to do each area once, so be sure that you are using more than enough grout.
In the picture above, Jordan grouted before he did the finishing work on the 1″ x 2″ header piece.
Here is what it looks like grouted (but not filled in on the header piece)!
Take a look at the final powder room makeover here!
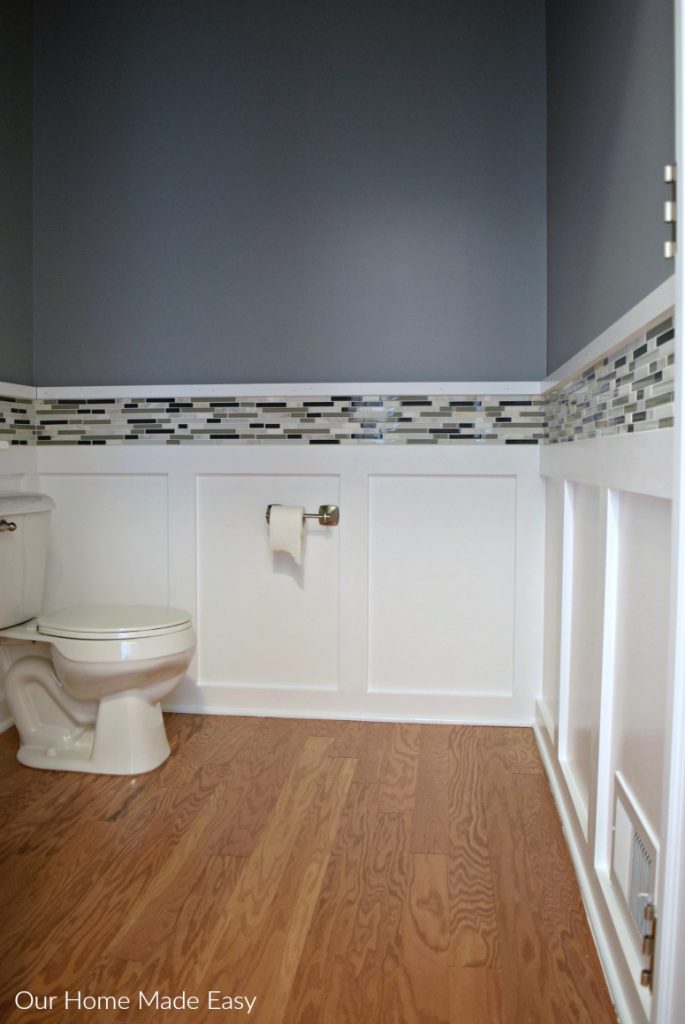
And there it is! An easier way to tile a small space! Hopefully you’ll feel a little less nervous about starting a tiling project. I know this was the perfect introduction for us, and we couldn’t be happier with the effort-to-end result. Simply eliminating mixing mortar and using the trowel removed some mystery for these weekend DIY-ers. Have fun tiling!
Want to remember this post? Pin for later!
Look at you using that wet saw!! Awesome job! I am kind of terrified of doing tile — same as you were. I really want to tile our kitchen backsplash but it just seems like SOOOO much work. I will definitely have to try out that backing you recommended. I think that would really help make the project seem more doable.
Way to go on your first tile project!
>> Christene
Keys to Inspiration
Jordan did the real work 😉 But it was a great project to do and I REALLY want to add a backsplash to our kitchen or master bathroom! -Brittany
Do you know what mosaic tile you used? I like that.
Hi Claudia, we bought it at Lowes!
I LOVE LOVE LOVE the color of paint you used. Please, what is the brand and name of the paint? Thank you!
Thanks Deborah! We used Valspar’s Drizzling Mist. 🙂 -Brittany