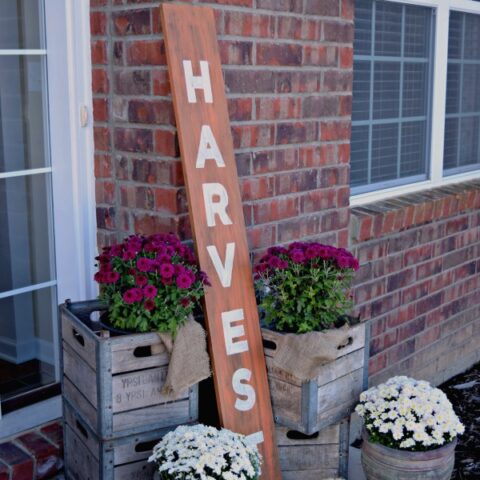
Harvest DIY Wood Fall Sign
Make this wood fall sign easily! Simply choose your favorite stains, paints, and then stencil!
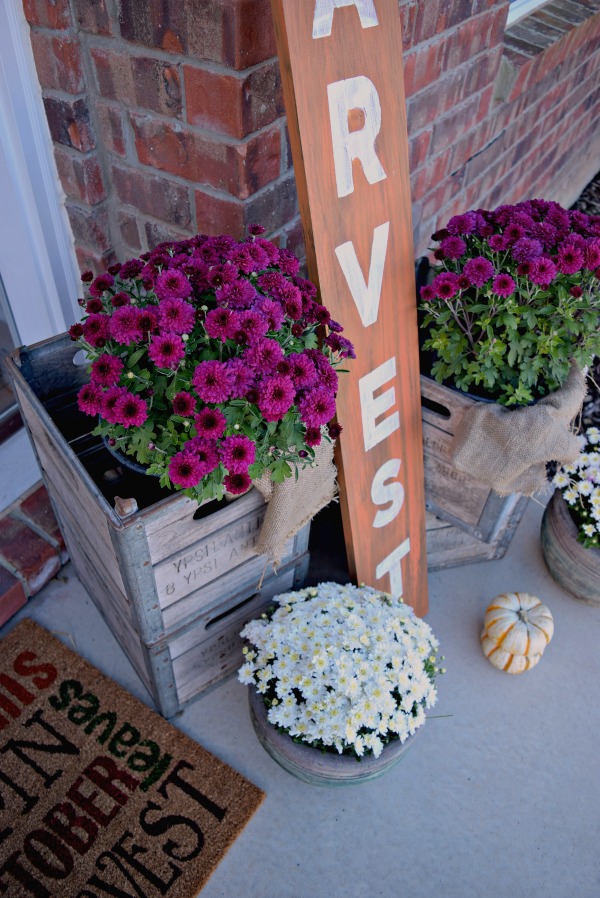
A few weeks ago I shared out front porch looking a little fancier than usual. And honestly, I had a lot of fun putting the whole shebang together. It was so much fun that I posted a guide to decorating your own front porch. Seriously, it’s easy! And one of the things I recommend is one DIY project to include in your planning.
What was my DIY project?
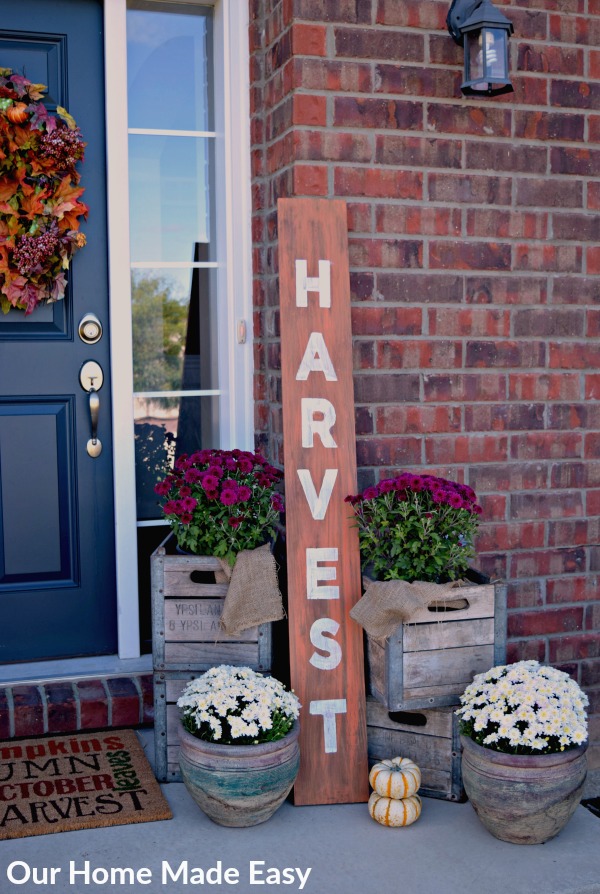
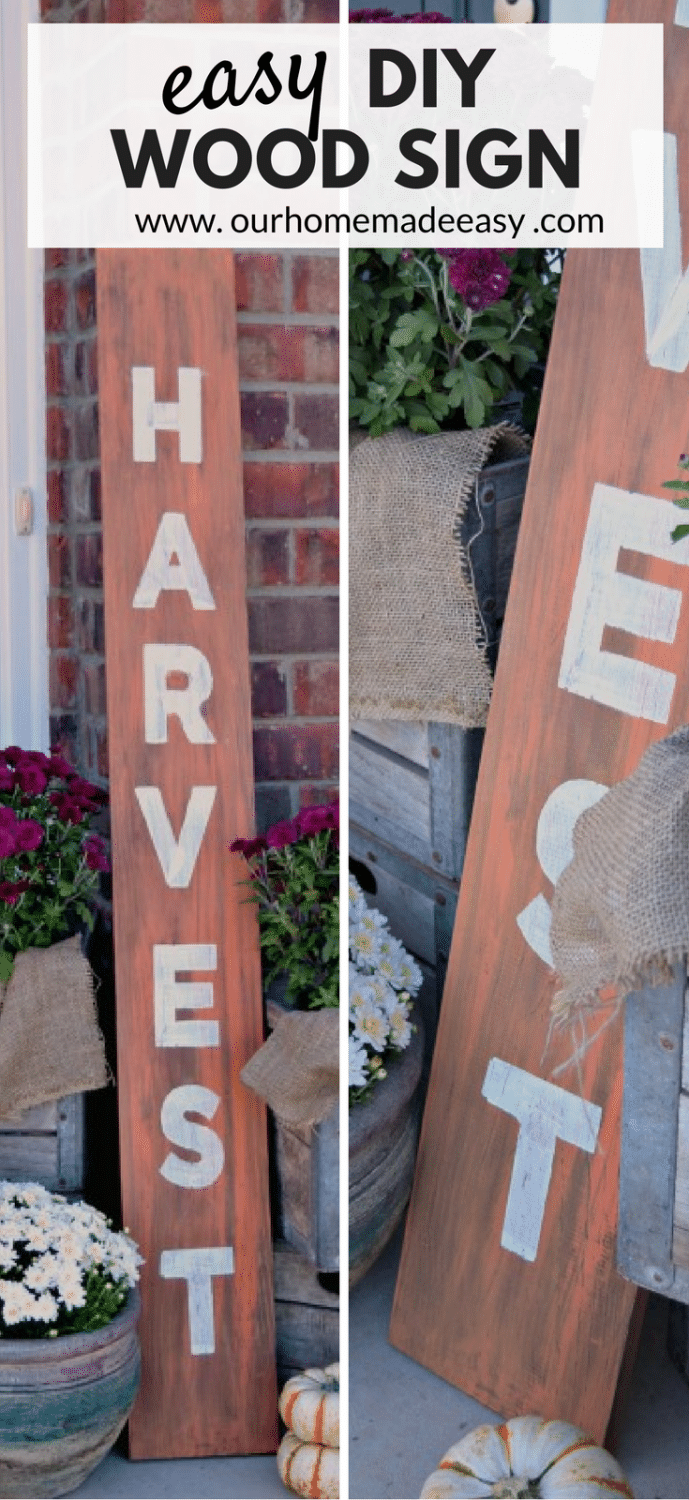
This adorable ‘Harvest’ fall sign. I made it in only a few minutes and it’s super easy and customizeable for you!
How to Make a Wood Fall Sign
This post contains affiliate links. If you shop from my blog, I may be compensated for clicks or purchases that you make. Read my disclaimer page for more information.
Supplies Needed for a DIY Fall Sign
- 1×6 piece of lumber (We used select white pine)
- Miter Saw
- Sandpaper or Orbital Sander (Optional to lightly soften edges and sides)
- Ruler & Pencil
- Stencils (I used this one)
- Stain of Choice (We used this one)
- Paint Sample
- Acrylic Paint (I used this acrylic made for exterior areas)
- Large Paintbrush
- Foam Brush
- White Cloth for Staining (You’ll need several!)
Start off with any Board!
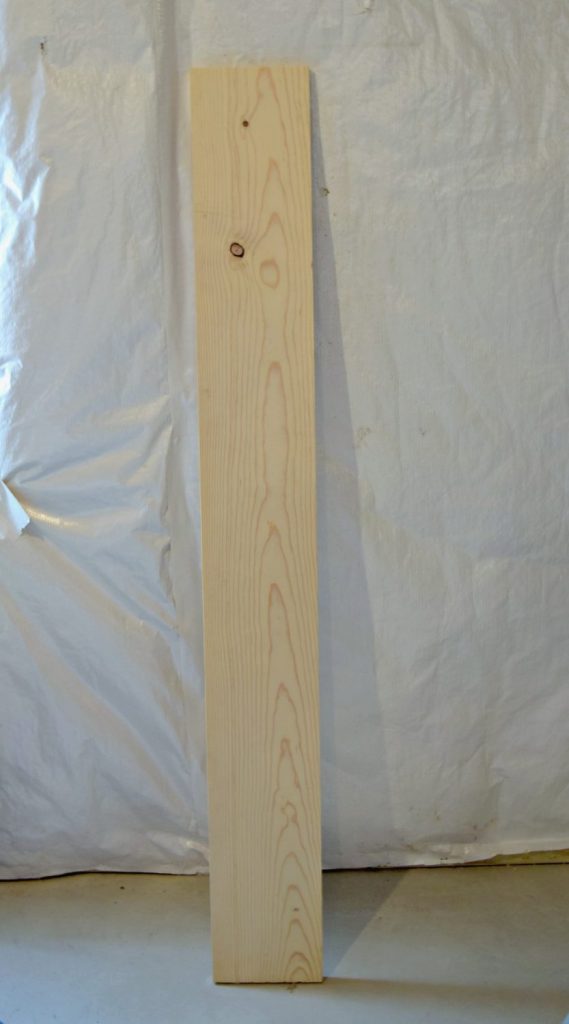
First I started with a leftover piece of board I found in the basement. Jordan originally picked it up for our ruler growth chart, but ended up using a wider (& straighter) board. I used this select pine because it was already in the house and begging to be used for something. 🙂 This board is a 1″ x 6″ and I cut it down to about 5 feet in length.
Stain & Paint the Wood
Next, I wanted to give this sign a rustic feel. I did this by staining it very quickly. Like so quick that I rubbed the stain in with white cloths and I immediately wiped it off. I was going for depth, not necessarily uniform coverage. You’ll need to let the stain dry, but it’s only a handful of minutes. Seriously, I made this at 6 am one Saturday morning.
Stain… start coffee pot… paint.
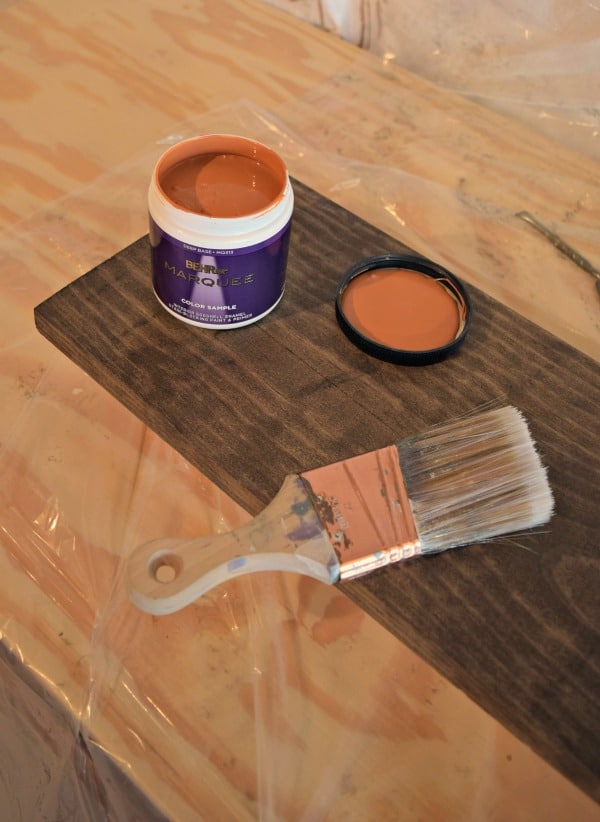
For the paint color, I went over to Home Depot to pick up a paint sample. Paint samples are my thing! They are so reasonably priced, you get lot’s o’paint and nowadays you can choose your desired sheen. Love them.
For this project, I chose “Fall Foilage” in an eggshell sheen.
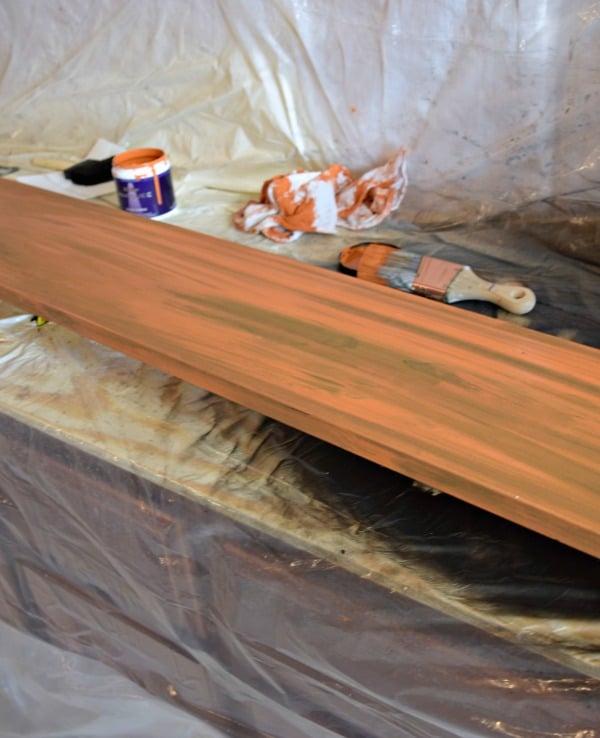
Using a paint-ish staining method (my own -ism), I applied paint with a bristle brush. I worked in small sections and after applying the paint, I immediately wiped off most of it with white cloths. See? A little paint, a little stain like treatment. I finished by doing the same thing with the sides & top/bottoms. To avoid leaving any drip marks, I ran a white cloth along the edge of the paint. You would rub off the paint to your desired rustic effect.
Allow the paint to dry completely before stenciling.
- Related: DIY Hexagon Pumpkins
Stencil the Lettering!
Next, you will want to lay out your letters. I chose 5″ letters for this board. I lightly drew center marks down the board with a pencil so that I didn’t creep left or right. Sometimes it happens… a lot. I left some room at the top and the bottom for blank space only because I didn’t know how I was going to stage the sign yet. In case there was a lot of stuff on the porch (and there is) I didn’t want half the lettering to be covered up.
With the letters in place, I quickly brushed on exterior acrylic paint using a foam brush. It was not scientific, I held the stencil in place and quickly painted over it. Once the letter was done, I filled in the letter where the stencil left lines.
Distressing the Board!
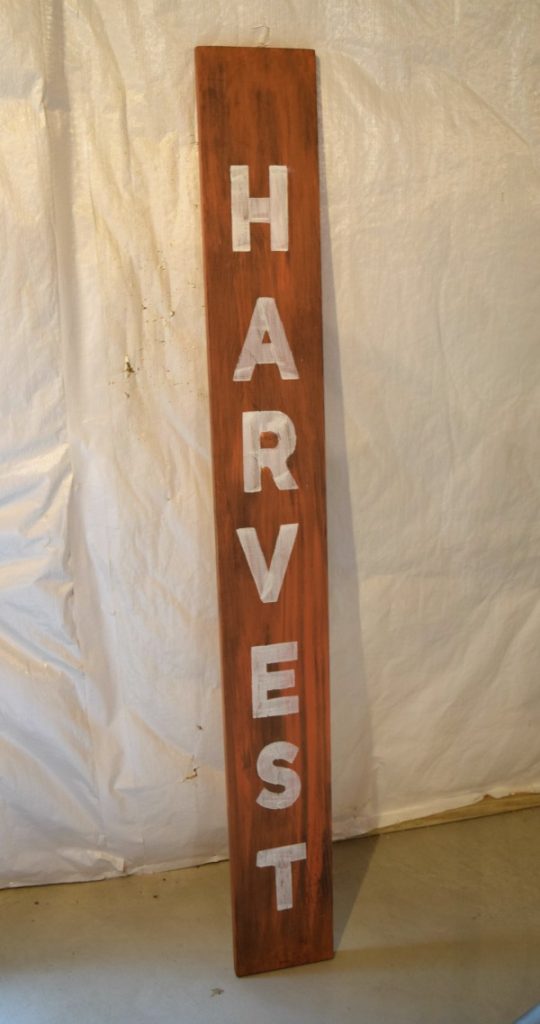
The last part is the best part, distressing! For this, I took a piece of sandpaper and rubbed it around the edges of the board to soften them up. I continued this along the front edges. My last step was to lightly run the sandpaper over the entire length of the sign. This gave it an awesome look and allowed me to control the amount of paint that I wanted to take away.
If you wanted more stain and less paint seen, use an orbital sander so that you can quickly sand down to your preference.
And that is it! Are you making your own DIY fall sign this year?
DIY Wood Harvest Sign
Add a rustic touch to your fall front porch with this easy DIY wood harvest sign!
Materials
- 1x6 piece of lumber (We used select white pine)
- Miter Saw
- Sandpaper or Orbital Sander (Optional to lightly soften edges and sides)
- Ruler & Pencil
- Stencils
- Stain of Choice
- Paint Sample
- Acrylic Paint
- Large Paintbrush
- Foam Brush
- White Cloth for Staining (You'll need several!)
Instructions
- First I started with a leftover piece of board I found in the basement. This board is a 1" x 6" and I cut it down to about 5 feet in length.
- Next, I wanted to give this sign a rustic feel. I did this by staining it very quickly. Like so quick that I rubbed the stain in with white cloths and I immediately wiped it off. I was going for depth, not necessarily uniform coverage. You'll need to let the stain dry, but it's only a handful of minutes.
- For the paint color, I went over to Home Depot to pick up a paint sample. Paint samples are my thing! They are so reasonably priced, you get lot's o'paint and nowadays you can choose your desired sheen. For this project, I chose "Fall Foilage" in an eggshell sheen.
- Using a paint-ish staining method (my own -ism), I applied paint with a bristle brush. I worked in small sections and after applying the paint, I immediately wiped off most of it with white cloths. To avoid leaving any drip marks, I ran a white cloth along the edge of the paint. You would rub off the paint to your desired rustic effect.
- Allow the paint to dry completely before stenciling.
- Next, you will want to lay out your letters. I chose 5" letters for this board. I lightly drew center marks down the board with a pencil so that I didn't creep left or right.
- With the letters in place, I quickly brushed on exterior acrylic paint using a foam brush. It was not scientific, I held the stencil in place and quickly painted over it. Once the letter was done, I filled in the letter where the stencil left lines.
- To distress the sign, I took a piece of sandpaper and rubbed it around the edges of the board to soften them up. I continued this along the front edges. My last step was to lightly run the sandpaper over the entire length of the sign. This gave it an awesome look and allowed me to control the amount of paint that I wanted to take away. If you wanted more stain and less paint seen, use an orbital sander so that you can quickly sand down to your preference.
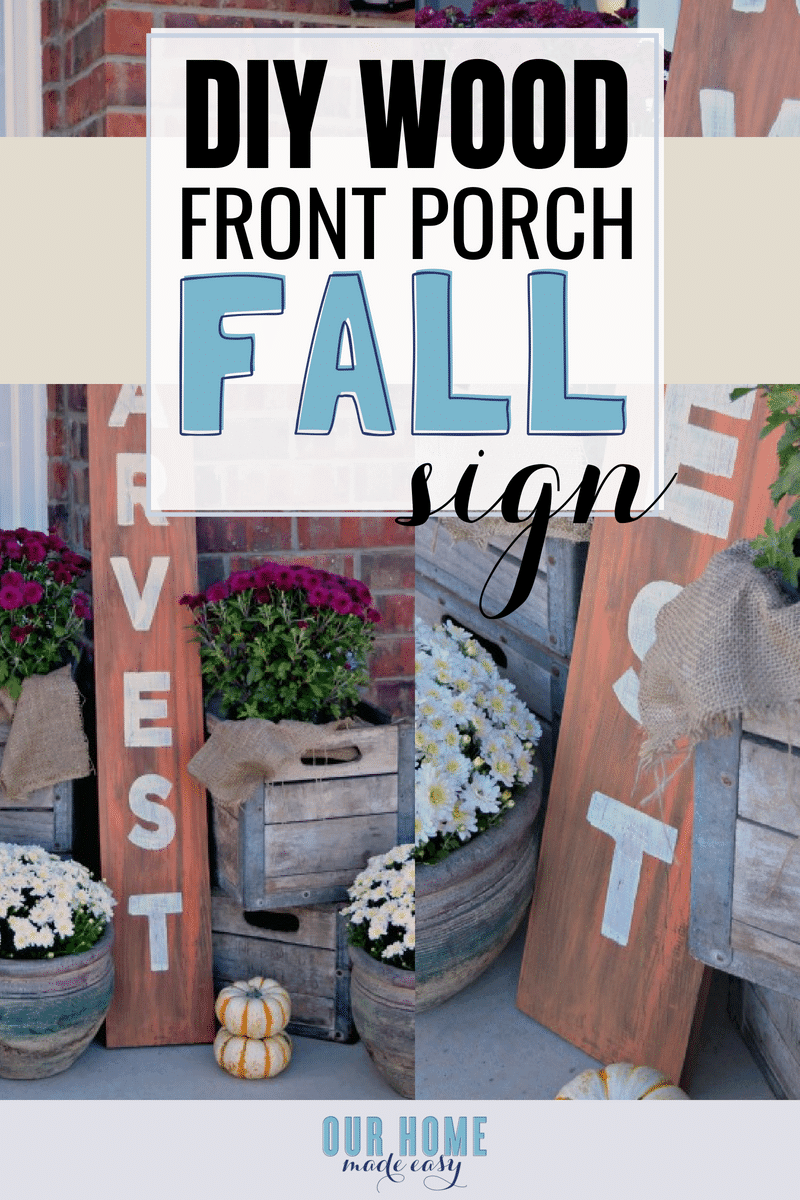
PIN THIS FOR LATER: